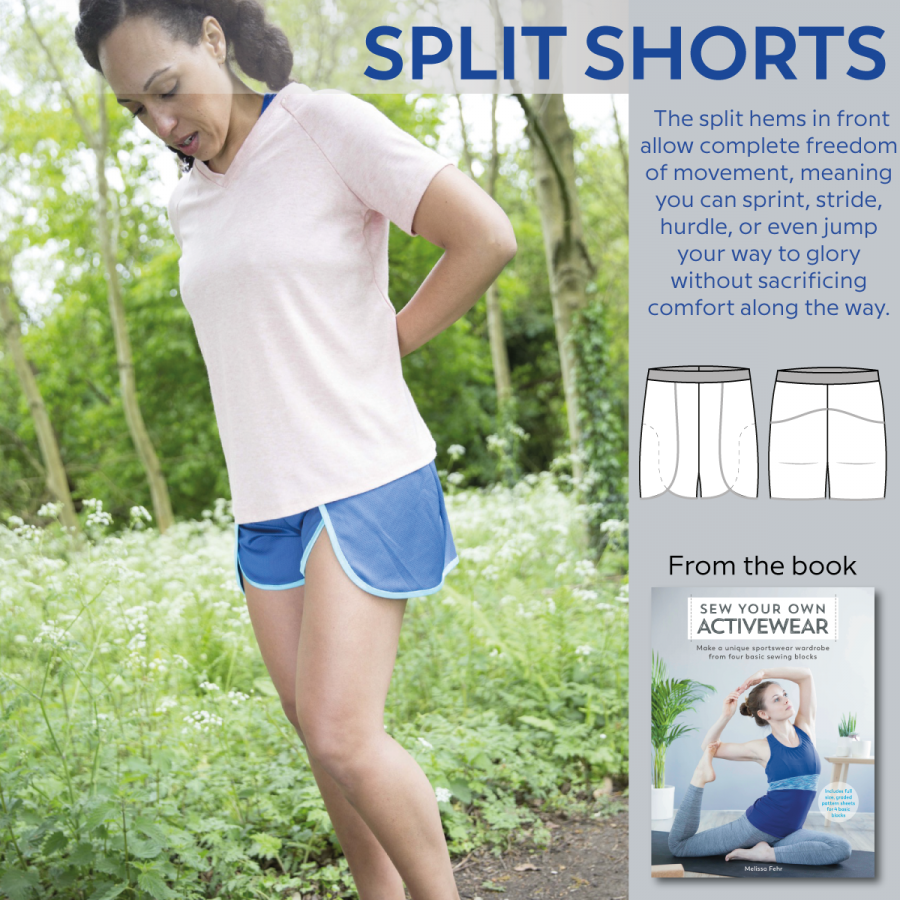
I designed the Split Shorts in my “Sew Your Own Activewear” book to have the greatest mobility possible to minimise the chance of the inseams riding up while running (a really common issue with running shorts!). These shorts do show a bit of thigh, but the back of the shorts stay close to the body, and the inseams really do stay put. In fact, they can be mistaken for a skort or running skirt while you’re in motion, and they look really feminine!
But some of you may find that the Split Shorts as drafted in the book are a little more revealing than you’d like, and the good news is that there are two easy ways to adjust for this! Note that by making these less revealing, though, you are limiting the mobility of the leg, so be sure to make incremental steps and sew and test your muslins along the way to make sure you can still move effectively in them. But if you’re planning to wear these for an activity that doesn’t require the extreme amount of forward leg motion needed for running, then modesty may be more important to you than the range of motion anyway!
Method one – lower the S curve joining point
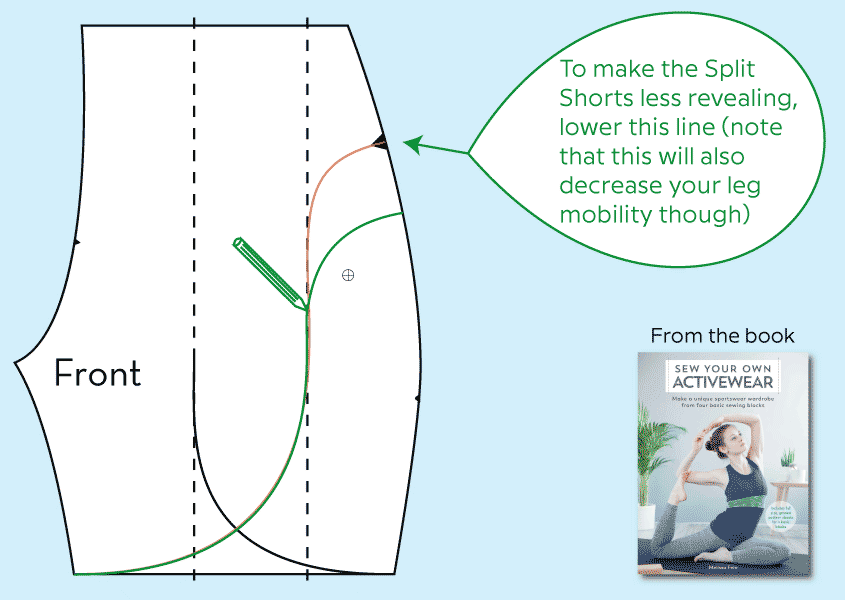
As indicated in the image above, just lower the point at which the S curve of the Front piece meets the side seam, and adjust the curve accordingly (Note: do not move the mark, however, as that indicates where the back seam will join the side seam).
You can either do this as you’re drafting the Front pattern piece (Step 4 of the Pattern Draft instructions on page 122), or after you’ve already got your paper pattern pieces by placing your Front piece over your Side Front piece and redrawing the curve.
Method two – swap the overlapping pieces
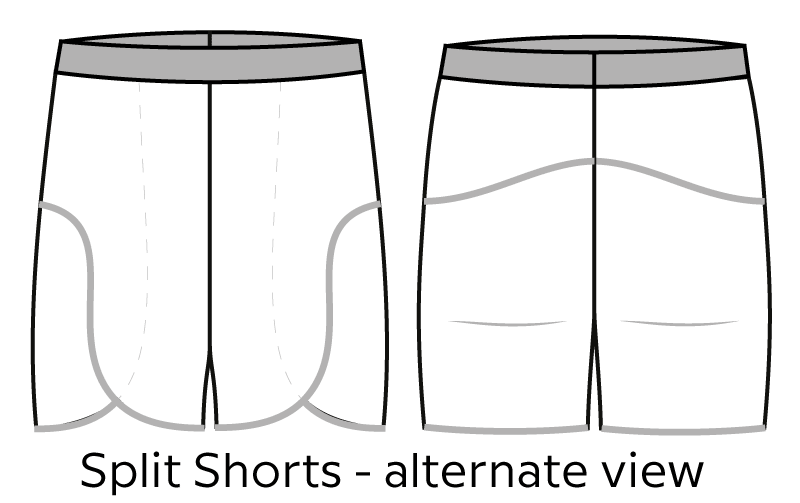
By layering the Front over the Side Front you can reduce the amount of leg show-through and change the look of the finished shorts from “petals” to “swirls”. This was actually my original design for these shorts, but it means that some sewists might struggle to get a clean binding finish where the Front meets the side seams (and if you change the S curve, too, it looks weird because it won’t match the Back seam exactly). But if you’re okay with this, this is a change which requires no drafting changes – just the order of sewing!
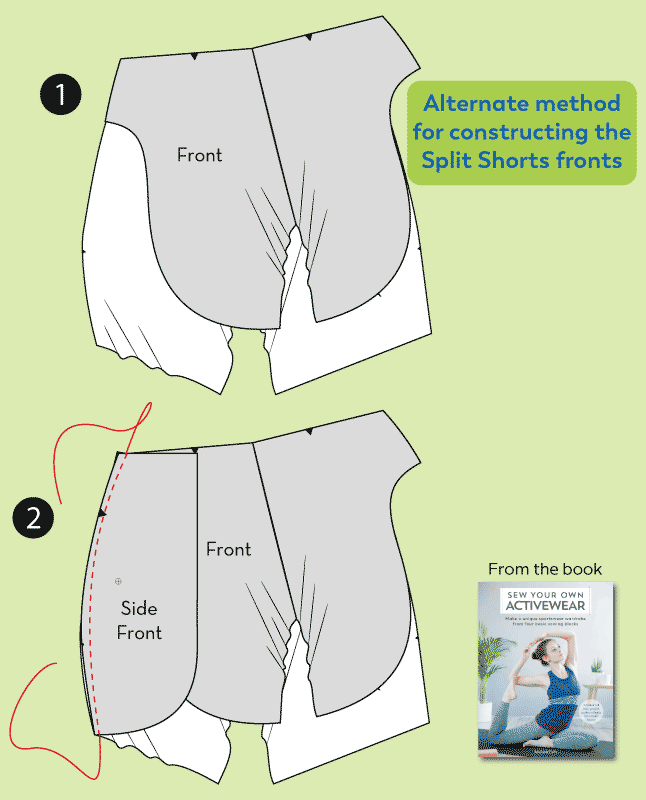
On page 124, in Step 7 of the Construction steps, first place the Front over the Back at the side seam instead of the Side Front. ie:
SIDE SEAMS: With right sides together, pin the Front to the side seam edge of the Backs, aligning the lower edge of the Front to the Back seamlines. Then place the Side Front right side down on top of the wrong side of the Front, aligning notches. Sew both Front pieces to the Back pieces along the side seams through all layers. Repeat for the other side.
When you get to the Hem Binding step, your pieces will look a little different to the illustration, but the process will effectively be the same. Be very careful to get the binding as close as possible to the side seams, though, as in this method it’ll be on show rather than covered up by the Side Front!
And of course, in Step 10, the Front will overlap on top of the Side Front:
10. OVERLAP FRONTS: Place the wrong side of the Front over the right side of the Side Front aligning the bound edge of the Side Front to the notch on the waist edge of the Front. Tack (baste) layers together along the waist edge. Repeat for the other side.
Carry on with the rest of the Construction steps as indicated in the book.
One of my testers made some shorts this way over the Australian summer, but I never quite got around to sewing any Split Shorts for myself before the “blink and you’ll miss it” English summer was over. Hopefully this year I’ll get a chance!