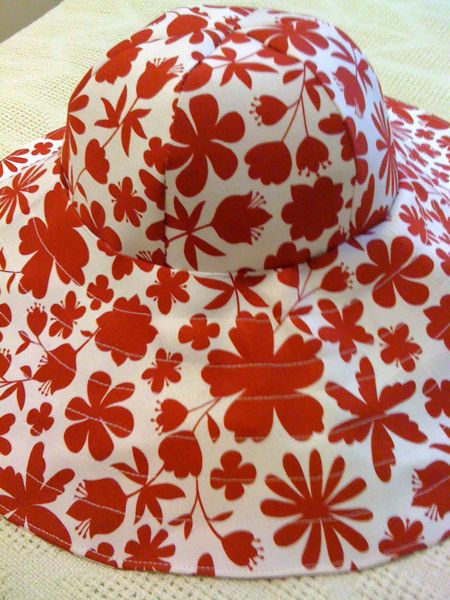
I had the itch and energy to sew on Monday (Day -2) so I spent a few hours working on my first activity pack. Because even after I get out, I’ll have to avoid all exposure to the sun for the next two years to avoid aggravating graft vs host (Gvh) disease, so I thought this wide brimmed, floppy sun hat from the May 09 Burda (#141) looked like a good way to ease myself back into sewing and eventually shield my face and shoulders from Mister Hurty McSunshine.
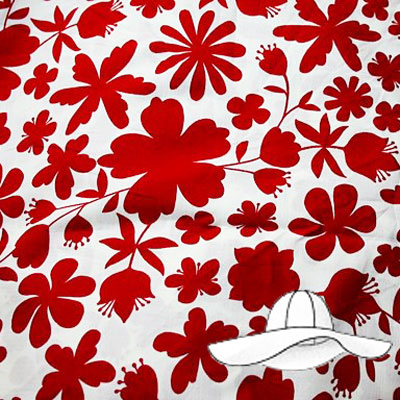
This hat pattern comes in two sizes – 56 or 58cm head circumference (I made the latter as I’ve got a fat head), and I really wanted to make sure the brim stayed nice and stiff to get the maximum shade, so I picked up some incredibly stiff fusible canvas the last time I was in MacCulloch & Wallis.
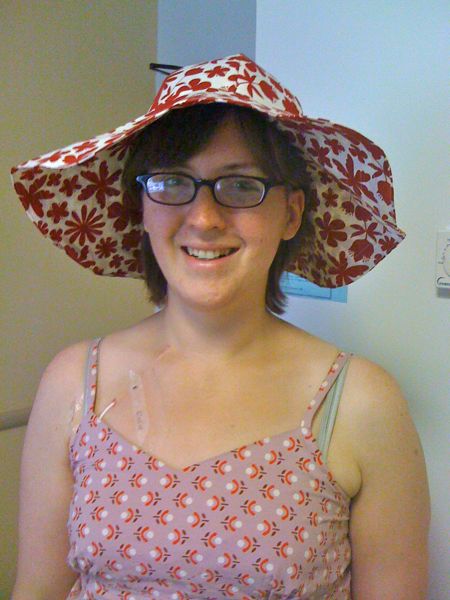
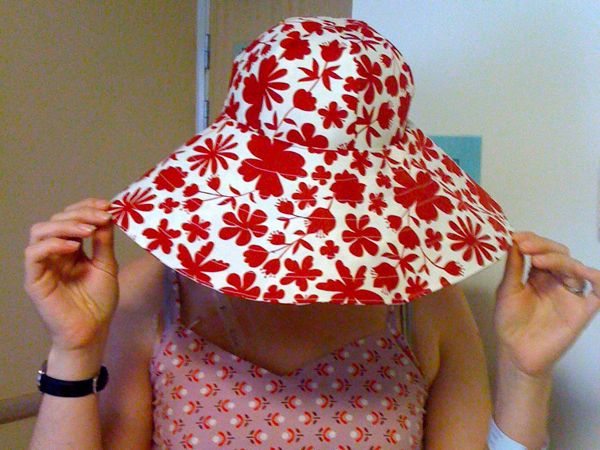

As you can see, both the brim and the cap keep their shape and bounce back after being folded, too! This hat can be styled as above for the “1970s garden party look”, or with the brim slightly folded up for a “wide sombrero” styling, or I’m even thinking I could do the “Thelma & Louise” look by tying a white gauzey scarf around and under my chin!
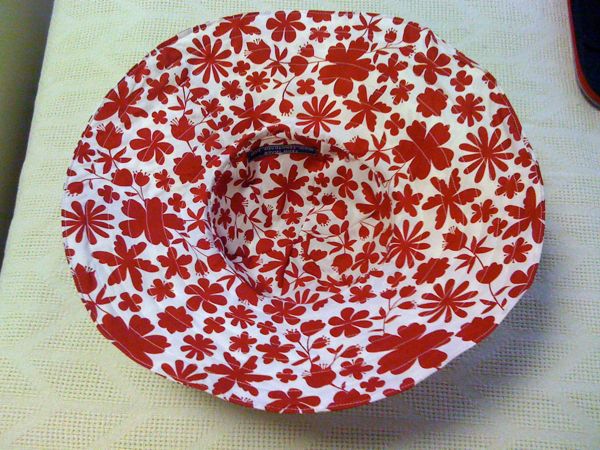
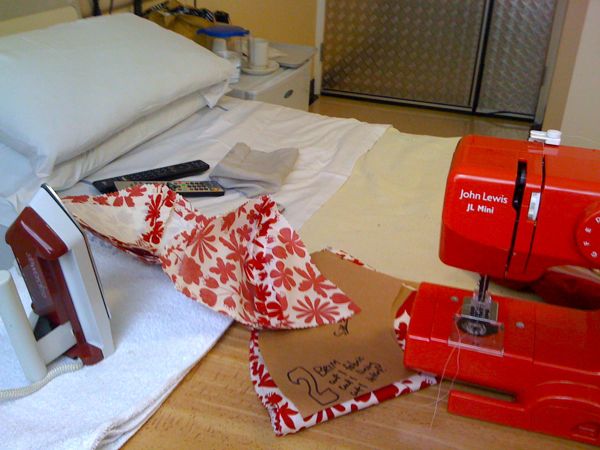
I opted to place the interfaced pattern pieces to the outside on this hat, as I figured it’d be a cleaner look, and also because the non-interfaced lining pieces would then be a bit softer on the head, too. I didn’t really use Burda’s instructions as I made this, but I do recall them saying to sew together three of the triangles, then sew the two halves together. But I thought that looked a bit crap in their hat photo as the points didn’t line up well, so I instead sewed the triangles together in pairs, pressed and clipped those seam allowances, then added another pair onto that until I had the full circle, paying very close attention to where the apex of the hat was.
I also chose to just attach the outside of the brim to both layers of the cap by machine, and then go through afterwards and hand tack the brim lining up over that seam allowance. If I was at home, I’d have probably done it all my machine with a bit of stitch in the ditch, but my little red machine has no speed control (the foot pedal’s just on/off) so I’d prefer to do precision work by hand.
Another change I made was to topstitch circles around the brim for added interest as well as keeping the stiff exterior and soft, floppy lining layers together:
As I mentioned earlier, I did all the cutting and fusing prep work a month and a half ago so all I’d have to do is open up the bag and start sewing, but I did require an iron, so James’s parents kindly lent me their tiny travel iron, which, when teamed with a folded towel for a makeshift ironing board, did a rather great job (no steam, but it got plenty hot enough).
All in all, I really like this hat. The shape of the cap is perfectly curved and not pointy in the slightest, and the brim is a great and really versatile width and level of incline. It was a quick project, but I do think half the success here lies in buying the correct interfacing, so I’d highly recommend waiting until you get the good stuff rather than just using whatever you’ve got on hand.
Hospital stuff: The above (Day -2) was a great day, then Day -1 was A Bad Day, and it took me all of Day Zero (yesterday) to claw back my appetite and strength. But I got my stem cells yesterday(!!!) and I’m feeling back to normal today (Day 1) so now I’ve just got weeks of waiting ahead of me before the stem cells migrate into my bones and start doing their work….