Even though I prepared this to sew in hospital, I was in and out so fast I ended up sewing #20b from the May 09 KnipMode as my first project back in my own sewing room since it was all cut, interfaced, and ready to go!

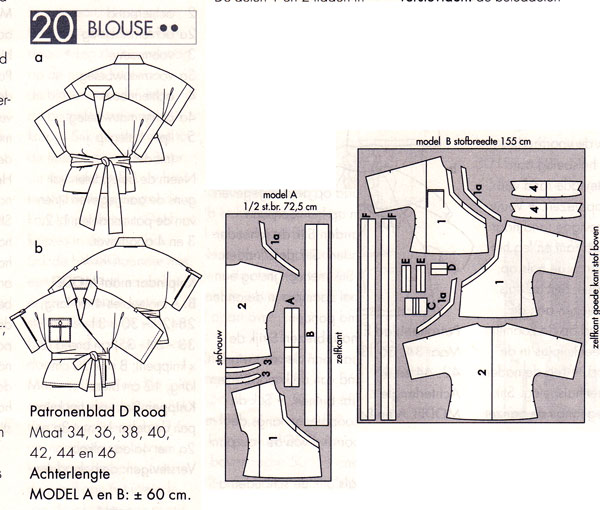
I chose to make the 20b variation since I liked the full (rather than band) collar, the roll-up sleeves, and the breast pocket, which made it look a bit more like a camp shirt than an Asian-styled top. It also means I’ve finally used the last of the enourmous stash of fabric I bought in America in August 2007, as this cotton/lycra poplin was originally intended for that Hot Patterns blouse disaster…


Here’s a close-up on that breast pocket, which has a cute inverted pleat and a flap with a ring snap (rather than a button) –
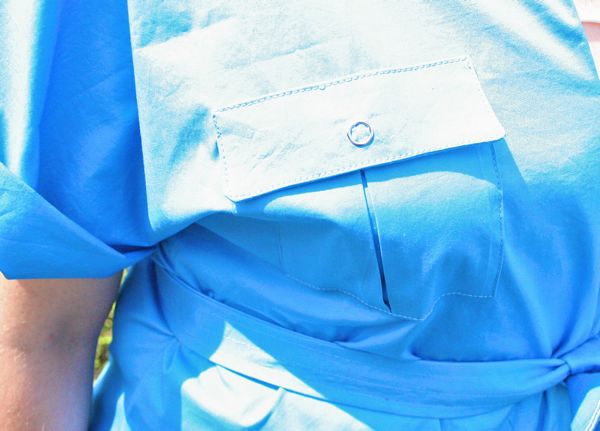
And those same press snaps got reused on the sleeve tabs, which allow you to roll up the quite long and wide sleeves and keep them in place. Otherwise, if you prefer the long sleeved look, the tab just stays hidden inside the sleeve, attached to the top seam, with just a snap showing on top to give it away.
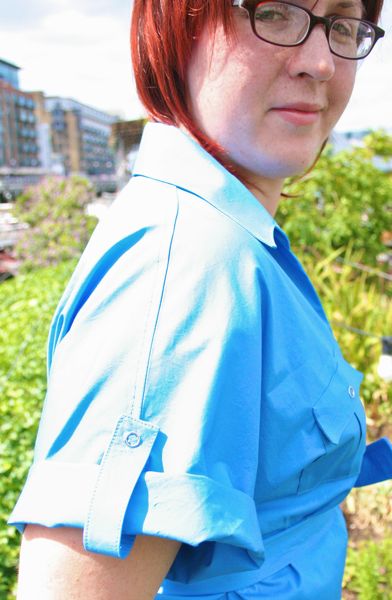
I thought ahead when I was making this and realised I’d probably wear it mostly with the sleeves rolled up, so instead of just sewing a normal seam, I took the extra step to flat-fell the shoulder/upper sleeve seam so that the seam allowances wouldn’t show when the sleeve is rolled up. I could’ve done the same to the bottom sleeve seam, but it’d be under my arm and no one would really see it much anyway!
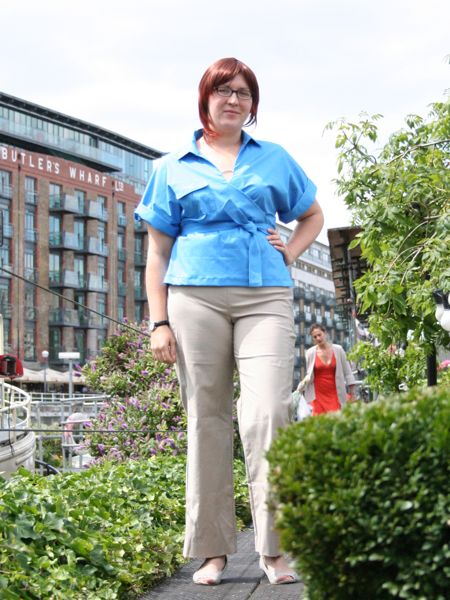
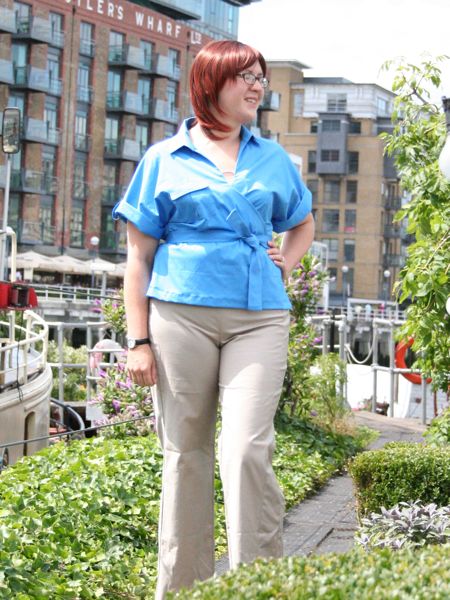
The only thing I’m not so keen on with this pattern is the all-in-one collar and stand – I’d separate these into separate pieces next time so the collar lays a bit better. But on the plus side, I really love the shape of the neckline here! Most wrap tops just have a straight or slightly curved surplice, but the angled shape of the neckline here means that you get a pleasing narrow and (higher!) V at the neckline, but also it means the understitched facing lays inside really nicely and never ever flops out, which is a change from most wrap and surplice tops.
I secured the inner wrap layer with a snap to the side seam allowance, but let the top wrap just be secured by the waistband alone, which is fine and allows for greater width adjustment as my weight (oh please god) returns to normal over the next few months. I also topstitched the band for a more “kimono-style” look and also to minimse wrinkling when it’s tied, and I’m really liking this little detail.
For those taking note, this is the “auburn” wig! You’ll see another later in the week, and then four more to go in future photoshoots until I have to start repeating colours, how dull…