I’m no big fan of muslins and fitting tweaks, so the title is really reflecting my impatience at still being in the fitting stage. I want to get on with the fun stuff! But I also really want to get the fit and design perfect here as I can’t really go unpicking the vintage satin (the needle holes remain), so here I am, still soldiering on, though hopefully not for much longer…
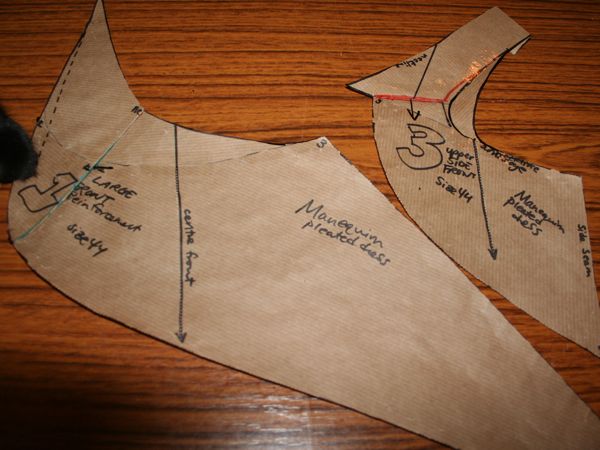
Yesterday was my day off so I devoted pretty much the entire day to this dress. Right after breakfast I made up Muslin #2 (not shown because no one was around to photograph me), which incorporated the neckline changes and better-drafted add-on straps. There’s no photos, but essentially, I just needed to pinch some fabric out in three places, which you can see here shaded in orange on my pattern pieces:
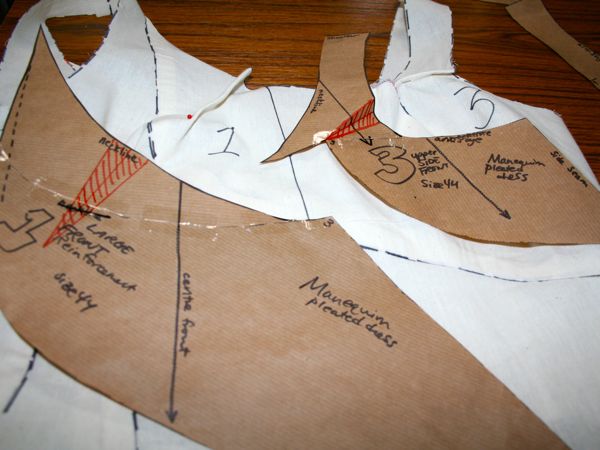
So I made those changes to my paper pattern, unpicked pieces 1 and 3 from the muslin, cut new ones out, and reattached them, bringing us to Muslin #3. And I was pretty happy with the fit, apart from a bulge above my right breast which I immediately knew the cause of and fixed it on the paper pattern.
Then, following Bridal Couture‘s advice, I stitched on the boning. On the real thing, I’m using casings attached to the flannel underlining and spiral steel boning, but I had a bunch of nasty Rigelene boning in my stash that I utterly hate that needed using up so I used that here to test the overall boning placement and measure the amounts to order the spiral steel.
After following Bridal Couture’s rough placement guidelines, I made myself a diagram to keep track of all the lengths I need:

So after the initial boning fit I shortened a piece here and lengthened another one, and I’m rather happy, especially about how nicely the basque waist falls now! I then went and bought 3m of continuous steel boning plus a ton of end caps from The Sewing Chest now that I have my required lengths.
The next step was to attach the waist stay just above the waistline (on the outside here for ease of adjustment – it’ll be on the inside in the gown) and just as I finished pinning it on, Neighbour Helen poked her head in to see how it was going, so I recruited her into taking some photos:
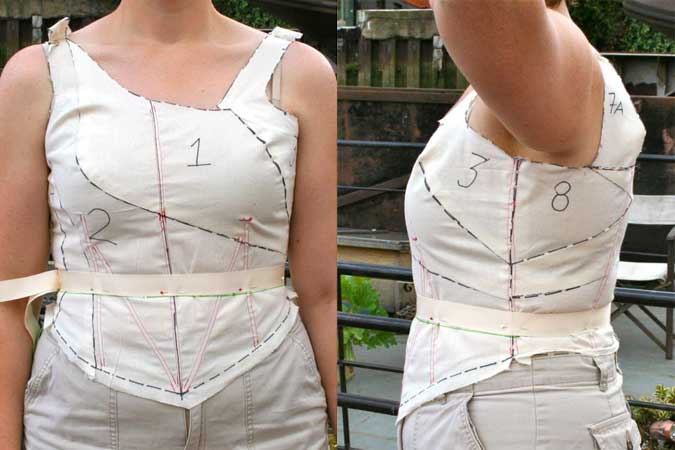
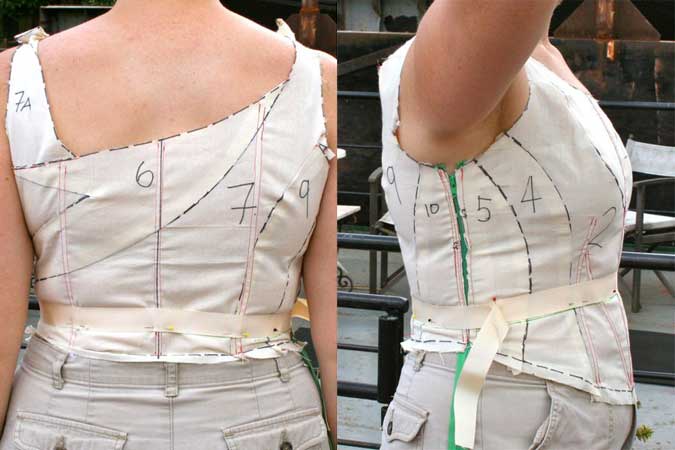
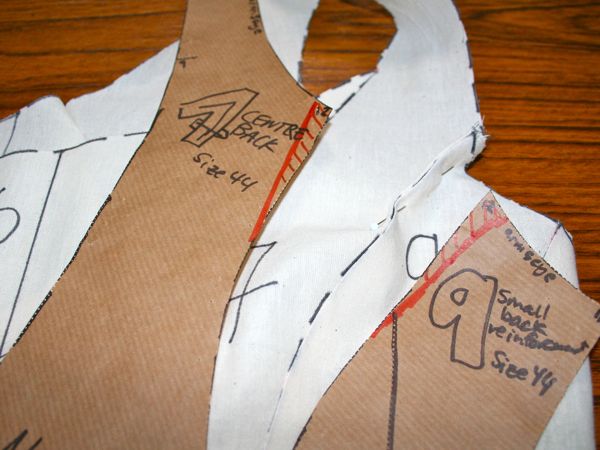
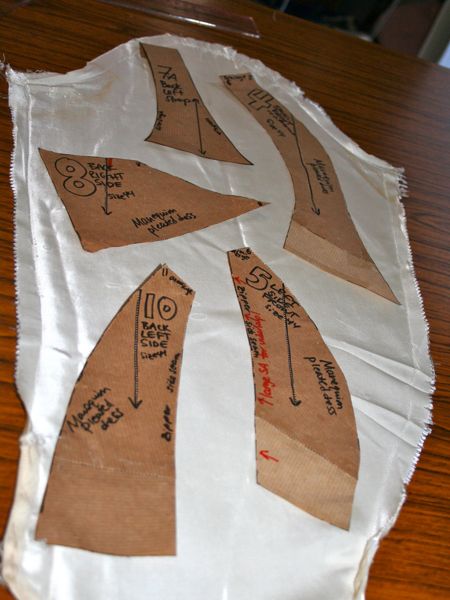
I realise it’s a bit bubbly above my right breast (piece #2) and that’s already been noted and fixed. Ditto on the back left strap where it joins the bodice. But it’s also a bit bubbly above my left breast (piece #3) and I don’t quite know how to fix that. Here are the pieces involved:
Adding the boning and waist stay had the effect of raising everything upwards a bit, hence why I had to take out some room at the shoulders and why this issue with Piece 3 only came up now. I’m going to see if moving the waist stay up a smidge takes care of the breast and shoulder issues, as that’d be easier than fixing everything individually. Or maybe I just need to try this bodice with a push-up bra!
Seam Ripper vs The Vintage Gown
So as I’ve been toiling away at my toile (see what I did there?), I’ve had to also keep the momentum going with regards to Granny’s gown, now that it’s been properly documented. On Sunday I spent 5+ hours just sat on the couch with a seam ripper, which killed my forearm muscles but resulted in my finishing nearly all of the bodice, waist, and peplum seams. The few bits leftover I finished up yesterday afternoon after muslin fatigue settled in.
The great news is, there’s a TON of fabric there, so I might not have to cut into the train at all. And there’s also a bunch of net hidden underneath the peplum and a few other places so I may use some of that in place of pleating to highlight a few of the sections. I mean, look how many pieces I could fit onto just one sleeve!
(these weren’t pinned – just placed on top for my own curiosity!)
And then I set to work trying to press out more of the 60 year old wrinkles and pressed edges, now that my silk organza arrived.
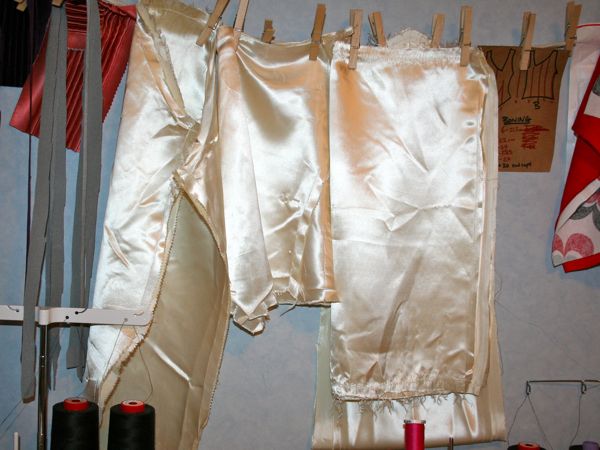
In these photos, the top piece is with pressed with the iron on the Silk setting, and the lower piece is its twin, pressed again on Cotton setting using a silk organza press cloth and (gasp!) a bit of steam. What a difference!! (Honestly, it’s even more apparent in real life than it is in these photos…)

I’ll give these a couple more passes with the hot iron and press cloth, but the wrinkling left here is acceptable to me, especially given the gown’s age. You can’t expect 100% unblemished fabric when you’re working with vintage, nor would I particularly want to erase its history entirely.
It doesn’t look like much here, but these pieces are all stacked as twins, folded over, and layered to fit onto my line. Included are both sleeves, the front and back bodice pieces, the two collar pieces (huge and on the bias! yeeaaaah!), and the two big peplum rectangles (with equally large netting rectangles!).
I’ve also set aside the piping from the waist seam, the vintage, metal-toothed ivory zipper, and the satin loops and covered buttons to be reused.
Next up: Try on the muslin with a push-up bra. Move the waist stay up a smidge and see if the issues resolve. If neither of those work, grudgingly attack that bulging piece 1&3 problem. And probably work on the organza flower factory while picnicking at the moorings cricket outing tomorrow…