The next step in my epic wedding gown project was to properly finish the neckline and armhole edges in advance of the lining. Instead of most lined garments where you construct the outer shell, construct the inner shell, then place the two together, right sides facing and sew around the opening edges, in this case Bridal Couture advises us to construct the outer shell, fold in the opening edge seam allowances, then create the lining, with the opening edges similarly folded inside, and then place the two together wrong sides facing and very carefully fell-stitch along the opening edges, prickstitching the lining where necessary.
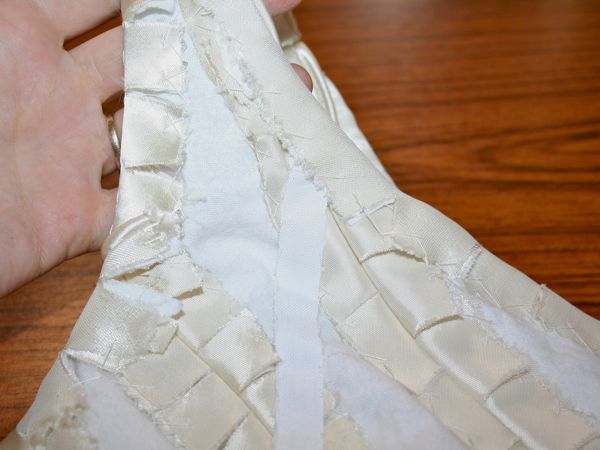
So here are the neckline and armhole opening edges, nicely clipped, pressed, and catchstitched:
The next step was to add the waist stay, tacked to the boning channels with bottom edge of grosgrain on the marked waistline:
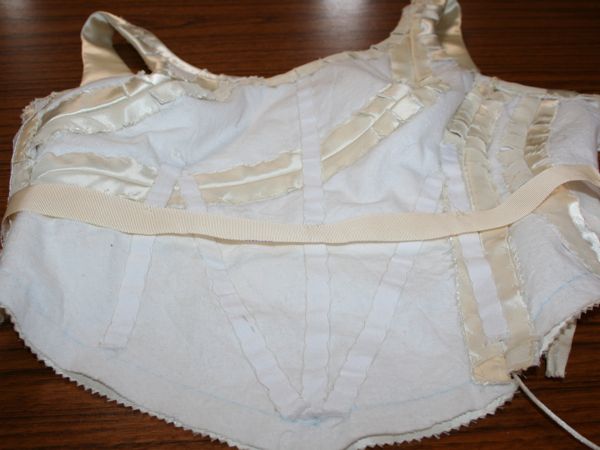
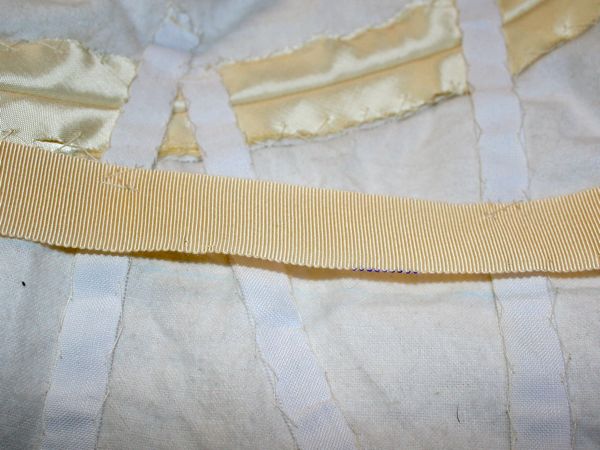
(I’ll tack down the bottom edge of the waist stay after a fitting session with the waist stay, boning, and zipper in place.)
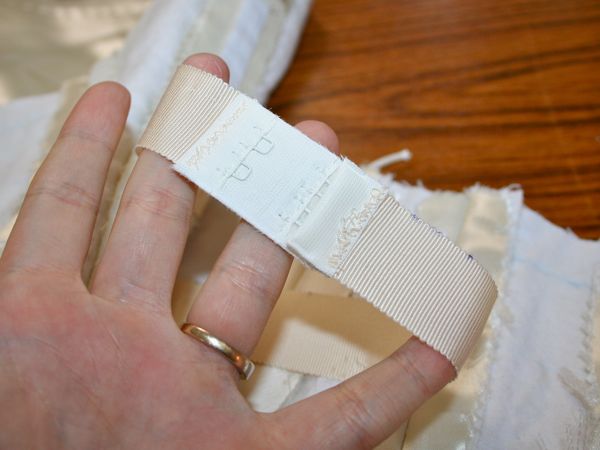
Here’s my own stroke of genuis – I used a bra fastener on the ends of the waist stay rather than sewing on your own double hook and eyes. They’re readymade, already padded, with the hook & eyes securely fastened AND you get a bit of room to expand or contract (bring on the wedding cake!). The 70p this fastener cost me was well worth it in terms of the time it saved and the added piece of mind that those hooks will NOT be coming off!
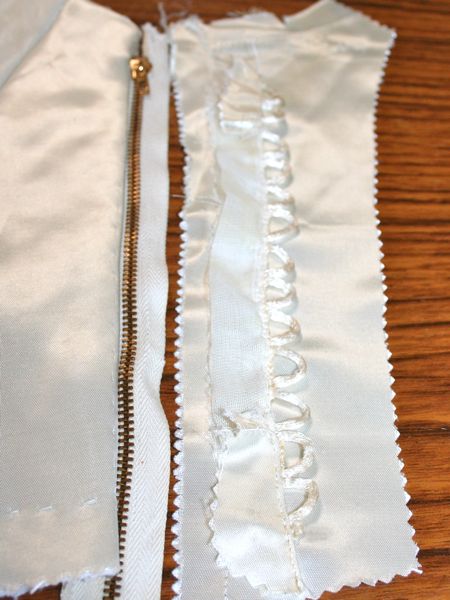
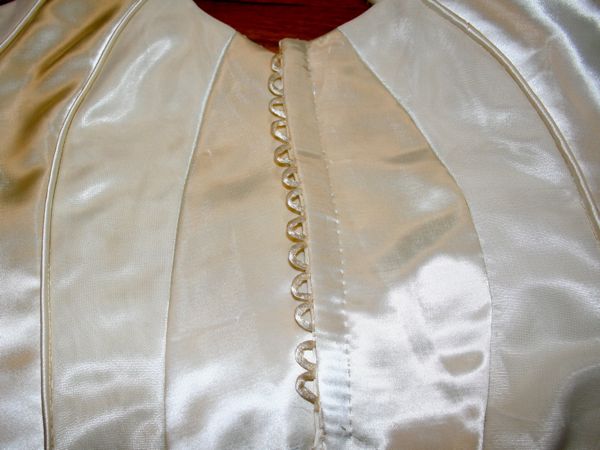
From the original gown, there were nine tiny covered buttons on the centre back of the illusion neckline, and two each on the wrists, and I really wanted to reuse these somehow… And all lucky 13 of them fit perfectly into the side seam of the bodice when placed end to end. How cool is that?? As a bonus, the loops (usually a fiddly process) are already formed and affixed to a netting backing, so these were SUPER easy to attach.
First I hand sewed the back/left edge of the vintage brass zipper (taken from the original gown), and basted the three loop sections onto a bit of scrap satin which will form the facing of the zipper overlap (on the front/right hand side).
Then I pinned the looped facing section face down onto the front/right hand edge of the side seam (which will form the overlap of the lapped zipper).
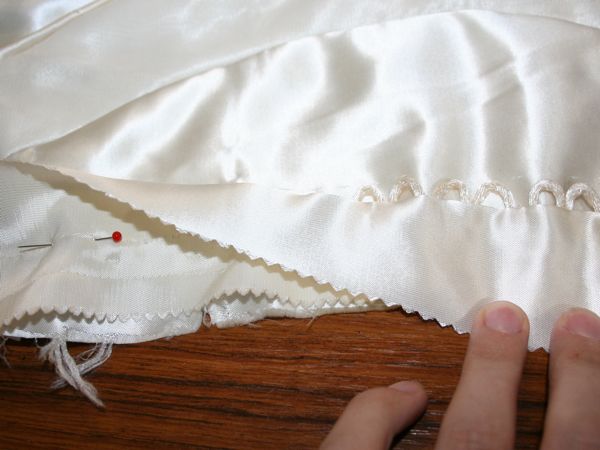
I machine stitched along my previous basting stitches, turned and pressed it, which gave me loads of gorgeous loops along the edge.
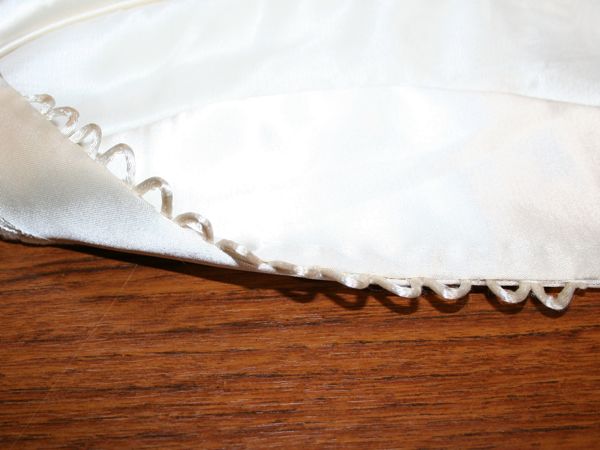
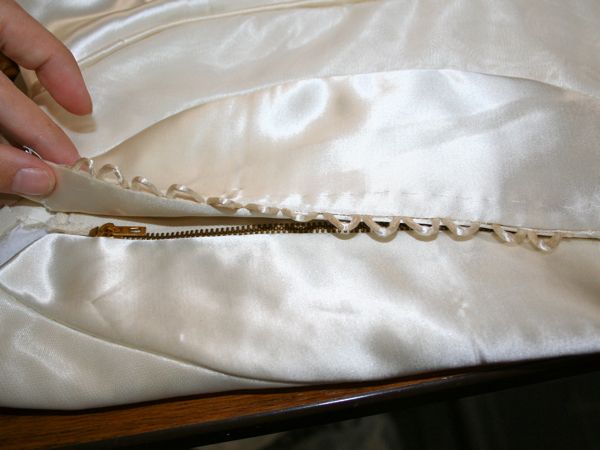
Then I hand basted the facing onto the remaining side of the zipper tape before very carefully prickstitching through all layers to attach the overlap to the zipper. This is the first time I’ve prickstitched a zipper but it wasn’t difficult at all, especially compared to inserting invisible zippers by hand!
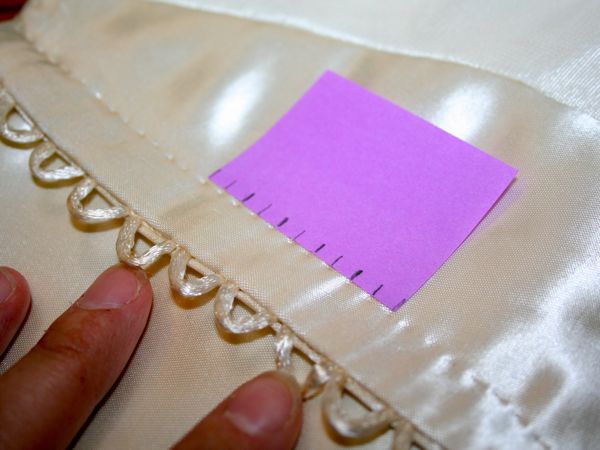
I did cheat a bit, though – I marked out 5mm increments onto a post-it note (the only sticky substance I trusted not to rub off on the vintage silk!) and used this to keep my stitches even along both the edge of the paper and at even intervals along my marks.
This zipper with the looped edge is another part of this dress that made me do an embarrassing happy dance all around the boat!

I’ll sew on all 13 covered buttons before affixing the lining to the zipper edge, and I’ll need to do that before I attach that last boning channel along the zipper tape, too.
RIP: My favourite long, sharp basting needle, snapped in half while running the thread through beeswax for the zipper insertion. Sob! Now I’m stuck with the super short, sharp basting needle while I contemplate spending the shipping costs on a replacement…
Up next: a quick test-fit before tacking the bottom edge of the waist stay, sewing on the covered buttons, and attaching that boning channel. And cutting out the lining pieces in my blue silk crepe for a (hopefully) quick machine assembly.