Fehr Trade x Laurie King fabric – first samples

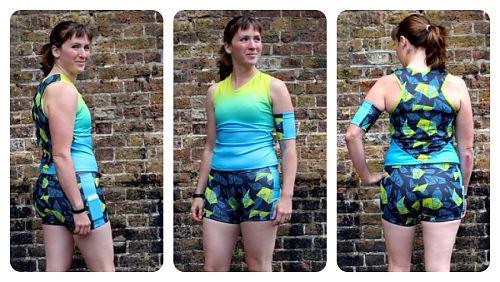
Thank you all so, so much for your enthusiasm and compliments on the launch of our fabric designs last week! I’ve been swamped with work (which is great!) but managed to squeeze in some time to sew up the first two samples – a VNA Top and Duathlon Shorts (booty length) in the coordinating “Maps” citrine & black colourway.

So if you buy one yard of the “Maps” citrine/black VNA fabric and one yard of the “Maps” citrine/black Duathlon fabric, this is what you get! Cool, eh? There’s more photos of me modelling at the end, but I know loads of you were waiting to see finished versions first before taking the plunge!

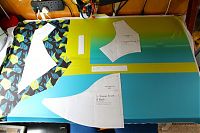
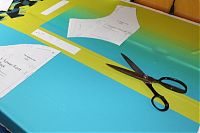
Having cut out and sewn both, I took some photos throughout the process, and have a few tips as well. The previous post shows you how to lay out your pieces onto the different zones, but in real life, I know my makeshift cutting table (err, desk!) isn’t big enough to hold the full yardage.

So the first thing I recommend is to cut the fabric apart along the different zones and trim the white borders.

This makes it a lot easier to match up the edges so you can fold the zones in half and cut on the fold (or in the case of the Duathlon shorts, cut two layers at once). It also means I can fit the fabric onto my cutting table!

Lots of little happenings

First of all, thanks so much for all your kind comments last week! It was a bit week for me, posting two finished garments and a pattern/tutorial so this week might be a little sparse, especially in the leadup to our departure next week.

But I’ve been doing a bunch of little bits over the past month or so – things that aren’t really big enough to post about on their own, or that I’m not quite ready to post about yet, or things that I’m just really keen on. So it’s time for a little roundup post, I reckon!

Refashioned doggy tee

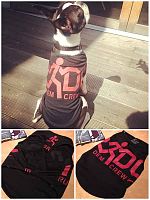
I’ve been so impressed by all the shirts Novita has been making for all her foster dogs over the past few months, so when a friend asked if I could maker her Boston Terrier puppy a Run dem Crew shirt for his cheering duties at a race, I thought it sounded like fun.

With Novita’s advice, I used the free Milla Milla pattern in size Medium (we tried Small initially but it was too tight), and it was really quick to put together apart from the binding. Don’t use their crazy, fiddly binding instructions – next time I’m just serging on a folded binding and topstitching! Done! I used a small RDC shirt as the starting fabric, and tried to place the logos as best I could. Apparently little Stringer Bell was the hit of the cheering station!

The Napkin Project embroidery

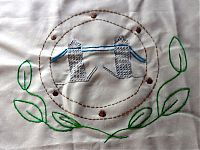
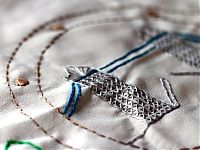
I didn’t get as much detail in as I’d hoped, but I did complete a decent design for The Napkin Project before the deadline!

The topic was “home” so I worked in Tower Bridge, boatlife (via a porthole) and the greenery of the gardens. All the embroidered napkins will be used in a nursing home in Bristol to spark memories in dementia patients, so I hope mine is well received! My grandmother is suffering from dementia right now so I’m really proud to be a part of this project and help others like her, even in a small way.

Fabric Buys

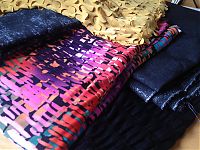
I wasn’t meaning to, but I ended up buying some fabrics from Minerva. Oops.

The crazy print will become perfect running leggings (of course!), there’s some silver-coated denim in there, a cool cutwork mustard jersey that reminds me of camouflage tents, and a few other interesting 1m cuts of jerseys, too.

Running vests

One fabric I bought but which isn’t pictured above is a large quantity of the cheapest stretch fabric they had, for use in running muslins. As it turns out, the peach poly jersey is actually not too bad – at least it’s a nice middling weight for use in testing tops or bottoms.

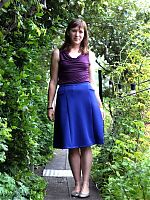
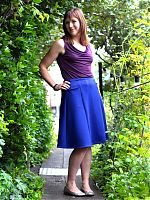
A blue neopreney travel skirt

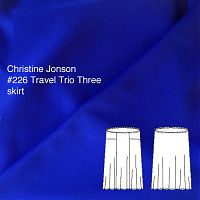
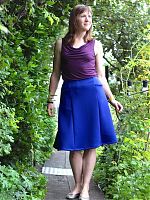
I revealed my Mexico travel wardrobe plans last week, and what better way to start it than with a pattern actually intended for travel! I bought Christine Jonson’s Travel Trio Three pattern a few years ago because I loved the gathered turtleneck, but I’m slowly working my way through the rest of the pack, too. So far I’ve made two different views of the turtleneck already – one gathered and one plain raglan for winter running, but this time around I wanted to try out the pocketed, knit skirt.

Like the other views in the pattern, the instructions for this are utterly excellent. Christine Jonson clearly understand knits and the best ways of finishing them, and she even uses the exact same method I do for elastic waistbands (though I prefer a 3/4-1 inch wide elastic, myself)! I’m seriously tempted to buy more of her patterns with my Adsense money because I’ve really gotten my money’s worth with this pattern!

My only change here was to shorten the skirt by 12cm at the “lengthen or shorten here” line, as the original was mid-calf and felt a bit too dowdy for me. This now falls right at my knees and is just about perfect for me.

Two pairs of marathon leggings

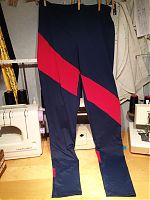
Word got round my running crew that I was starting to do some custom drafted leggings for a few people and my friend Lee Ann immediately came up to me and said “I want you to make my leggings for London marathon.” Holy crap – what an honour! It’s her first marathon, and the biggie, and she trusts me to make them for her?! I couldn’t say no to that, so I measured her up right then and there, then drafted out her pattern using the Shin book, and made her a test pair using some cheap thin lycra. She came round the boat and tried them on and amazingly, the fit was perfect, with no alterations needed, woo!

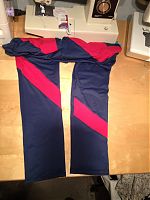
With the fit out of the way, I could then start in on the design lines, which she said she wanted to have a stripe/ribbon that started on her right hip and wrapped around to her right calf, and in navy and red to match her charity vest.

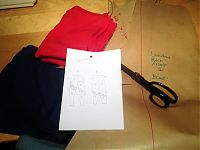
So, as I do, my first step was to draw myself a little plan:

Sorry for the crap quality there, but essentially I drew out the four big pieces (front right, front left, back left, back right) and the rough stripe shape, and realised I’d need 12 pieces in total, and as it’s asymmetric, I’d need to cut everything in single layer.

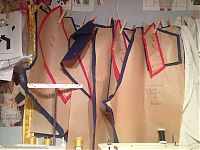
Organisation was the key, keeping the three pieces for each quarter pinned together on my sewing room clothes line!

I assembled each quarter first (ie: I sewed the front right top to the front right mid, to the front right lower until I had a full leg, and moved on to the front left). The cutting was really the most difficult here, but I managed to just barely squeeze everything out of 1m each of Tissu’s navy blue and red supplex lycras. Assembling it was much easier, but I had to be careful that the seam lines matched up over the left side seam!

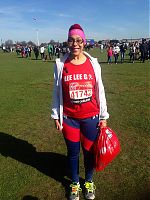
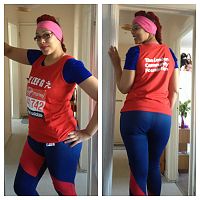
I was so chuffed to see them on LeeAnn when she ran past me during the race, and she said they were a dream to wear on the day, too! No tugging, no baggy ankles, no nothing, hurrah!

Don’t they look great on her?? And she’s totally caught the bug, too – already planning her second marathon!