Blog

A last minute travel bag

I wasn’t planning on doing this, but as I was packing for Mexico, I realised that I didn’t have a suitable bag to carry around with me on all our adventures – something that would be big enough to carry water, guidebooks, and all my usual purse stuff, but also be both secure, low-key, and not kill my shoulders. I utterly love my orange leather satchel, but it’s very recognizable, plus it’s only got two snap closures and I have to open the whole top to get anything in or out. Fine for London, but not for traveling.

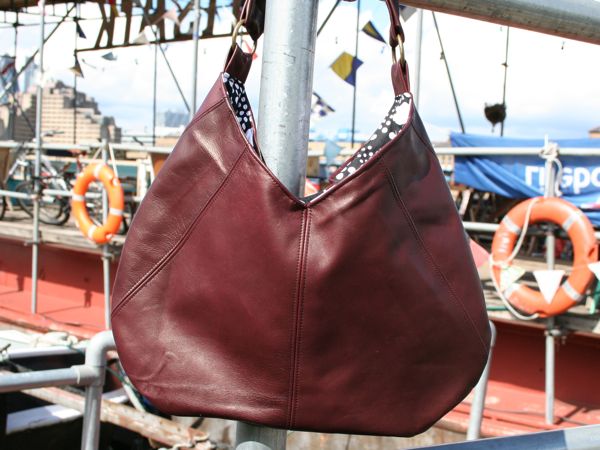
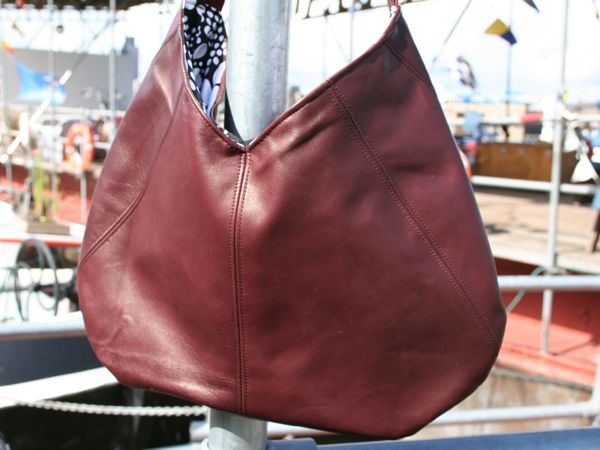
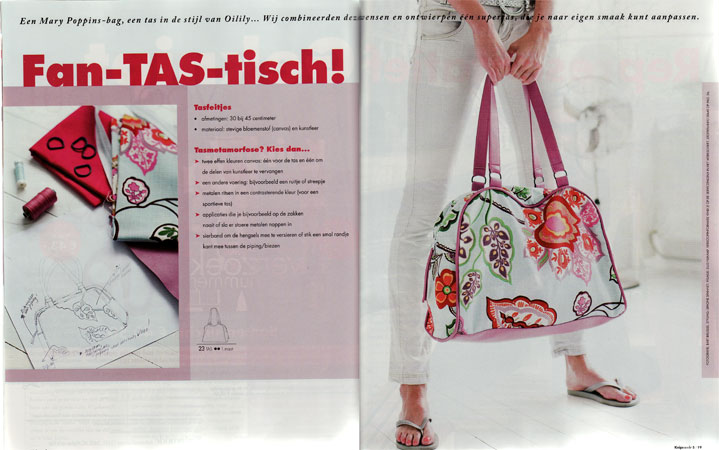
So, I found myself, on the day before our flight, devoting the vast majority of the day to sewing up the free Urban Jungle bag tutorial! Nothing like sewing on a deadline (or, uh, preferring to sew all day rather than just go to TK Maxx and buy a bag!).

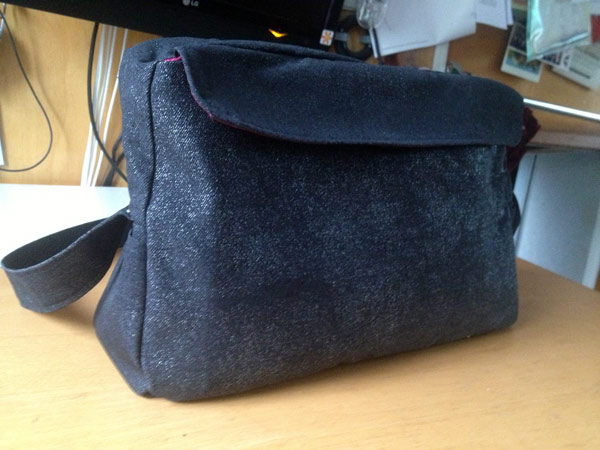
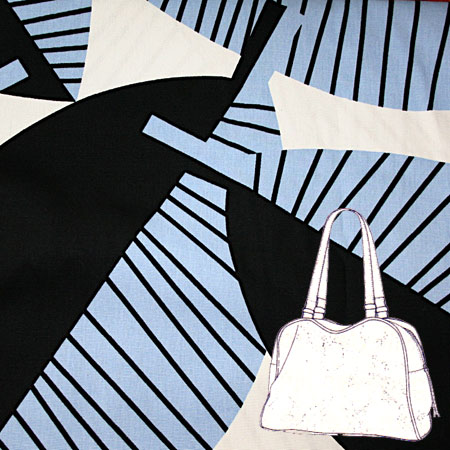
By its very nature, this bag used only supplies I already had on hand, so it was essentially free. The exterior fabric is this silver-coated stretch denim from Minerva that I’d bought then did my usual 30 degree pre-wash, and I was really disappointed to find most of the silver coating had disappeared (they’ve since added a warning to the listing). Minerva were great, though, and sent me the same fabric again so I could try hand-washing it. I wasn’t quite sure what to do with the faded yardage since I wanted rock star jeans (though both pairs of Catherine’s look great anyway – her pre-washed pair and her unwashed pair), so this seemed like a great use.

For the lining I used some cheap poly satin I’d been given years ago, plus I found a nice metal-toothed 20 inch zipper in my stash (I think from Zipperstop in NYC?), and I got to use up a bunch of really heavy interfacing that’s been in my stash for ages, too (though IMHO, the tutorial goes a bit overboard on the interfacing, but it was written for an interfacing company so go figure).

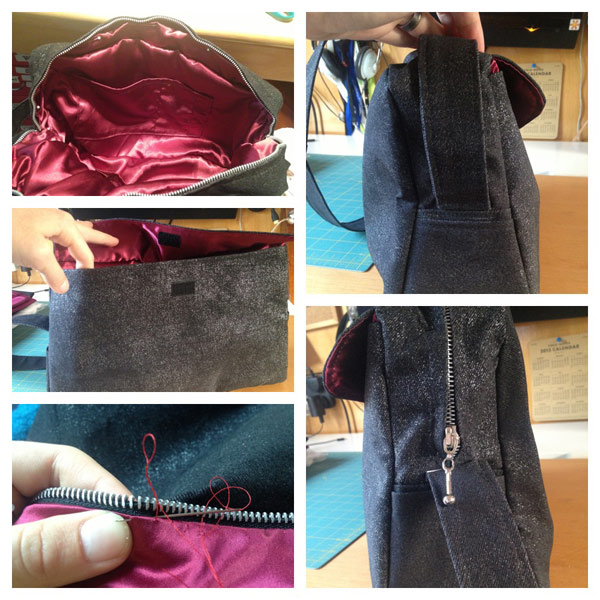
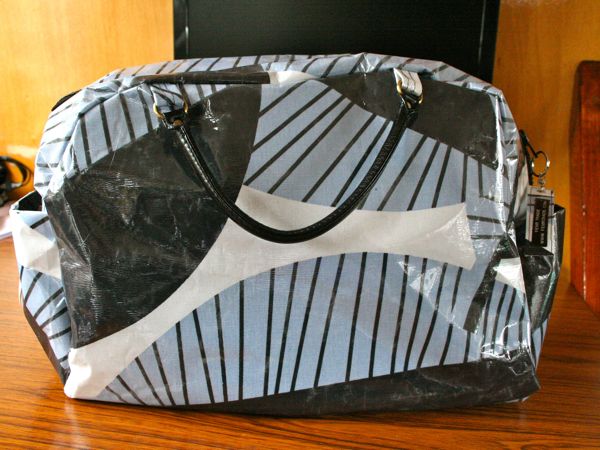
I made some changes to the tutorial for my own use – I left off the “accent” pieces and instead doubled the side pieces so I have little pockets on the side, I used velcro as the closures for these side pockets as well as the large, flapped document pocket purely because I didn’t have any magnetic closures lying around! I also added a few patch pockets in the lining to help organise my stuff. Normally I’d have a zippered lining pocket in there, too, but I was feeling quite stressed about finishing in time (I literally finished with minutes to spare before I had to leave for Run dem Crew!), so I left that out. Oh, and instead of purchased handles, I made my own shoulder strap, which is conveniently long enough to either go over my shoulder, or across the body.

Birthday leather iPad case

Yesterday was my birthday, and I wanted to start the year off right, so I got up early and ran the Sport Relief 6 mile run down on The Mall, and I’m happy to report that I ran a new PB of 46:38 for the 10k! Though I have my doubts as to whether the course was entirely accurate, since this is a full 5 minutes faster than before…

Then I came home and enjoyed the glorious sunshine, cupcakes, and the pressies James had in store for me – luscious new Wolfords, a beautiful hardback copy of Habibi, and a cool lunchbag that mimics the old school brown paper bags.

Oh, but there was one more thing…

So of course I had to sew a case for it!

I wanted something more classy than crafty, so I used bronze/black leather from the obi belt (which I actually hardly wear and is too big now!) and it’s lined with black sweatshirting leftover from James’s sweatshirt from a few Christmases ago.

I measured up the ipad and then cut the leather to be two conjoined rectangles of 21cmx26cm, plus about 6cm more length on one side for a closing flap, plus a facing (only because I didn’t have enough leather to do a self-facing

I used long strips of velcro (sewn on) for the closure, making sure the soft loops are on the flap so the iPad doesn’t get scratched as you slide it in!

Another red leather handbag

The changing of the seasons… the circle of life… and another Nairobi leather handbag for me!

I’ve become a bit boring with my handbags, but I just love everything about the Hot Patterns Nairobi bag and my own little evolutionary improvements that I just can’t bring myself to mess with a good thing. My mustard handbag has lasted over two years of heavy, every day use now, but it’s on its last legs, so it was time to create a new one.

This bag is very similiar to the bag I made Pip for Christmas last year, but without the central strip (I find it just too big with it in!), and with my own special lining pockets added inside.

A very beginning sewing lesson

On Sunday I taught a very beginning sewing lesson to three friends who all wanted to learn how to sew and have been begging me to teach them for months! I decided we would learn to use the machines and make a simple bag, and that would probably be more than enough for a first lesson. So I set up my little red machine, my everyday vintage machine, and made space for Veda to bring her new (purple!!) John Lewis mini machine up in the saloon…

The Sewing Machine Driver’s Test

After showing everyone the various parts of the machines, I put an old or blunt needle in each and I had them “sew” on the lines while the machine was unthreaded. The object is to get every single hole touching the line on the page, and when we did this in my home ec class in middle school, the teacher circled any errant holes (if we had more than three, we’d have to repeat that sheet). You start with straight lines, then corners, then a spiral, and finally wavy lines. My girls did great, but opted to redo the last two sheets to get some practice in!

Download my Sewing Machine Driver’s Test here! (Pdf, 200kb)

They all said that this really helped them to get comfortable with the machine and said the curves of the bag were way easier because of it!

The bag

Then we moved on to BurdaStyle’s (free!) Charlie bag pattern, and I showed them how to trim and tape the pattern pages together, then how to lay out the pieces and obey grainlines and learn how to find the selvedge.

I really didn’t like that BurdaStyle’s instructions have you trim off the seam allowances on the bag handles and then overlock them (wtf? What beginner sewer has access to an overlocker??) so I had my girls make a facing for the top of the bag. It got them to practice sewing curves, the importance of clipping the seam allowances, and flipping inside out! And I personally think it’s less fiddly than bias binding when you’re just learning.

Here’s the one I made earlier, to refresh your memory…

(Belated) Christmas gift – red leather handbag

We were supposed to meet up with my friend (and former bridesmaid!) Pip and her boyfriend back in mid-December to celebrate Christmas, but we had to reschedule due to my swine flu, so I’m only just now able to show you her present – a Nairobi bag made up in gorgeously soft red wine leather, bought in NYC from Global Leathers (I find it interesting that Americans would call this colour “burgundy”, whereas in the UK it’d be “claret”).

I sewed this up before Christmas (so you saw a sneak peek in my 2010 roundup), but she asked me to hold off posting about it until she received it. I actually made this same bag for her a few years ago in black corduroy, and she famously texted me later that night exclaiming “I can fit a whole bottle of vodka in here!”

When I made the Nairobi bag for myself, I usually leave out the strip that joins the two halves together as I find the bag is just too big for my liking with it in, but Pip asked me for the bigger size, and bigger she got!

Pre-Christmas prep

Are you ready for some random sewing goodness? Let the randomosity begin!

  • When I was at the bookstore on Brick Lane buying James’s birthday card, I couldn’t resist this reusable wrapping paper (okay, it’s just fabric to me and you!) with London streetsigns. I love that it’s a London fabric without being OMG UNION JACKS THE QUEEN TOWER BRIDGE! I figure I could use it as a lining like I did with that Japanese tea towel and my bolero jacket a few years back…

  • We were supposed to meet up with Pip and her boyfriend two weeks ago to celebrate Christmas, but we had to reschedule due to my swine flu, so I’m only just now able to sew up her present – a Nairobi bag made up in gorgeously soft red wine leather, bought in NYC from Global Leathers (I find it interesting that Americans would call this colour “burgundy”, whereas in the UK it’d be “claret”). I’m about halfway done and already I can tell she’s going to love it!

Free ruffled wristlet pattern!

This might possibly be my longest running project-to-post duration since I drafted and sewed up this cute wristlet last February using some scrap leather and some vintage lingerie fabric for a lining. I made it as a gift for a neighbour who wanted to remember a dear departed friend who left her a stash of vintage fabrics, and I loved the resulting wristlet purse so much that I felt compelled to share it with all of you! But I had problems digitising the pattern so it languished… but recently I was inspired to take another stab at it and I love the way it turned out!

The great thing is that because it’s a small purse, you can really make this out of leather scraps, or even an old leather skirt or jacket from a charity shop (thrift store or op-shop)! Or it doesn’t even have to be from leather at all, it’d work equally well in corduroy, denim, or even felt! And because it’s a wristlet, you can keep your hands free for drinks & canapes, or for beers & barbecues!

Download the free pattern by clicking the image below!

To anyone linking – please link to this page, not directly to the pdf file!

I hope you all enjoy this and please email me any photos if you make one for yourself! I’d rate this as an Advanced Beginner project just because of sewing the zipper, but it’d make a GREAT first leather project if you’ve never sewed with it before.

Illustrated instructions!

Text instructions are included in the downloadable file, but I wanted to provide photo instructions to make it easier for beginners to sew this, too. But when I put the photos in the file itself, it turned out way too big so I compromised and I’m offering them here instead!

Step 1


Using the exterior fabric, cut out two copies of the purse body, two copies of the flap, one of the ruffle, and one of the strap (or omit the strap for a ruffled clutch). The interior circle from the ruffle is unused and can be turned into a decorative flower by pinching the centre and securing with a few hand stitches.

Christmas Present – yellow leather & tweed handbag

While my mom was staying with us over the summer, she absolutely fell in love with my mustard yellow handbag and called dibs on something (anything!) made from the remaining leather. Since I didn’t have enough to make another Nairobi bag, I started looking through my stash and fashion mags to get some inspiration, and lo! from the Feb 09 Burda WOF “Australia The Movie” accessories feature (not on the website I’m afraid), there was the perfect handbag, already in yellow even!

There were only two pattern pieces to trace – the main bag body (I doubled the paper pattern so it was the full size rather cut than on the fold to make it easier to lay out on the leather) and the small flap. All the other pieces were rectangles of various dimensions that Burda list in the instructions – the only one I actually used was the piece for the side and bottom of the bag.

The Weekend bag

I think this bag might be my longest-running project, having cut out the bag pieces back in August, so it feels good to finally finish it, even if I’m not 100% sold on the end result. If you recall, it’s from the Aug 09 KnipMode:

Instead of tracing pattern pieces from the sheets as usual, this bag pattern was printed in the instruction section as a drawing on a grid, which you then replicated on your own paper, making every square something like 4cm each. It was a different experience, but not necessarily bad if you’re decent at freehanding curves. I think in the end it took me a bit longer to do it this way than to just trace it, as I had to first draw out the grid onto my paper since I don’t own any patternmaking dot & cross sheets.

The fabric is a black, white, and pale blue “Inger” heavyweight canvas from IKEA, bought for £3.51/m. The outside was then coated with the laminate plastic Lamifil to make it waterproof and (hopefully) more wear-resistent.