Blog

The first Jalie jeans

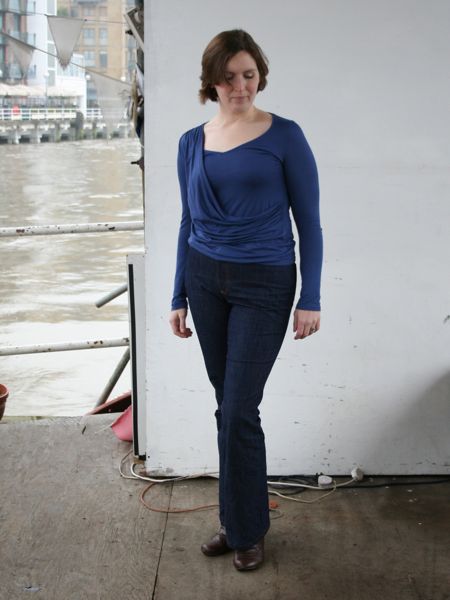
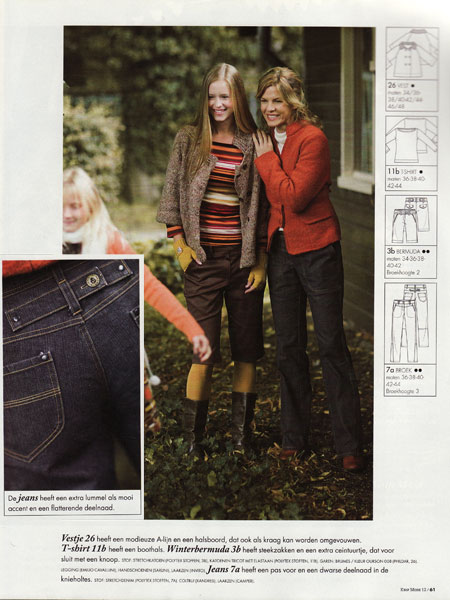
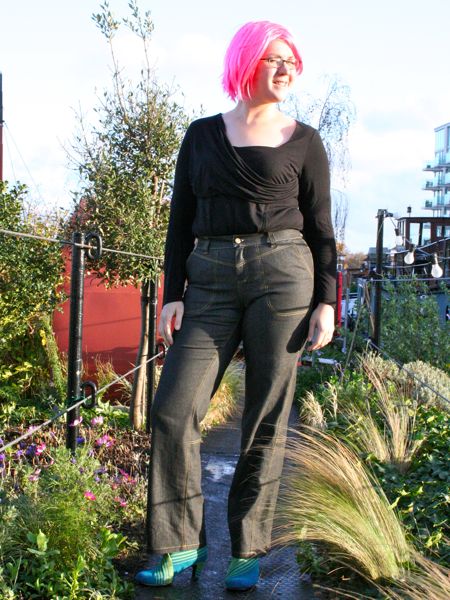
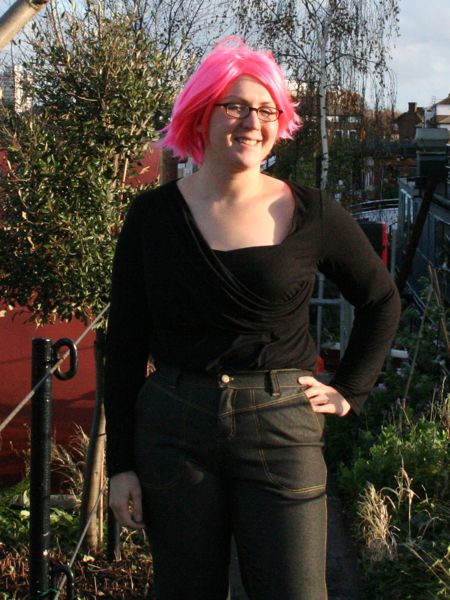
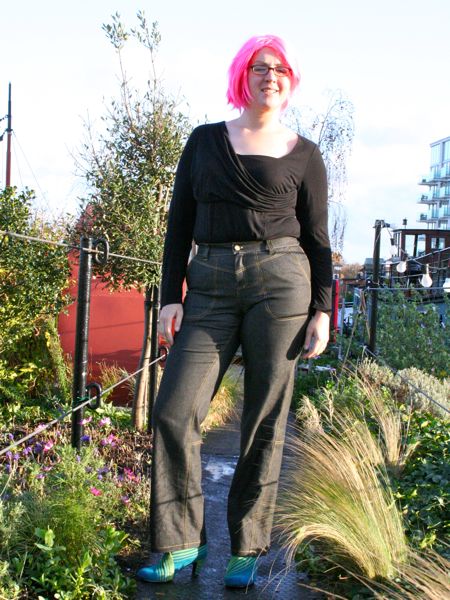
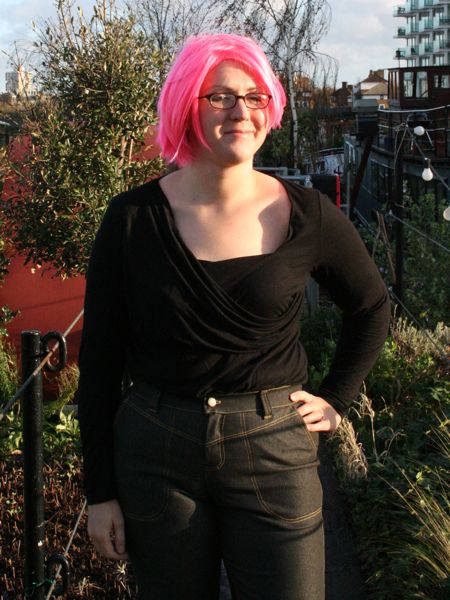
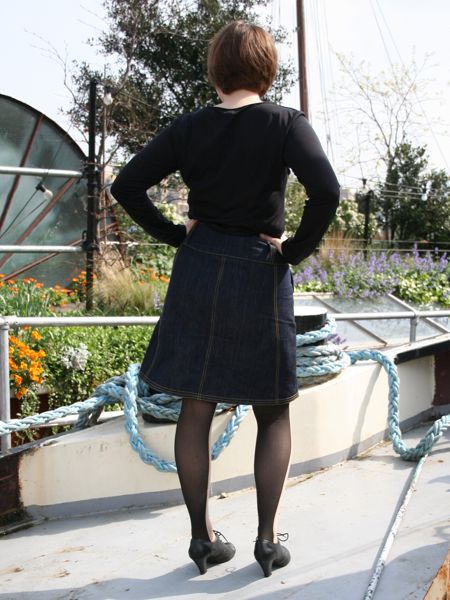
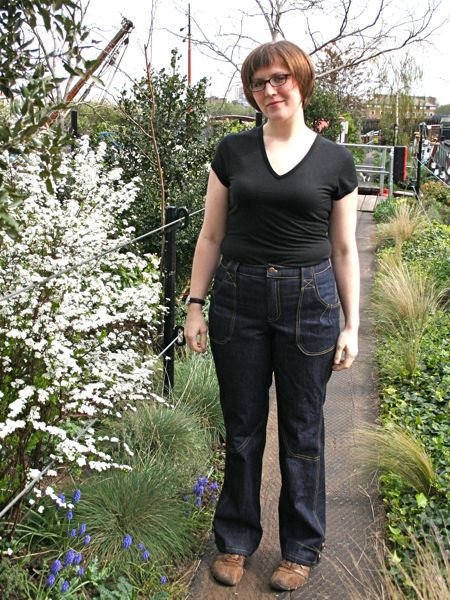
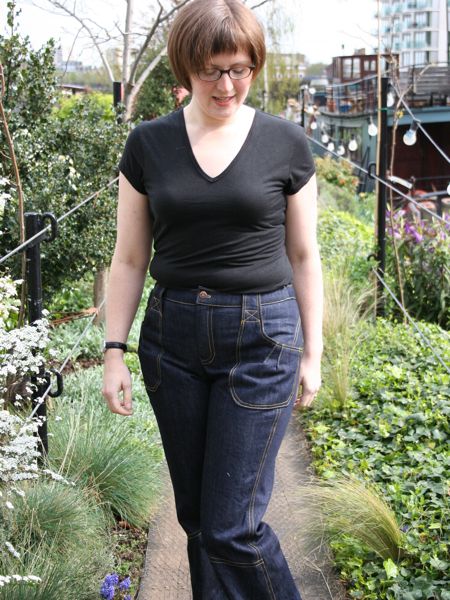
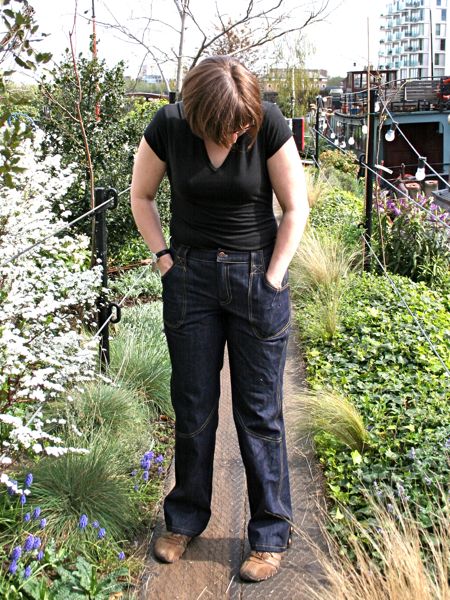
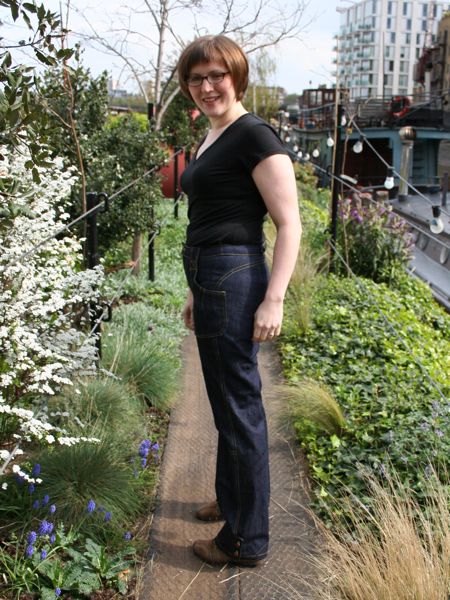
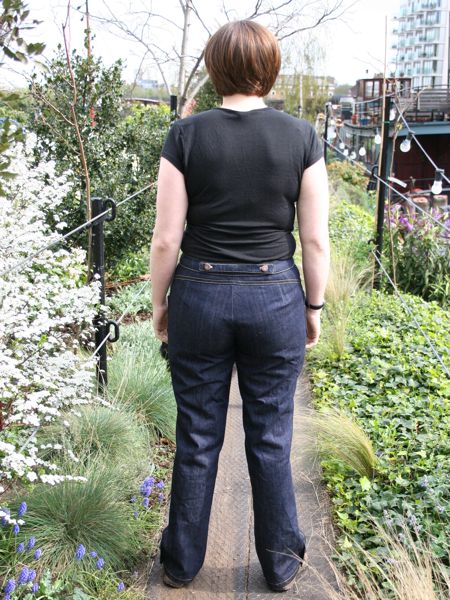
The ladies at the Walthamstow meetup got a sneak peek of my new jeans on Saturday, but now everyone can have a look at my (mentally counts…) sixth pair of jeans!

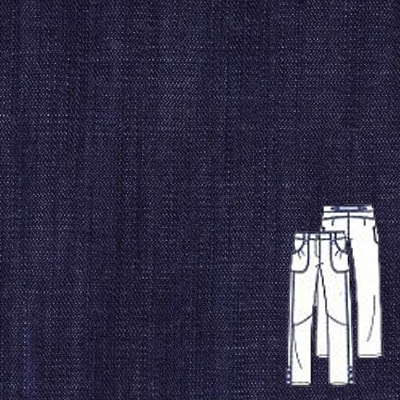
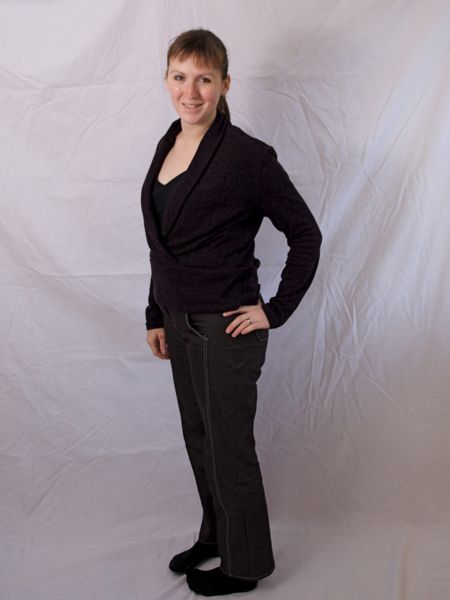
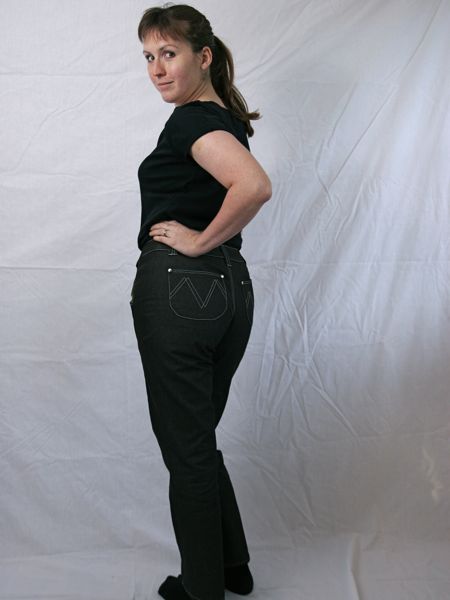
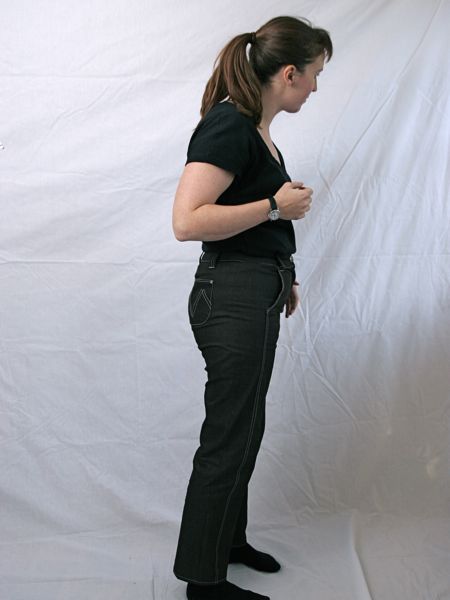
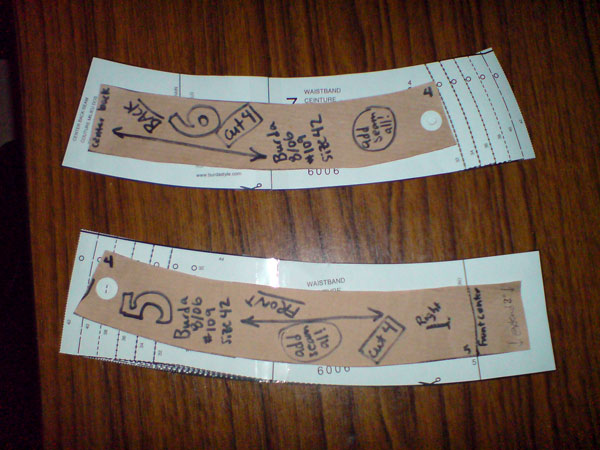
I wanted to try out the Jalie 2908 jeans pattern in cheap fabric before I broke out my good stuff, so I made these using some cheap stretch denim from Goldhawk Road, bought for £3/m. It’s papery and stiff and smells kinda like petrochemicals when you iron it, but it was taking up room in my stash and was good enough to try out the pattern (and good enough for wearing round the boat, too!).

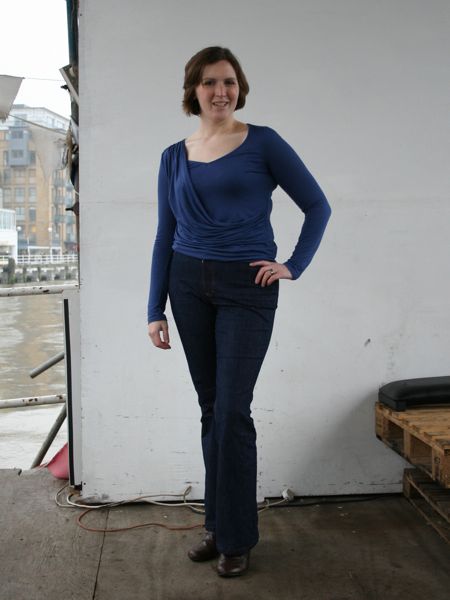
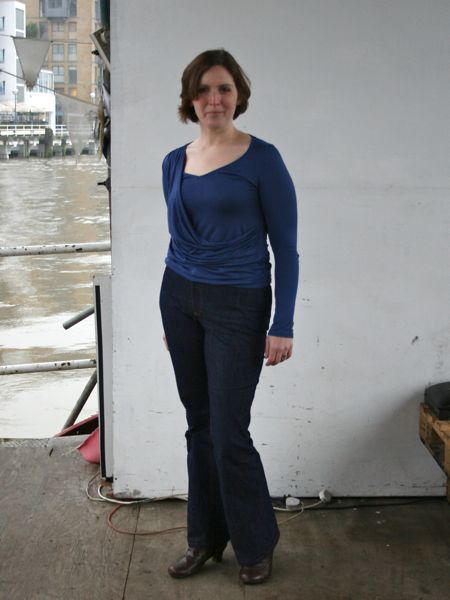
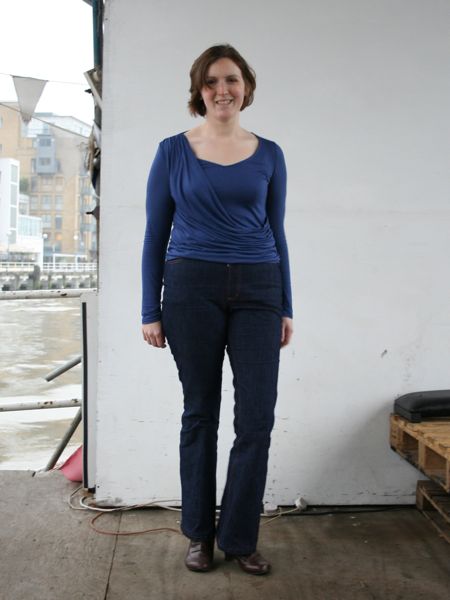
I made the regular rise version (as opposed to the low-rise) and I knew these were bootcut, but wow, this has a VERY flared leg! But the fashion mags can’t stop going on about how flares are big for SS11, so I suppose I’m ahead of the pack with these. I think the rise here is good and comfortable, and the crotch curve, bottom, and thigh fit my “white girl pancake butt” really well. The leg length on these was almost perfect for me, too – I only needed to add 1-2 cm past their hem line (I usually have to add more for Burda trousers, and nothing at all for Knip’s).

Post-coat winter sewing plans

Now that I’ve got my big winter coat sewing out of the way, I can turn my attentions to filling in a few gaps in my winter wardrobe. Sewing these things now means I can get another good 3-4 months of wear out of them before moving on to short sleeves and lighter jackets (no really, for the past few years we’ve had flurries and hard frosts in April or May).

So I’ve gathered together the patterns I’d most like to sew along with fabrics I’ve got in my stash that would help fill my wardrobe voids…

Starting at the top of this collage, we’ve got:

Patrones two-tone jeanskirt

When I first saw the tech drawing for this skirt (#13) in Patrones 292, I assumed the curved upper back section wrapped around seamlessly into the angled front pockets, and it’s what initially drew me to this design.

But on closer inspection of the pattern pieces, I realised this wasn’t the case and that there were side seams on the upper portion as you’d expect in most skirts. So after tracing the pattern, I went about transferring the curved side seam “dart” into an area that would be hidden by the pocket, went so far as cutting out the piece…. and then realised it seemed like a kinda stupid amount of faff just to remove a seam line on a colour-blocked skirt where the seam would be so overshadowed by the overall colour-blocking anyway. So I reverted everything back to the pattern as drafted, recut the nude fabric pieces, and made the skirt as intended.

Nostalgic flowered jeanskirt

I’ve had this flowered black and red denim I’ve since I was 13 or 14 year old. I remember being so inspired by the “sewing machine driver’s test” we took in Home Ec class that I got my mom to buy me this at JoAnn’s Fabrics and I made a really simple tote bag out of this using her old pea-green Kenmore sewing machine. The bag fell apart soon after (let’s just say I wasn’t big on following any “rules”), but I just attached the straps back on with some safety pins and continued to use it as my school bag for the rest of the year.

I honestly had no idea this fabric even still existed, but my mom found it lurking somewhere in my old room at their house and brought it with her this summer. I looked through my pattern magazine archive (made so much simpler by scanning each of the index pages into an online album) and #113 from the July 2008 Burda WOF magazine jumped out as the prime contender.

There wasn’t much fabric left, but it was plenty enough to make this skirt. I’d definitely keep this one in mind if you’ve got a metre or so of heavyweight fabric you want to make use of!

Sew your own designer jeans!

Step One: Find yourself a pattern with tons of interesting details. In my case, I’ve used pattern #7a from the December 2008 issue of KnipMode magazine.

Don’t get me wrong, I love Burda, but when’s the last time you saw one of their trouser patterns with anywhere near this much detail?? KnipMode are by far my best source for interesting trouser patterns in the last year or so!

Step Two: Find some ex-designer denim like this black stretch denim from Ditto Fabrics in Brighton (50% Cotton 45% Polyester 5% Elastane) from “one of the Italian designers”. It’s listed as black, but when it’s held up to black, it looks blue, and when held up to navy it looks black. Whatever the colour, it’s seriously the nicest stretch denim I’ve ever come across, and it’s really similar to the weave you find in RTW jeans.

Step Three: Sew!

KnipMode faux-wrap jeanskirt

I didn’t get much sewing done this weekend, but I did catch up on photoshoots for my finished garments from last week, at least. First up is an A-ine, faux-wrap jeanskirt from KnipMode March 09 issue, #12:

It features the very last of my super heavyweight Levis denim that also bore the Thames jeans and the recent KnipMode boyfriend jeans. And stylistically, it’s also got a similar idea, if not construction, to the KnipMode kilt-styled jeanskirt I made a few years ago.

KnipMode boyfriend jeans

It seems like everyone’s caught the jeans sewing bug recently! Maybe it’s the warmer weather or just the slow realisation that I could really do with more casual trews in my wardrobe, but KnipMode Jan 09 #11a really took my fancy and wouldn’t let go.

This is my first pair of Knip trousers (the leggings don’t really count!), though certainly not my first pair of trousers or jeans!

Annoyingly, it’s hard to get a good look at these jeans in the magazine photos – they’re either covered up by her jacket, or partially shown in the detail shots, or just not photographed at all.

But between these and the technical drawing, I was able to piece together how these should go together, in what order, and with what topstitching (I posted some essential topstitching tips a few years ago, fyi). What really drew me to the pattern was also to be the most difficult sewing aspect – the front pattern piece has “arms” at the top that wrap around completely to meet at the centre back, and the back piece of the trousers has a curved seam around the bum, and wraps round slightly so the “side seam” on the legs is actually on the front:

So this means there’s no traditional side seam to tweak the fit, and there’s no centre back seam in the waistband to tweak there, either. So if you’re unsure of the fit, I’d fully recommend sewing a muslin first, though I actually just threw all caution to the wind here and used my super heavyweight Levis denim from the outset (since I’ve made so much KnipMode in the past and knew I was a consistent size).

Grey skinny jeans

While I’m still waiting for the fabric to arrive from America for my last Christmas present, I decided to add to my trouser collection and make a second pair of the black biker trousers, which are BWOF 05/2006 #112. I realised in my observations of what I’m wearing this month that my trousers in general are way too dark and I need some slightly lighter ones to allow me to wear (my many) black tops with them.

Birthday bolero and Thames jeans

I’ve just spent nearly all of my four day weekend (double bank holiday, woo!) behind my sewing machine and ironing board, and I couldn’t be happier! For the last few years I’ve made myself something nice and new to wear on my birthday, so today I’m wearing my new clothes! It dulls the pain of turning 29, you see… 😉

Pattern matching

I should have some photos for you very soon of my beautiful silk blouse, but in the meantime, I’ve started thinking about sewing up my next pair of jeans, using some brand name Levis 3% lycra denim from Crybaby’s Boutique (though it appears to be sold out now!). It’s all washed and dried (in my neighbour’s tumble dryer) and pressed and ready to go, but now I have to decide whether I’ll stick with my tried and true jeans pattern, Burda World of Fashion 08/2006 #109, or whether I should a new pattern, BurdaStyle’s Anita skinny jeans pattern.

So my first thought was to compare the two patterns to see exactly how different Anita is from my usual pattern. It fits me like a glove, but has back darts rather than a yoke, which is my only aesthetic issue with it. Now, the BWOF pattern (in brown paper) does not have seam allowances and Anita (in white paper) does, so if the two patterns were exactly the same there should be 5/8 inch of white showing all the way around the edges.

Here’s the waistband pieces: