Blog

Grey flannel outlook ahead

My next two sewing projects to share with you both use the fantastic, charcoal grey, ex-designer poly/viscose/lycra flannel that Neighbour Helen gifted to me just before they set sail for the continent. If I didn’t have the fibre content tag still attached to the fabric, I’d assume it was a cashmere or wool flannel, it’s that lovely!

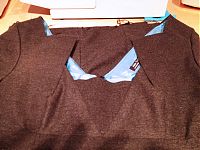
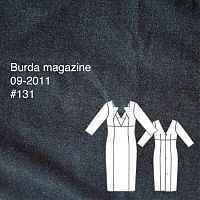
The first use of the flannel is actually already finished and could’ve been spotted in the swankier parts of Spitalfields on Saturday night – an amaaaaaaazing sheath dress from Burda magazine:

I’ll avoid a long story to explain the Why, but you’ll have to wait til next week to see the photos. But trust me when I say it is a truly stunning va-va-voom dress!

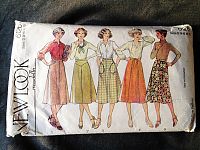
Then this weekend I decided to jump right in and use up the remaining ~2m or so of the flannel and make the vintage Maudella midi skirt pattern I bought in Sheffield a few weeks ago:

Mobile sewing weekend report

I’m beginning to feel like my draped suit (Burda September 2011 #126 and 127) is dragging on forever, so it’s good that I am making progress in the few snatched snippets of time available to me over the past few weeks. I hope you’re not getting too bored yet!

We were out of town this past weekend, up in Sheffield visiting two very good friends of ours in their new place (a house with his’n‘hers sewing machines! We slept in a room with a vintage Bernina!). It’s about a 3.5 hour drive from London, so there was ample time in the car for handstitching, but it did require some planning ahead to get the suit in a state ready for it.

Going back to my earlier To-Do list from last week, I was able to finish the following on Friday night before we left:

  • Construct and attach the sleeve linings to the rest of the lining
  • Interface the jacket hem
  • Attach the lining to the jacket around the front facings and neck edge
  • Construct the skirt lining and baste to the skirt at the top edge
  • Attach the waistband
  • Machine-hem the skirt lining
  • Machine-stitch some grey lace tape to the bottom skirt edge

I also prepped about 5 lengths of grey and pink thread with beeswax before leaving so that I wouldn’t get horrible tangles while doing all the handstitching. I never used to bother with beeswax, but it seriously does help cut down on the excess tangling, so the time spent waxing and pressing the thread in advance really does save you time and frustration in the long run.

Then, in the in the car ride up to Sheffield and back (and, err, also in the KwikFit waiting room while we had new tires put on) I was able to:

  • Anchor the lining to the seam allowances at the underarm
  • Baste and hand stitch the jacket hem
  • Hand stitch the lining hem to the jacket hem
  • Hand stitch the sleeve lining hem to the sleeve facing
  • Baste and hand stitch the skirt hem

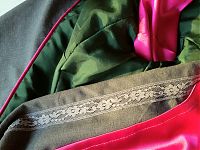
I just love how that hot pink satin piping turned out! You can also see my lace hem tape on the skirt here. This was a pack of lace tape I’d bought at the Amish dry-goods store in Perry County last year, paying 50 cents for it, and with a 1986 copyright on the package!

The Hour – my new Fall style inspiration

I have a new style crush – The Hour, a new BBC drama starring Dominic “McNulty” West and Romola “her that wasn’t Keira in Atonement” Garai. Yes, there are a lot of comparisons with Mad Men, but it’s a fantastic show in its own right, and being set in 1956 London, barely out of rationing and in the publicly-funded BBC, means there’s a lot more quirk and ragged edges than you find in the ultra-slick Madison Avenue counterpart. The best part is that this series isn’t even about fashion – it’s about the shift in the purpose of television news around the time, where it went from being a government puppet supplying newsreels to a subversive, investigative element in its own right. It’s a riveting, wonderful show, and James is just as addicted as I am.

Still not interested yet? Well, you soon will be – American viewers, set your DVR of choice to record BBC America on 17 August at 10pm Eastern, because I have a feeling the style blogs are going to go nuts for this once it’s gone international (and UK viewers, you can watch the latest episode tonight on BBC2, or watch the previous episodes on iPlayer as it’s a series catchup show).

The thing I love most about the fashions on show here are that they’re not what you imagine 1950s fashion to be – this is as far removed from June Cleaver as you can get! Just like Mad Men changed our view of 1960s fashion from hippies and go-gos, The Hour takes us out of the mentality that the 1950s was all about Dior’s New Look silhouette. Think more British vintage style – impeccable pencil suits with nipped-in waists, stylish blouses and power dressing, plus a nod here and there to more noticeable 50s styles like the teddy-boy “Grease” look and even a Marilyn Monroe-a-like!

Revisiting pattern drafting and the vintage tab dress muslin

Remember the vintage dress pattern I graded down to my size a few weeks ago?

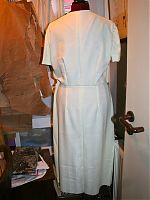
Well, I made up a muslin with my grading changes in place, and though I didn’t get any photos of it on me, I did get some on Susan. I realise that diagnosing fit issues on a dressmaker’s dummy is particularly futile, though, so you’ll just need to take my word for it!

On first glance, the worst issue is that there is way too much fabric in the upper back, but also I think I may need to raise the waist seam by an inch, and narrow the shoulders by an inch or so, too.

The skirt length is d-o-w-d-y so I’ll need to shorten all those panels, too (happily I’ve got a “lengthen or shorten here” line on both the bodice and skirt pieces).

While the sleeves themselves fit nicely, there is an unholy amount of excess ease in those sleeve caps, omg. So I’ll need to shave down those caps to take a good few inches out of there.

It wasn’t necessarily the list above that made me lose enthusiasm for this dress, but I can’t really put my finger on what it was. But it turned out that doing all the boring grading reawakened in me a desire to conquer pattern drafting, which I dabbled in when I received “Metric Pattern Cutting” by Winifred Aldrich last year, but didn’t get far.

Grading down the vintage tab dress pattern

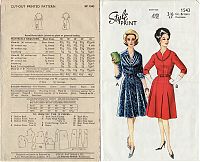
One of my big tasks this weekend was to finally get cracking on my upcoming vintage tab dress, Style Print 1543. It doesn’t have a copyright date, but was estimated to be from the late 1950s/early 1960s by the vintage gurus on Pattern Review. I’ll be making the button-tab view in blue, but since this pattern is for a 42” bust, I’ve got to grade down the pattern to be closer to my 38-39” (depending on the bra!) bust.

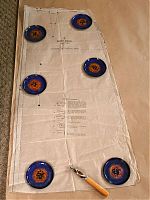
My first step was to trace the pattern pieces (read more about my pattern tracing method here) so I wouldn’t have to cut or damage the vintage tissue. Those blue enamel coasters from my mom are the most perfect pattern weights! They’ve even got a nice felt bottom to them.

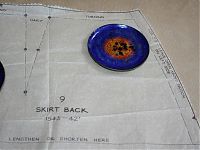
This pattern has seam allowances (called “turning” here!) included, but they also mark all the seam lines! Heaven! Since I’m going to be altering the pattern anyway, I just traced on the seam lines to make life simpler.

Surely this is the best of both worlds, right? You can choose to use the seam allowances or not (though I understand how this would be impractical on multi-size patterns!)

As I was unfolding all the pattern pieces, I found it really interesting to see the fit alterations the previous seamstress had made. She:

The Madame Grès exhibition

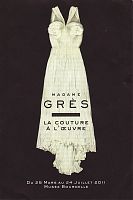
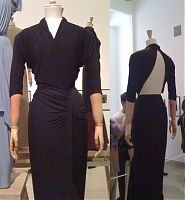
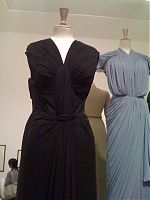
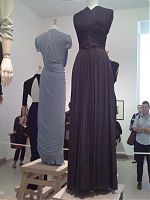
One of my highlights of our weekend in Paris was seeing the superlative Madame Grès exhibition at the Musée Bourdelle. For me, this was higher on my Must-Do list than even visiting the Montmartre fabric shops, and I was so glad that this museum is open on the weekends, and even located very close to our friends’ flat, too.

Madame Grès originally wanted to be a sculptor, so it makes perfect sense that the dresses were shown in a sculpture museum, and intermingled amongst the various sculptures on display.

I went on a Saturday afternoon, and the museum was filled to the brim with middle aged women and young men, all taking a multitude of photos on their cameras and phones. Had I known it was allowed, I would’ve brought our DSLR, but as it is, you’ll have to settle for the limited detail from my iPhone…

Our DIY wedding – refashioning my grandmother's gown

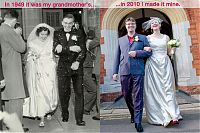
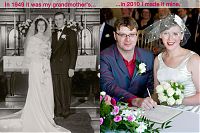
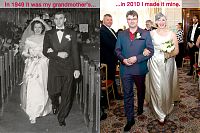
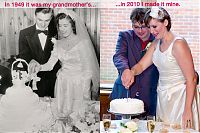
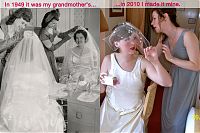
I’ve got many, many more wedding photos to come, but as I was slowly going through all the photos from friends and our professional photographer, I realised that there were a lot of parallel poses between my grandparents’ photos and ours.

Big thanks to my Dad for taking the time to scan in my grandparents’ wedding album in hi-res format, and also to our truly INCREDIBLE and AMAZING wedding photographer, Paul Tanner. I’m pretty sure he was the best money we’ve ever spent.

Confetti toss:

Post ceremony posing:

Walking back down the aisle:

Cutting the cake:

Pre-wedding girly preparations:

If you’re new to this site, let me back up a minute and explain what went on here. First of all, yes, I sewed my own wedding gown. But that would be too easy (ha!), so I decided to sew it from my grandmother’s gown.

Something old…

Check back on Sunday around noon (London time) for wedding dress photos!

Around the end of August, I got an MMS (photo text message) from my bridesmaid Pip’s boyfriend Rob of a brown case next to an assorted pile of clothes with the message “Saw this and thought you might be interested.”

I replied with “Ooh what’s inside? Have you got a model no or year? And does it work, or Need Love?”

To which he said “No idea at the moment. It’s in the window of a charity shop, I’ll check it out on Tuesday.”

And I said “Ah I can’t really justify a 3rd machine! But if it’s a vintage Singer I’m interested (I’ll pass on any others, so don’t spend too much energy on it!)”

And since I never heard anything further about it, I completely forgot about our conversation (conveniently still saved in my phone though!) until they presented it to me as a wedding gift!

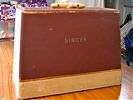
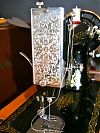
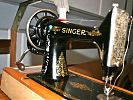
It weighs a TON, but it’s got a great hard case:

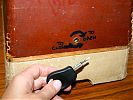
…which opens with an altered Citroen car key! ha!

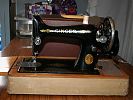
Front, left, and back views:

DIY Wedding Gown – attaching the bodice and skirt

Finally I can give you another progress report on the wedding gown! Don’t worry, as you can see below, I’ve been continuing to work on it on my weekends and Wedsnesdays, so I’ve got a lot of progress to cover!

For the first time I got to turn my attentions to the skirt, which is exactly as it was when it was attached to Granny’s dress, albeit separated from the bodice at the (very gathered) waist seam. But there was a prominent blue stain in the centre front (CF) panel at about thigh-height from the blue tissue paper it was wrapped in for 60+ years, so the first step was to unpick and remove that entire panel. I then moved the two triangular sections that had been on either side of it together to form a new CF:

I actually prefer the way these two look together, forming a beautiful triangular, almost art-Deco detail at the CF!

But back to the bodice, where I had completed prickstitching along the entire neck and arm edges. I just free-handed this without my post-it guide and I actually think this looks better than my zipper insertion!

Bridal bodice – buttons, lining and shopping!

Ok after that little lingerie diversion (and a day spent being filmed for BBC1!), we’re back on the wedding gown!

First up was a quick fitting of the shell with all the boning pieces inserted and the waist stay hooked. And I can breathe a sigh of relief, because it’s looking good. A tiny bit of horizontal pulls around the zipper (which can be fixed by laying off the ice cream a bit) and a bit of boning show-through at the centre front (which I’m going to hold off worrying about for now, but I may just shorten that boning piece so it stops below the bust).

So I can push on ahead, safe in the knowledge that there’s no major fitting issues…

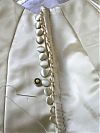
First up – I sewed on all 13 original covered buttons along the right side’s zipper, matching up with the original satin loops I placed along the overlap during the zipper insertion step.

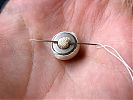
On the surface, these look like ordinary covered buttons, but look at the underside!

I’ve never seen buttons like this before in my life! Instead of a shank with a hole, there’s a mound of stuffed fabric to sew through! What a strange vintage detail! I’ve learned so much from taking the original gown apart…