Blog

Bridal bodice – finishing the edges, waist stay, and zipper

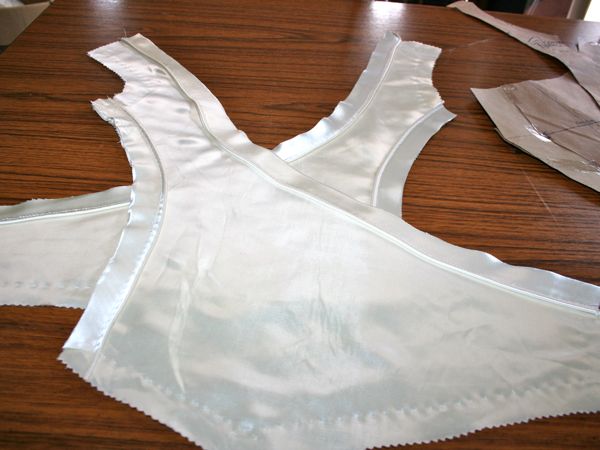
The next step in my epic wedding gown project was to properly finish the neckline and armhole edges in advance of the lining. Instead of most lined garments where you construct the outer shell, construct the inner shell, then place the two together, right sides facing and sew around the opening edges, in this case Bridal Couture advises us to construct the outer shell, fold in the opening edge seam allowances, then create the lining, with the opening edges similarly folded inside, and then place the two together wrong sides facing and very carefully fell-stitch along the opening edges, prickstitching the lining where necessary.

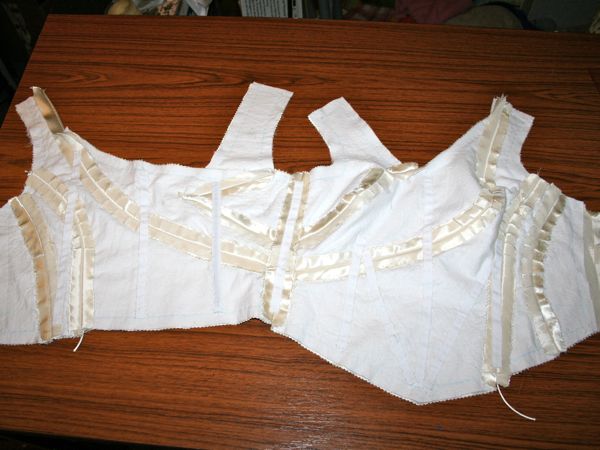
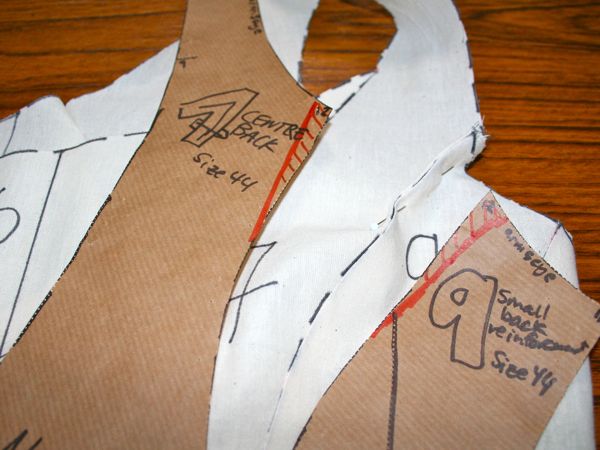
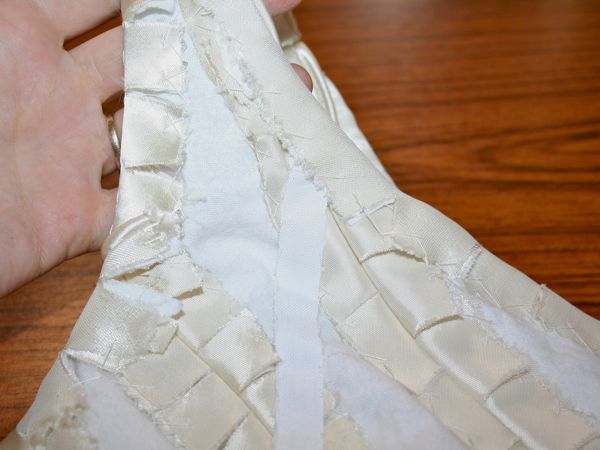
So here are the neckline and armhole opening edges, nicely clipped, pressed, and catchstitched:

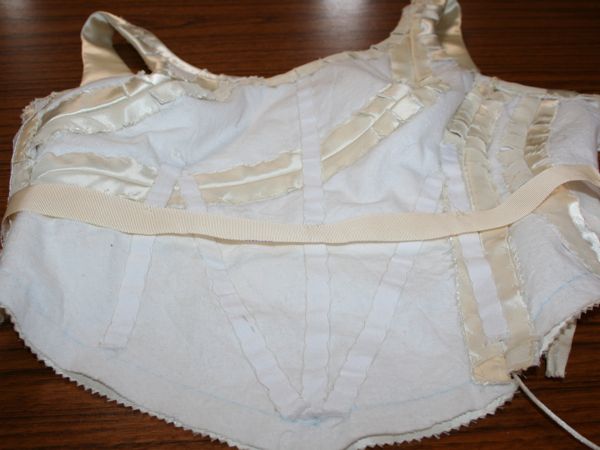
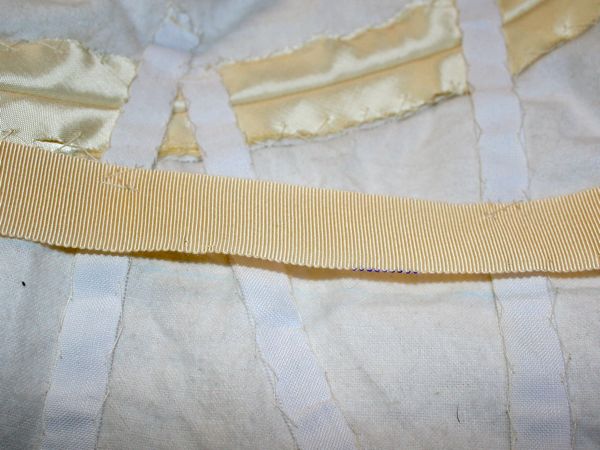
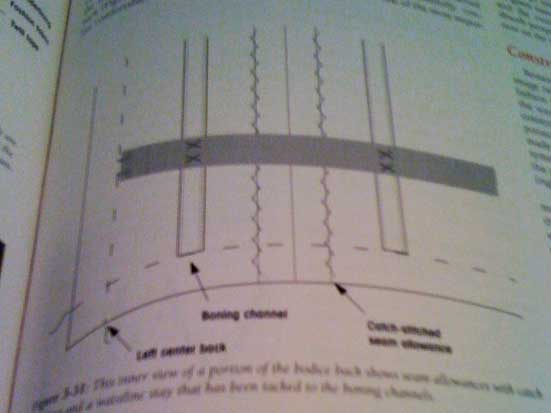
The next step was to add the waist stay, tacked to the boning channels with bottom edge of grosgrain on the marked waistline:

Bridal bodice – boning

With the seams (mostly) constructed and all the seam allowances tacked down, it was time for the boning! Bridal Couture assumes that you’ve got a fairly standard princess-seamed bodice and so advises that you sew the channels to the centre of the underlining pieces at the very beginning before attaching the underlining to the fashion fabric. But my bodice has all sorts of crazy seams and the boning crosses over a bunch of seamlines, so I had to obviously apply my channels after the main seams were stitched, as Susan Khalje advises in this Threads article.

I was originally thinking to make my own channels with silk organza, but then I saw that the Sewing Chest had pre-made and seam-free cotton channels so I bought those and ended up going with that instead to save myself some time. And as Ms Khalje talks about using them herself, I figured it’s okay!

So I started a production line – first I sewed the end of the channel closed with the sewing machine, then I carefully pinned the channel to the bodice underlining where it was needed, then cut the end just before the seamline at the bottom of the bodice. Once all the channels were in place, I then catchstitched them all to the flannel underlining, keeping the bottom free to insert the boning.

Here you can see all the channels, minus the one going on the zipper tape (to be attached after the zipper is in place):

Bridal bodice – Piping and basting

…in which I work with more piping than a plumber and more basting than a Thanksgiving dinner!

When I last checked in, I had cut and prepped all the pieces of the bodice, so it was now the point in my plan to sort out the piping if I was going to do so (and you’ve probably rightly concluded from the title that I did!). I had about 80cm of piping from the original dress’s waist seam, but I realised this wouldn’t be enough to pipe both sides of pieces #2 and #7 like I’d planned. So before I could do anything, I had to make some piping!

Luckily, the dress’s collar pieces were nice and long and on the bias, so this was a piece of cake. I cut four strips of 5cm wide and joined the edges together to make one long strip, then inserted my 2m of satin rattail and ran the whole thing through the sewing machine with the zipper foot.

But as I’ve already established, I can’t be making errant needle holes nor can I afford to use the seam ripper any more than what’s absolutely necessary, so in order to get the piping inserted perfectly on the first try, some hand basting was in order.

First, I basted the piping to one of the pieces, aligning the piping’s stitches with the basted seam lines:

And I did that for all four piped seams:

Bridal bodice – Prepping the pieces

I finally got the muslin fixed and finished! Thanks for all your advice, though I haven’t had a chance to reply to hardly any of you, for which I do apologise…

Muslin #3 changes –

  1. Unpinned the shoulder change, took off the waist stay, and since it seemed to be pulling everything upwards before, I reasoned that it must be too low. I repinned it a little higher and everything seemed to sit nicely and correct those weird problems it threw up before.
  2. I’ve said it before but I’ll say it again – I detest Rigilene boning! Only someone who hates women could’ve come up with those tiny, needle-like implements of torture. My spiral steel boning for the finished dress arrived and it just feels wonderful.
  3. No one actually came up with the fix I needed for piece #3’s weird bubble. As it turns out I just needed to flatten the curve a bit below the inset corner. (Before and After are below)
  4. There’s no way I’m muslining the skirt. It’d literally take a whole week of sewing time to even approximate the panels on the existing skirt, plus the drape and weight of the muslin fabric is totally different, and it won’t achieve much of anything I won’t learn in the actual skirt attachment anyway. End of story.
  5. Yes, I know about wearing proper undergarments. I’ve been wearing the bra I intend to wear on the day all along (though I got sharpie on it during my muslin marking process so I need to buy another copy of it, boo.). I was not being serious about the push up bra.

So with the muslin done, on with the dress itself!! Hurrah!

First step was to lay the pattern pieces onto the wrong side of my flannel underlining, fuzzy side down (I’d been transferring all my changes onto them and I prefer paper with no seam allowances over muslin with allowances). Once pinned in place, I then chalked the seam lines, waist, centre back and fronts, and the two notches onto it. Then I cut out the pieces with eyeballed seam allowances (when you’re dealing with seamlines, the size of the allowances are largely unimportant).

Next I laid the flannel pieces onto the wrong side of the satin, pinning only in the seam allowances because all the pin holes show on this fabric.

Yet another bridal bodice muslin

I’m no big fan of muslins and fitting tweaks, so the title is really reflecting my impatience at still being in the fitting stage. I want to get on with the fun stuff! But I also really want to get the fit and design perfect here as I can’t really go unpicking the vintage satin (the needle holes remain), so here I am, still soldiering on, though hopefully not for much longer…

Yesterday was my day off so I devoted pretty much the entire day to this dress. Right after breakfast I made up Muslin #2 (not shown because no one was around to photograph me), which incorporated the neckline changes and better-drafted add-on straps. There’s no photos, but essentially, I just needed to pinch some fabric out in three places, which you can see here shaded in orange on my pattern pieces:

So I made those changes to my paper pattern, unpicked pieces 1 and 3 from the muslin, cut new ones out, and reattached them, bringing us to Muslin #3. And I was pretty happy with the fit, apart from a bulge above my right breast which I immediately knew the cause of and fixed it on the paper pattern.

Bridal Bodice Neckline – opinions needed!

I am very happy to report that my dress for the BurdaStyle book is completely, 100% finished, packed up in an airtight bag and ready to be FedExed this week. HOORAY!

I’m afraid that’s all you get to see until next year, to. Boo.

But it means I can now devote ALL of my sewing time to my wedding gown. So the first step is to attack the muslin. I’ve marked my waistline in green, and the possible boning positions in blue. Once I marked my waistline I realised exactly how short the bodice is so I’m elongating it all by an inch so the back and sides aren’t ending exactly at my waist. My waist is an inch higher than the standard measurements anyway so I think this alteration will help (note: I’m not short-waisted. My bust-hip measurement is standard, my waist is just shifted up a tad).

But I really, really need your help choosing the right neckline for this gown!!

Bridal planning update

Apologies but this is a bit of a “brain dump” post as I’m understandably a bit frazzled right now, with the BurdaStyle book deadline looming on top of wedding planning and everything else I seem to list every time I post (ahh, just thinking about it is starting to stress me out, sorry!).

So I haven’t done much tangible work on my gown since I last updated because I’ve been focusing on getting the BS book dress done since it has a more immediate deadline, but I’ve been doing lots of mental sewing on the gown. Which, you’ll remember, is half the battle for me. So I took an evening out to read (really read and digest!) through “Bridal Couture” by Susan Khalje and the OOP Palmer/Pletsch “Bridal Gowns—How to Make the Wedding Dress of Your Dreams” book (the former being way way more useful than the latter IMHO). I placed copious amounts of Post-It notes sticking out the edges at places I want to refer back to later.

I’m also really glad I ended up taking that PR online Underlining class a few months ago now!! Though I just looked to see if I could link to the Underlining class somehow, and I noticed Susan Khalje herself is teaching a “Wedding Gowns 101” class starting Aug 15. If it were a few months earlier, I’d have jumped all over it, but you need time to devote to the classes most evenings and I’ll need all the time I can get to work on my gown!

After reading through the two books I had everything mostly straight in my head about this dress, but the boning placement still puzzled me because my pattern doesn’t have any obvious vertical seaming to place the boning along, and all three examples in Bridal Couture had some sort of princess seaming. Luckily for me, it was easily solved on the PR messageboard and by this Susan Khalje article, so I’ve got a full gameplan in my head now for the dress!

Vintage wedding gown photos

So you’ve already seen a bunch of detailed photos of my Granny’s gown (from 1949) laid out flat, but I wanted some on a real person so you could really see the style lines and how it falls. And this way I can get some nice Before and After shots when I refashion it into my gown for September.

Big big big HUGE thanks to my neighbour Kate who not only fit into this tiny dress (respect!) but actually humoured me and let me take photos of her in it to post to the internet (Secretly, I think she had fun!). Kate’s also engaged and I was thrilled to learn that she’s not having wedding colours, either!

So let the vintage dress photos commence!

Bridal Bodice update

When you last heard about my wedding gown, it was two years ago(!!) and I was leaning towards turning my Granny’s gown from 1949 into something with a cowl neck, deep back, and sleek lines, using Vogue 2965 as my starting point.

But recently I’ve been looking more closely at the fabric I’ve got to work with in my grandmother’s gown, and my recent cowl sewing adventure has reminded me that cowl necks need pretty huge amounts of fabric, can’t easily be pieced together, and on top of that, the silk satin in her gown is more of the heavyweight duchesse variety than something very drapey that would cowl nicely. And while I love a low back, it does make things awkward for bras and any sort of shapewear, too.

So I had a bit of a wake up call and told one of my bridesmaids to keep reminding me that “This is just one dress. It is not all dresses.” (thanks, Stacy!). Yes, I like cowls. But I also like other things, too. And I do not need to put everything I like into one dress!

Crafternoon

The moorings’ first Crafternoon was a smashing success! We normally have a monthly craft night amongst the neighbours, rotating around to different boats so no one person always has to host. Since our usual craft night falls on a Bank Holiday Monday in May (and again in August), we decided to move it to the afternoon and outside to the Arts Ark (which is like our little floating, communal village green).

Rather than everyone coming at once, it was more of a drop-in thing, with different waves of crafters coming throughout the afternoon… Clare from Selvedge Magazine and her flatmate helped out with the organza wedding flowers, as did Susannah from Cargo Cult Craft! I was a bit crap with taking photos, though, so I missed the bulk of the crafters, sorry!

James raised the bar for “boy craft” and built a step!