Blog

A gathered merino wool sweater

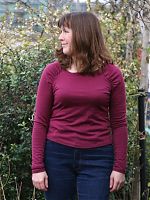
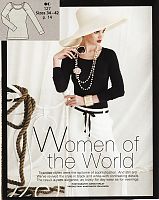
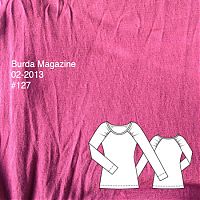
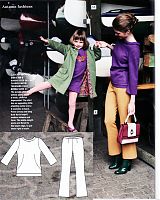
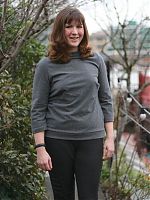
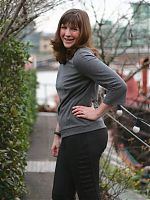
I’m not actually doing the Burda Challenge again this year, but I keep seeing so many great patterns in each issue that I want to sew – like this quick, gathered raglan merino wool sweater from the February BurdaStyle magazine (or to purchase as a pdf download here). And I am powerless to resist.

I bought this plum merino wool jersey on etsy along with some brown as well – the purple is sold out but there’s some brown merino wool jersey left and it’s luscious and so soft – nice and thing for layering but so warm, too. Amazing stuff! So cheap, too – 5m for £30 is an absolutely steal. I often see Antipodean sewists going on about how lovely merino wool is to sew, but it’s something I’ve never, ever seen for sale in Europe so I jumped on this when I saw it!


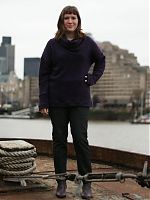
(Worn in these photos with the jeans I made in November)

Wool sweatshirt & denim-look pleated leggings

I’ve been meaning to sew both of these pieces for a few months now, but it didn’t occur to me exactly how well they work together until I went to do the photoshoot and realised, hey – these make for a great transitional weather casual outfit!

The wool sweatshirt

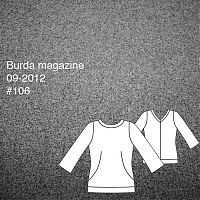
I mentioned it in my Burda Challenge roundup but I abolutely adore my turquoise chic sweatshirt from the September 2012 Burda magazine (or you can purchase the download pattern here), and I wear it so much I’ve been plotting another ever since. I’ve had this wool blend fabric in my stash since our honeymoon in 2010, when I bought it at Elliott Berman in NYC. I’m not sure if it’s a jersey or a woven, and it’s got a bit of loft and stretch, but it’s not as spongey as your typical loden. And for a wool, it’s super soft and not scratchy in the slightest.

So I made another “chic sweatshirt” out of this wool – does this make this one my “luxe sweatshirt” or something?

As before, you’ve really got to baste those curved front darts carefully so they’re accurate when you sew them. I always do my hand basting with silk thread (hot pink so it stands out against pretty much everything I sew) because it pulls out so much easier than polyester or cotton thread when you’re done.

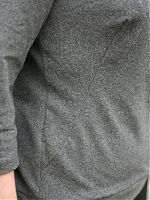
I really like the detail of the curved, darted sleeve head, which makes the construction of this more like a raglan sleeve than a set in one.

Catching up…

A month on, and I’m still ravaged by the shingles attack that hit me in mid-January. Absolutely everyone who saw my torso said it was the worst case they’ve ever seen (doctors included), and lucky, lucky me, the little bugger caused nerve damage, which means the pain in my side could continue on for months or possibly a year (again, lucky, lucky me). I’m on four different prescription painkillers until the neural-specific one hopefully starts working soon, so I’ve been stuck at home Resting (I hate resting.). The good news is that the doctor says I can now go do the odd half day at work and very easy run here and there as it’s driving me crazy not to, but I’m not to overdo things. But even that’s better than being chained to a couch!

Anyway, I’ve done as much resting as it’s humanly possible for Melissa to do, which means I’ve been lying flat on my back and sleeping for most of the days, but I managed to squeeze in some sewing, almost entirely in 5 minute segments, followed by 20 minutes of rest. Rinse & repeat… These will have photoshoots and proper posts coming hopefully next week!

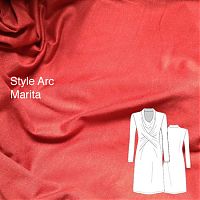
The amazingly simple-to-sew Style Arc Marita dress:

A grey wool “chic sweatshirt”:

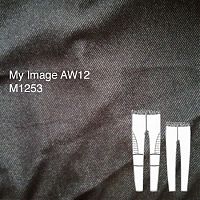
A pair of pleated, My Image denim-look leggings:

A quick, gathered raglan merino wool sweater from the February BurdaStyle magazine:

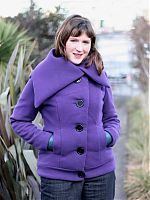
The MyImage Purple coat

This coat originally appeared on my Fall 2011 sewing plans, so it feels good to finally finish it just as the weather’s starting to defrost (I hope anyway!). I’ve been wearing my muted turquoise coat for most of the winter, but I’m hoping to wear this to transition into Spring!

I’ve used “coat” in the title, but is it really a coat? Is it a jacket? Where’s the line drawn, anyway? It’s short like a jacket, but wool and warm like a coat, so I’m not quite sure what to call this.

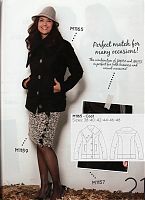
This pattern appeared in the Winter 2011 MyImage magazine (along with that awesome cowl top!) and it’s still available to buy if you fancy it (and holy crap, it’s on sale right now for €1.95/US$2.63, too)!.

You can see some in-progress photos of this coat here and here. The nice thing about working on a project for a while is that you get to see a lot of the “guts” as I work! The downside, of course, is that I have the attention span of a gnat and I get bored when projects stretch over the fortnight mark…

The first thing you notice about this coat is that Big! Collar!! It’s a “whole lotta look”, but I totally dig it. Your mileage may vary! I’ve worn it out twice over the weekend already and the collar is great – it’s substational enough and close enough to the neck that I don’t need a scarf!

MyImage Purple coat – in progress

Yesterday I mentioned that I’ve started sewing the asymmetric, collared coat from the Winter 2011 MyImage magazine, and after a prep period that felt like forever (probably exasperated by the fact that my ironing station is hovering around 0C/30F), I’ve now got some progress to show you!
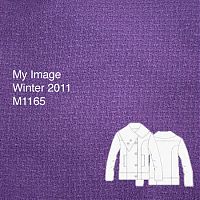
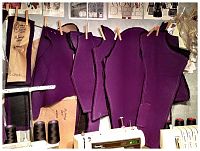
I’m sewing this up in a wonderful purple basketweave/boucle coating, which was another gift from Claire (she’s so good to me!) at the end of last winter. I always like to underline my coats when I can to just add that little bit of extra warmth, but it made even more sense here as it will help to stabilise the coating fabric and prevent any bagging out that might otherwise occur with looser-weave fabrics. The alternative is to block-fuse the coating with a lightweight interfacing, like I did with my Patrones duffle coat.

For this coat, all the facings were interfaced (the usual front and back facings, plus the front and back hip band facings), and pretty much everything else was underlined in black cotton flannel. This meant there was a lot of prep – everything but like 3 pieces needed underlining or interfacing! I love sewing, but prepping is dull dull dull work!

I machine-basted the flannel underlining to the coat pieces here, because frankly, the prep work was tedious enough as it was. I normally hand baste my underlinings, but in this case, the coating and the flannel “grabbed” each other quite nicely, so this, plus the walking foot, plus a long basting stitch meant it felt okay to do it by machine. I still made sure to never turn any corners though (when basting underlinings, you always stitch to the edge, cut the threads, reposition, and stitch the adjacent side so that you don’t create puckers at the corner)!
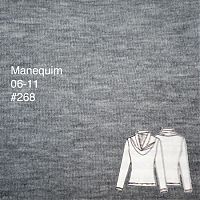
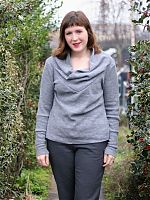
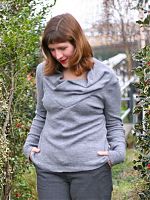
Manequim draped collar sweater

There came a point about midway through the construction of this where it suddenly dawned on me that I was creating my second draped collar sweater with pieced sleeves of the month. Clearly the sweater knits in my stash were calling out to me, and I’m naturally drawn to drapey styles. Though I really must remember when I’m in fabric stores that 2m really isn’t enough for long sleeves and a big collar!

This the Michael Kors-inspired, collared sweater from the June 2011 Manequim magazine. Last week I showed you details on the construction of the various pieces and altering the size “Small” pattern to my basic knit tee pattern.

The only problem was, when I was laying out the pattern pieces onto my awesome, ex-Versace sweater knit from Ditto in Brighton I realised that yet again, I didn’t have enough fabric to lay out the sleeves without piecing them, argh! I didn’t want to back down since I’d tried to use this fabric for something else last winter, but 2m of a really narrow fabric really limits your possibilities. So I carried on, introducing two seams in the lower arms. Frankly, sleeves tend to bunch up so much around the sleeves that I find the seams kinda get lost visually around that area anyway.

In the end, I was forced to cut the collar on the bias simply because the fabric was too narrow to place it on the cross grain!

Draped collar winter warmer

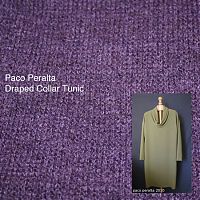
Paco Peralta is a Spanish couturier who has recently started making some of his designs available to buy as patterns. Late last year I purchased his “Draped Collar Tunic” pattern when he was having a special offer, and I’m so glad I found time to sew it already!

It’s an oversized, hip-length tunic with dropped shoulder and large, draping collar. All his patterns are hand-traced by him, with Spanish and English markings on the pattern tissue, but no included instructions – he’s got good photo instructions for this pattern on his blog though. I made size Medium here according to my measurements, though I could’ve easily gone done to a Small, as there’s a lot of ease in this style.

Bonus – All Paco’s patterns are 10% off right now with the coupon code here!


(Sorry, there’s no tech drawing provided and I’m too lazy to draw one!)

I had a 80% wool / 20% polyester purple sweater knit I bought at Ditto in Brighton last winter that was SO lush and soft and I just had to use it for this! Funny that Tany also chose to make this in a sweater knit, though she lengthened hers into a dress!

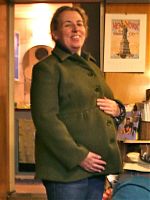
A wool maternity coat – finished photos

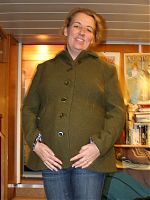
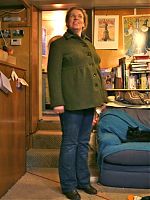
Last week I was nearly finished with Holly’s coat, and the week before that l told you all about underlining it, but finally I can show you completed completed photos!

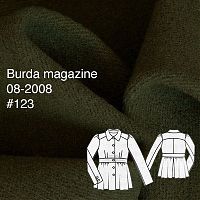
If you recall, I used this maternity coat from the August 2008 issue of Burda, but after the first muslin we made some design changes (namely, eliminating the band and gathered sleeve caps) and an added dart as a consequence of an FBA (full bust adjustment) so it’s not quite the same as you see in the original tech drawing below…

Apologies for the slight blurriness and busy background – this is why I try not to do photoshoots after dark, but it couldn’t be helped this time around! At least you can see how it fits her, even if the photo quality isn’t great.

A wool maternity coat – nearly there…

As you recall, last week I underlined Holly’s maternity coat and created all five bound buttonholes, but I had the day off work on Friday so I was able to make loads of progress over my long weekend! In fact, her coat is now 95% finished and ready to hand over, so I thought I’d give you a rundown of what I got up to…

I’m making this maternity coat from the August 2008 issue of Burda, but after the first muslin we made some design changes (namely, eliminating the band and gathered sleeve caps) so it won’t look exactly like this tech drawing:

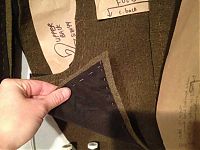
As I constructed the shell of the coat, I took the extra step here to catch-stitch all the thick wool seam allowances to the flannel underlining. I started off just doing this on the sleeve seams as I feel the bumps are most noticeable during wear there (and therefore most likely to get annoying quickly!), but I carried on and just catchstitched everywhere.

I wanted this coat to be as nice for her as one I would make myself, so why not? I also noted that Gertie was asking last week how to make the seam allowances lie flat on her coat – well, the answer is catch stitching!


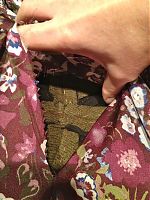
(I forgot to take a photo of all my stitching before lining it, though, so you’ll have to make do with a shot through the “window”!)

A wool maternity coat – basting and buttonholes

If you recall from last week, my next project is this maternity coat from the August 2008 issue of Burda, which I promised a very good friend:


(The issue date is still wrong above – it is indeed in the 2008 issue…)

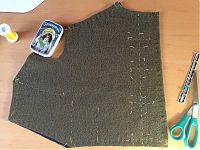
After we sorted out the fitting and design alterations (including a second, quick muslin fitting of just the upper bodice in the pub toilets on Saturday night!), my first step was to cut out all the pieces in the green wool and then again in the black cotton flannel I’d bought to underline the spongey wool coating and give it a bit more structure. The coating is wonderful, but I’m a bit concerned about it bagging out in places, and I wanted to give it some added stability as well as a bit of extra warmth (though if warmth were my primary concern, I’d call it “interlining” and attach it a bit differently!).

Here’s all the pieces hanging on the line in my tiny sewing room:

I then hand basted all the layers together around the edges of the pieces, plus through the darts, and then also marked out the placement lines for the five bound buttonholes: