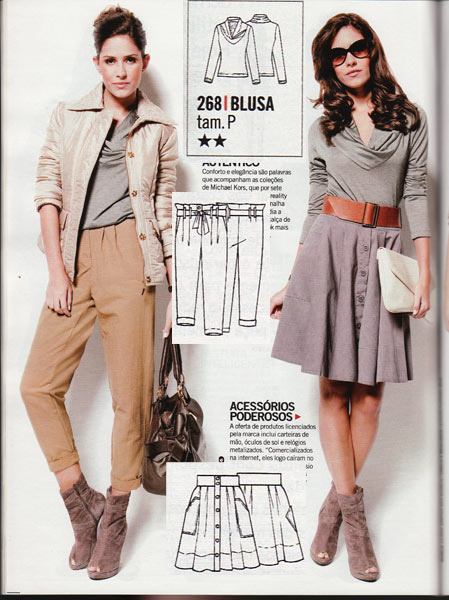
If you remember from earlier in the week, my next project is to make this collared sweater from the June 2011 Manequim magazine:

Since the pattern is only in one size, “Small”, my strategy was to take an existing long sleeved teeshirt pattern that I know fits me well, trace that, then trace the neckline area from the Manequim pattern overlaid onto it and morph the two together. For simplicity’s sake, I wanted to keep the collar piece as unaltered as possible.
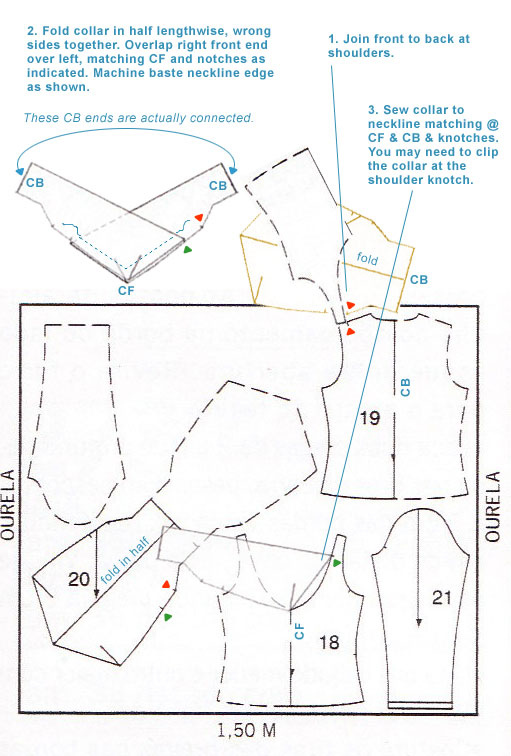
Here’s that wonderful diagram again showing how the Manequim pattern fits together, so we all have an idea in our head of what we’re aiming towards:
While overlaying the Manequim pattern onto mine, I wasn’t quite sure what I should use as the “frame of reference” to align the two patterns together – should I use the Centre Front & Centre Back? Or the shoulder seam/armscye corner?
In the end, it turned out that sorting out the Back first was the key to making the bigger changes on the Front piece work, since the Back of my teeshirt and the Back of this pattern were much more similar.
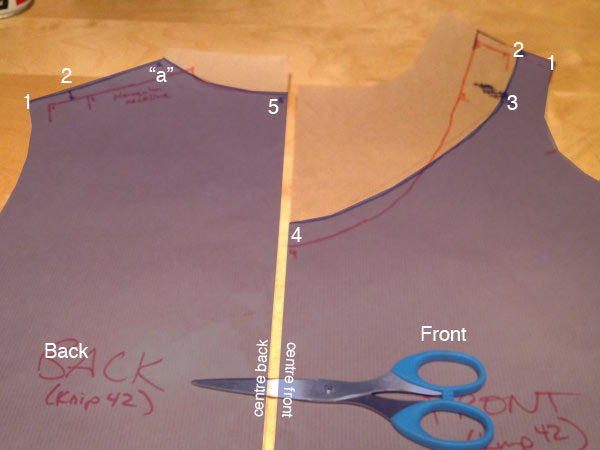
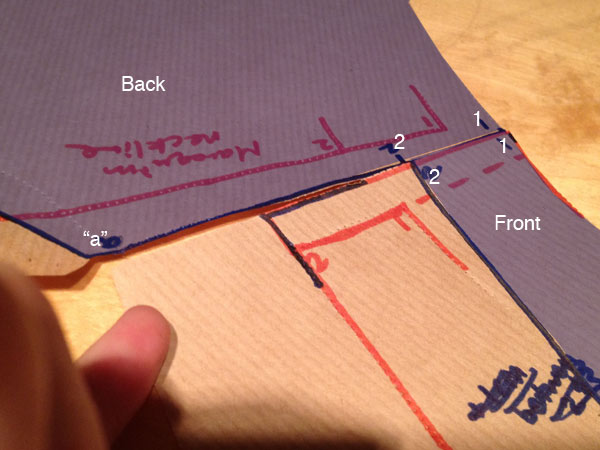
I’ve shaded my final pattern shapes in blue here to try to make it clearer. The original teeshirt pattern is (mostly) at the cut edge of the paper. Ignore the red lines – they were misaligned tracings!
First, I placed mark 1 at the shoulder/armscyce corner, then measured the distance between 1 and 2 on the Manequim pattern and placed it the same distance apart on my pattern. Then I measured the distance between 2 and the corner on the collar pattern (I labelled this “a” for my own sanity), and marked this distance on my pattern as the edge of the shoulder seam, also marking this “a”. I then realised that the distance between “a” and the Centre Back (5) was absolutely going to be longer than between “a” and 5 on the collar piece, so I drew a nice neck curve there, measured it (with my Japanese pizza wheel tool), and had to add a bit of length into the collar piece to make it match. C’est la vie.
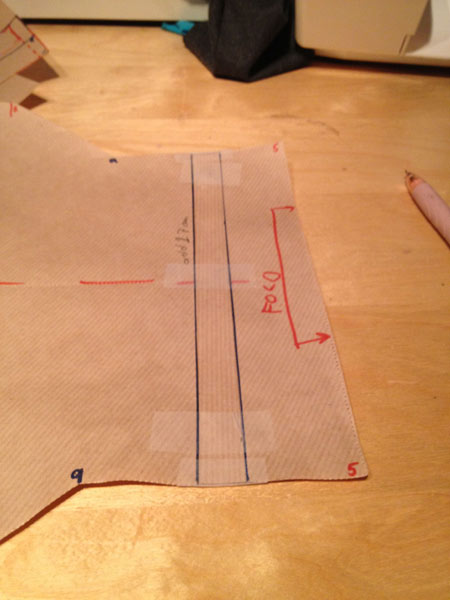
Addition to the Collar piece…
Having completed the Back piece, I then moved on to the Front, which only has a very short shoulder seam (between marks 1 and 2), because the collar takes up the rest of the width there. This is actually really similar to the shoulder seam on Paco’s Draped collar tunic pattern actually!
So I aligned the shoulder/armscye corners of the Front and Back, and marked that 1 on my Front piece. I then marked 2 at the same point where it matches up with the Back:
On the Front neckline, there’s a mark 3 midway down which shows where the collar overlap stops, so I measured the Collar piece between 2 and 3, and drew a line of the same length on my Front piece. Then I measured the Collar piece between mark 3 and mark 4 (the Centre Front), since I knew that whatever neckline curve I drew on my piece between marks 3 and 4 had to be this same length (unless I changed the Collar piece again, which I didn’t fancy doing).
So with a bit of finagling with my French curves, I got a line that was the same length, though you can see my neckline will be slightly higher and wider than the Manequim pattern, but I’m thinking that shouldn’t be a big deal.
Here’s the pattern pieces again:
I did all of the above on Wednesday night, but I also went and traced that Burda February dress at the same time. You may have seen me tweet about it at the time, but this was a total beast to trace. I must’ve traced at least a hundred Burda patterns in my day, but following red lines printed over pink shaded areas was really tough, even for me. If you don’t normally trace your patterns with the pattern paper on top, you may want to make an exception for this one!
And finally, a link for your Friday afternoon – I’m totally fascinated by this interactive analysis of US and UK high street clothing brand sizes! Give it your measurements, and it’ll show you how you correspond to various brands’ sizes. Though I found it kinda unnerving that my exact measurements were the default! Am I really Ms Average??