Hooray, my winter coat is finally finished! As you may have seen with all the coat sewing activity going on around the internet lately, making your own coat is no mean feat! While you’re perfectly able to take some shortcuts, it’s still a several week time investment no matter how you look at it. It’s for this reason that lots of us chose to sew them over the holidays, as it doesn’t feel like quite such a long ordeal if you’ve got several full days to devote to it at one stretch.
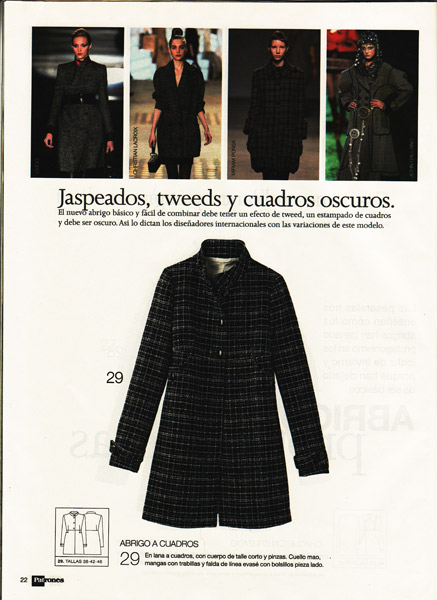
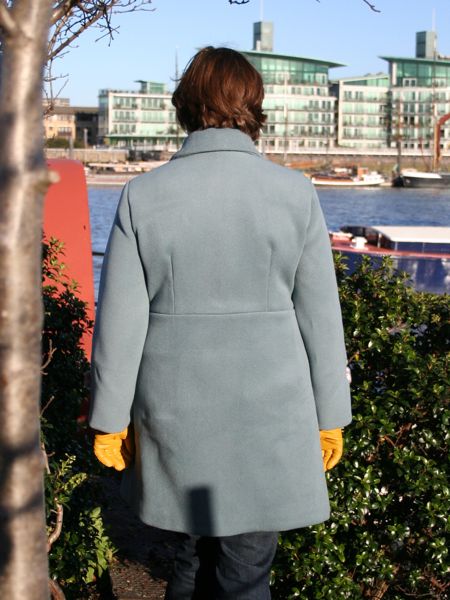
If you remember, I used Patrones 285 #29, but with the collar from #28 and major changes to the pockets so that I can easily put my hands inside while I walk to work (which I did today wearing it! yay!). After a muslin, the main changes I made were to lower the waist seam to match my natural waist, shorten and widen the front darts, add walking ease to the lower centre front, and change the pocket design.

I’ve already made a lengthy post about the coat construction and hair canvas interfacing, plus tons of HAWT handstitching action, so if you’re interested in the couture techniques I used or some interior shots of the coat shell, please click through before reading on…


No “shoulder divet”!! Kenneth King’s horsehair shoulder shields
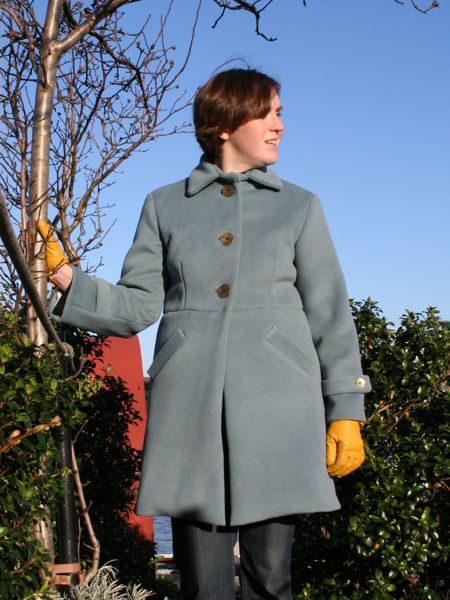

I was so happy to be modelling something warm for a change! I know the colour of this is quite similar to my Spring duffle coat (and to be honest, the fabric photo online made it look much darker), but the styles are different, and this is a much warmer coat than that one, so I don’t really see them as being in competition.

Totally necessary “lining flasher!” shot:
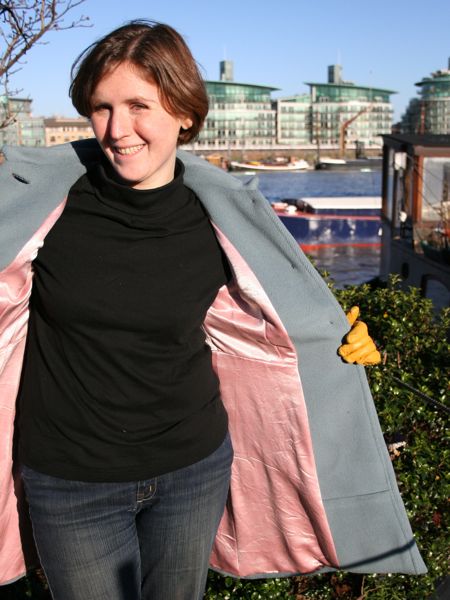
(You can also see where I had to piece the facing toward the lower edge!)
Collar detail:
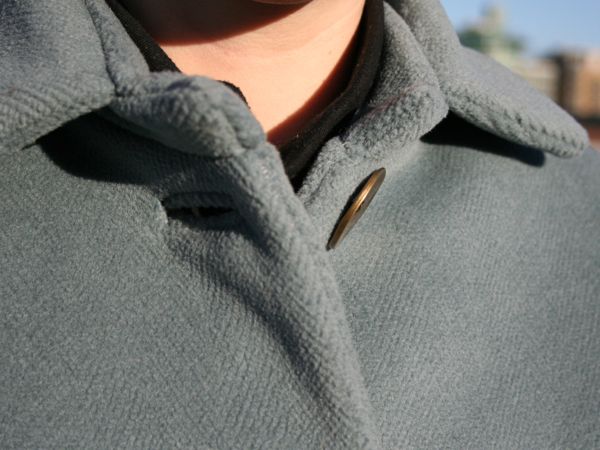
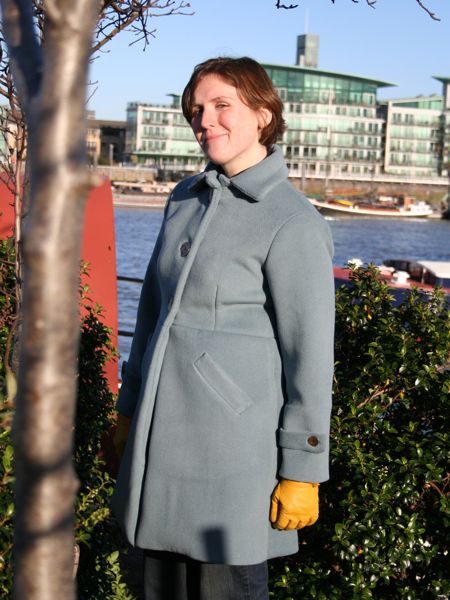
I’m not totally delighted with the collar. I’m not quite sure what, but it’s just not quite “right”. The fit is nice, though, but with the style, I need to wear my scarf overtop instead of underneath as I usually do with deeper necklined coats. Or open up the top button, which I quite like the look of.
Sleeve tab and pocket detail:

I love love love this photo! It shows off my beautiful buttons, my couture applied welt pockets, and the wonderful sleeve tabs. The tabs are lined in the same pink silk as the coat lining and have functioning bound buttonholes and smaller brass buttons of the same type used on the front.
If I were making this again, I think I’d change the sleeve pattern to be two-piece, as I just prefer those and it hadn’t occurred to me that this wasn’t (duh!) until the wool was cut out. But the fit isn’t bad for a one piece sleeve!

For the first time ever, I made a hanging chain in the lining rather than just a loop (I always love these when Tany does them!). This one small thing makes this coat feel so much more expensive!
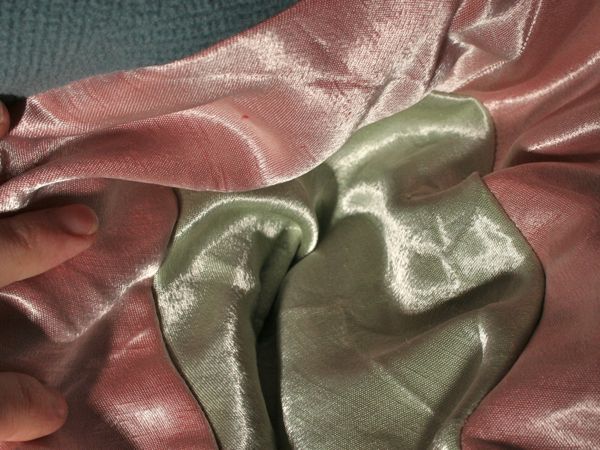
The sleeves are lined in the mint green Hong Kong silk:
As for the cost breakdown, I spent £32.50 at Ditto for the 2.5m of ex-Burberry wool coating (MacCulloch & Wallis had this exact same coating in orange for £30/m! I’m so smug right now!), plus £20 for the wool and goat hair chest canvas and the horsehair canvas, plus £10 for the big brass buttons. The smaller brass buttons were in my stash already and the silk lining was a gift! So all in, about £60 for this coat, which isn’t bargainous, but for the quality, cut, and fit, I’m very pleased.
Now I’ll leave you with a reminder of exactly how much stitching goes into a coat like this. Some of these spools saw active duty before this coat, but all of them have been finished off by it!!
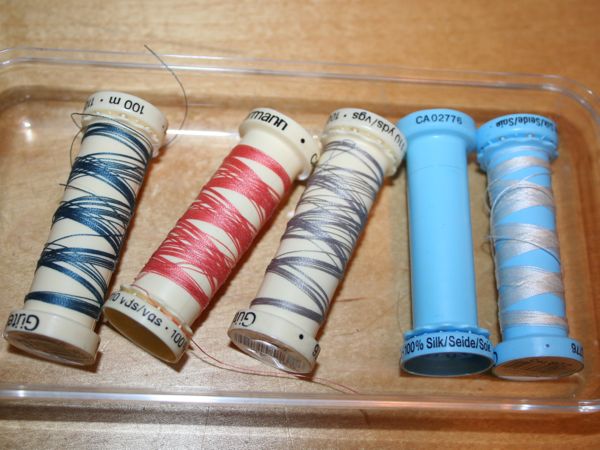
Yes, silk basting thread (the blue spools) is already on my shopping list!
Coming up next: my post-coat sewing plans, plus two other projects sewn this weekend!