Blog

Lace dress for a wedding

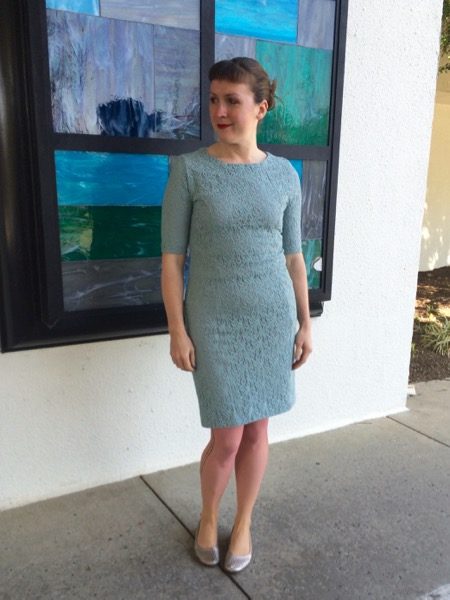
Last week I showed you the roses I made for my aunt’s wedding in DC, but I also managed to sew myself a new dress to wear for the occasion, too!

When I was at Ditto’s Brighton shop in December, I fell in love with a wonderful muted turquoise lace and bought a beigey lavender jersey to layer underneath it. I didn’t really have an occasion or pattern in mind when I bought it, but with the wedding trip approaching, I pulled these out of the stash and knew they’d be the perfect starting point.

When making lace dresses, I always look for patterns with a lot of little pieces as I’ve found that the shared seams help keep the layers from separating when worn, such as with the Burda dress I made in pink and grey lace (and still wear a lot, 5 years later!). If you try to make a lace dress from big pieces, you have the opportunity for one to grow or move independently if there’s nothing holding them together in the middle of the garment. I wanted something that I’d sewn before, too, as I didn’t have much time to make it before the wedding and wanted to skip the muslin stage. I ultimately decided on a pattern I’d traced from an ASOS dress and previously made twice – once in a mustard ponte and then again in mustard, teal, and white as a designer inspired colourblock dress.

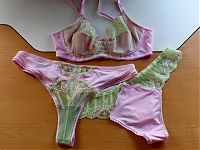
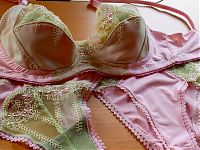
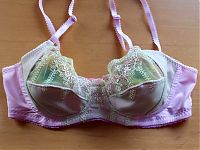
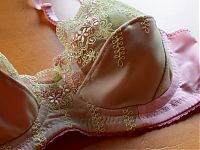
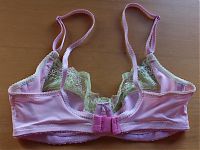
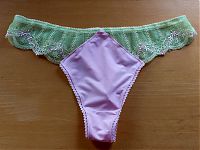
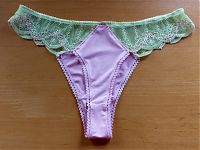
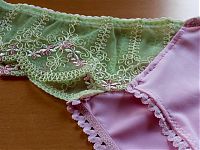
A pale pink and green lingerie set

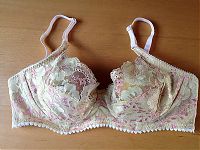
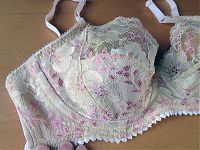
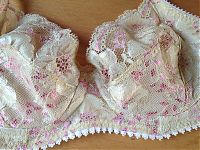
I’m not sure sure what happened, but I caught the lingerie-sewing urge hard a few weeks ago and finally cut into some gorgeous pale green lace I’ve been hording for years. It’s been so long that I’m not even entirely sure which online-lingerie-fabric-shop-which-has-since-closed-down I bought it from – eLingeria? Danglez? In any case, it was worth holding on to, and worth buying a pale pink bra findings kit off etsy a year or two ago, and then finally purchasing some pale pink “silk touch” lycra from Tia Knight about 6 months ago to finish off my supplies!
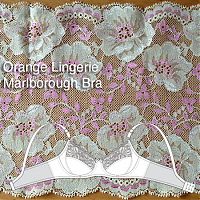
Frankly, I’ve been meaning to sew more Orange Lingerie Marlborough bras ever since I’ve made my other two. The original pale yellow one I wear several times a week, every week, and I love it. The wings on the pale blue one have stretched out a bit, and I really need to unpick the back hooks and shift them smaller to make the band more stable so I’ll wear that one more, too. But that I have two highly wearable bras that I love has meant that I doubt I’ll ever sew another underwired bra pattern again (unless Norma releases another, I suppose!).
The construction on this bra is the same as the other two – my only changes were stylistic, namely to not overlay the lace onto the frame, and to not line that piece, either. I fused lightweight interfacing onto the lower cup, centre front, and frame pieces, then basted the lace overlay on top, and used another pale pink piece as lining as I constructed. I also stabilised the scallop edge of the upper cup with clear elastic, because I didn’t have any beige narrow elastic, which I vastly prefer to the horrible clear stuff!

After I finished the bra, I kept the momentum going and made two pairs of panties to match – one using my (still free!) Lacey Thong pattern, which I could make in my sleep these days, but that I love and just plain works for me.

A Yellow Lace Marlborough bra (that fits!)

I have a long and rather conflicted history with bra sewing. I sewed my first bra five years ago, but despite being an accomplished seamstress and having a really standard body shape, I still haven’t managed to sew a single bra that I’m happy enough to wear on a regular basis in the time since.

Until now.

I knew Orange Lingerie had a bra pattern in the works for the better part of a year, and I knew her bra construction book was awesome, and, when I met Norma on her trip to London last year, she gave me bra fitting advice in a restaurant toilet – and still when she finally released the Marlborough bra pattern I was skeptical. That’s just how burned I’ve been by bra patterns in the past.

But I eventually did break down and buy it, with the thought to throw out all my other tweaks, calculations, traced RTW pieces, and just start fresh with this pattern and see where to go from there.

Choosing a size was actually the most difficult part for me – despite being a 34B in pretty much every RTW bra brand ever, the different formulas used to calculate bra sizes online are insane. Various calculation methods have said I’m anywhere from a 40A (Orange Lingerie’s method) to a 34DD (Bra size calculator’s method), both of which are just laughable (and yes, before you tell me to go get sized in person, I’ve done that in the past, and they said I actually am a 34B). So I threw both out and just made my RTW size, a 34B, with no changes.

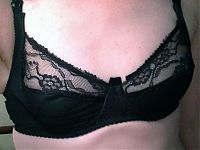
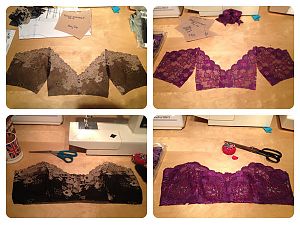
Before cutting into anything good, I first made a black test version – it’s unlined with unfinished edges, with various bits cut off of old RTW bras, and “plunge” underwires that were a bit too short. But it freaking fit.

I wasn’t about to get too excited (I’ve been down that road before, declaring I’d perfected bra fit, finally, only to have problems emerge over time and wear). So I wore it for a week or two. And it still fit well. So I cut into the good stuff.

Everything in this pale yellow version is from my (rather extensive) lingerie sewing stash, and I hadn’t remembered until afterwards, but this gorgeous lace was actually a gift from Norma herself, when she came to visit London! You may notice that my straps have an M&S lingerie brand on them, even. Yes, I definitely recycle when the RTW parts are nearly-new and save me some time!

Panty Party Part Duex

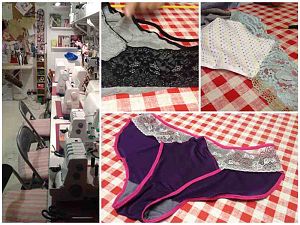
The Panty Party last week was more than a little awesome! I honestly don’t know where the time went, but one minute we were altering my Lacey Thong pattern to have full-cheek coverage, and the next minute the clock read 10pm!

I was joined by Michelle, Debbie, and Amy up at the Thriftystitcher studio in Stoke Newington (North London – an easy walk from Canonbury Overground) where they all got to pick through a huge pile of laces, fabric, and elastics, and learned how to best cut lace, deal with two different types of lingerie elastics, and how to do that cool “burrito method” of concealing seams.

They even got their first taste of the overlockers (sergers), and I could tell by their eyes that they’re hooked!

If you’re sad you missed out, then rejoice! Because the next Panty Party has been announced for Friday 28 March! Again, if you’re not into wearing thongs, that’s not a problem, we’ll have a couple of different styles of patterns to choose from and you’ll get to learn the techniques to make your own panties at home. All the ladies were amazed at how easy and fun it was!

Book tickets for the next Panty Party on 28 March HERE!

I will also be teaching teeshirt and leggings classes in the next few weeks so stay tuned for those dates! (hint: keep your Sundays free!)

PS: If you live too far away and want a mere taste of the “in person” me, have a watch of my latest #ExtraMile video for London Marathon, where I explain my reasons for running in less than 3 minutes!

A lace & silver weekend

I ended up having a fun and full weekend of sewing this weekend, partially because I lost a few days work last week to a spa day (omg!) and a full day of filming (for Extra Mile – if you haven’t already seen my blue wigged self all over your internets, watch here!). Part of the work sewing was to get a bunch of stuff done on my next pattern, which is digitised, graded, and now ready for my second test version before I test it out on some unsuspecting local athletes, mwahahah! I also had a few projects for private clients to get done, as well, so I had to change mental “gears” a few times, too.

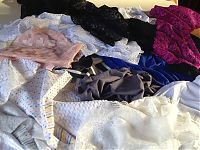
Another bit of work sewing was actually a bit too fun to be strictly considered “work”, and that’s because I needed to sew up a fresh sample pair of my free Lacey Thong pattern to bring along to the Panty Party class this Thursday, 13 February. There are still a few spots left if you want to snag them and join the fun, btw – I mean, seriously, look at this pile of lace and fabrics that arrived last week which is all for the class! Don’t you want to dive right in?!

To clarify: The Panty party class is at the ThriftyStitcher studio in Stoke Newington, North London, and it’s this Thursday!

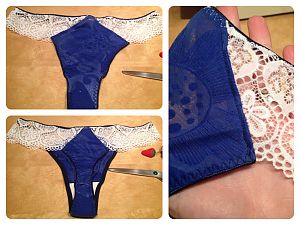
I’ve probably made at least ten versions of my Lacey Thong for myself, but, umm, I wear those, and it’s pretty creepy and gross to be showing other people your worn underwear, even if it’s clean, eww. So that’s why I needed to sew up a fresh sample pair to show off in the class, so I selected this thin, blue burnout jersey and some white lace and paired it with navy blue satin-edged elastic.

Isn’t she pretty? I also received a comment today from a Frenchman who made this utterly gorgeous satin & lace pair for his woman. So it doesn’t have to be a one-way lingerie sewing street – you could book your man on the course as a “surprise” and let him sew a pair for you! Ha!

I got to a point early on Sunday where I’d finished all the work sewing I wanted to accomplish, so I pulled out the Named “Jamie Jeans” pattern (now with US Letter-compatible printing and multi-sized, btw). I’ve been eyeing up this pattern since it was released, but it took it disappearing when the new collection was released to make me realise how much I wanted to sew it! Since a-l-l of my clothes are falling off me right now (thanks, running!) I am in serious need of trousers and even my leggings are baggy, so these were the top of my Fun Sewing list.

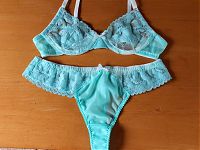
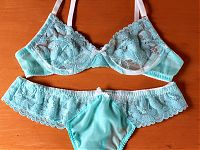
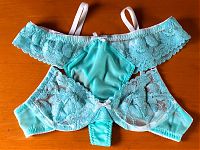
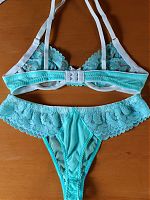
Turquoise lingerie set – bra and Lacey Thong

I arrived home from Mexico and wasn’t particularly filled with sewing mojo, to be honest, but happily this was short-lived, because I saw that Pattern Review had announced a short, two week Lingerie Sewing Contest for the second half of October! This was just what I needed to kick me into action and remind me that I’d been meaning to alter the seaming on my bra cup pattern after I’d made the eyelash bra.

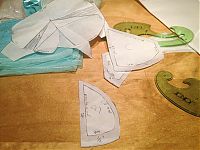
The cups on that one were fine, but I have some gorgeous turquoise lace in my stash from Danglez’ closing down sale (sniff!), and it was too narrow for my one-dart cup pattern. So before I could even start sewing, I had to do some pattern drafting manipulation first – introducing some seam lines to account for the narrow lace, split and rotate the dart around a bit, and voila! Now I’ve got a three part cup!

I was so happy with the fit of this bra that I made myself a matching pair of Lacey Thongs (my free downloadable pattern, if you’d forgotten!) to go with it.

Seriously though – I think this must be about the 8th or 9th bra I’ve sewn, but only about the second I’d wear out of the house. Sewing a bra is easy – getting the bra to fit properly, feel comfortable, and look flattering is beyond challenging. I think I understand other people’s frustrations with trouser fitting now, because this bra fitting journey has been character-building!

My real breakthrough came when I stopped using commercial patterns and just traced existing RTW bras instead. For me, they were a much, much closer starting point than the bizarre cup shapes provided in the KwikSew and Elan patterns I’d previously tried.

Shocking Pink Trousers and a Cream Lace Tee

Summer in England is a rare thing, but we have had an overflowing bounty of gorgeous, sunny, and hot weather for the past three weeks and counting! So it’s natural that the heat would go to my brain and cause me to make some out-of-character sewing choices, right?

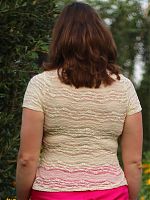
As I revealed last week, this manifested in the form of some super-bright pink trousers, and a teeshirt made from cream stretch lace:

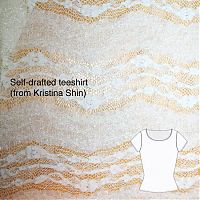
The lace teeshirt was ridiculously quick to sew up – I’ve had the lace in my stash for several years now after buying it at Tissu Dreyfus on one of my Paris trips, and some of you may even remember it from when I used it on a long-sleeved KnipMode tee. I love that those photos were in the snow and now I’m using it again in a heatwave! I just used my knit sloper I’d drafted from the Kristina Shin book, only I levelled off the sleeve hem rather than the usual scoop.

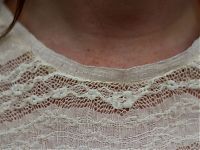
The construction was identical to any other teeshirt, and the only real point of note here is in the neckline binding – I didn’t have any matching cream jersey, and I didn’t want to just fold it under and topstitch, so I had the great idea to use the selvedge as a band, and just overlocked it in place. It matches, it’s lightweight, and it’s guaranteed not to fray!

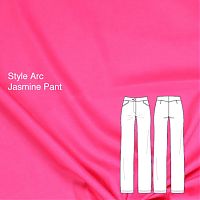
The trousers were much more interesting from a construction standpoint! I had a bunch of Mood fuchsia stretch cotton sateen leftover from my fuchsia party dress (which is still my go-to party dress btw – I’m getting lots of wear out of that!) and I knew I wanted some fun Spring/Summer trousers. In my original Spring/Summer 2013 ideas, I thought I’d reuse the Burda Jan 12 pattern I’d made in grey flannel, but then I really wanted to try a StyleArc trouser pattern, and I already had the Jasmine pattern to hand, and it’s for stretch wovens. Perfect!

Things I like about the Jasmine pattern:

Summer sewing & posts by mail

When summer weather comes to England, it’s always something of a surprise. Those in other countries may not be aware, but just because the calendar says June, July, or August, does not mean it’ll be either hot or sunny. Sometimes “summer” comes one weekend in March, or in a few days in September. Or in the case of 2012, not at all.

In any case, summer has arrived, and for the past week, it’s felt hot here. I think the heat may be getting to my brain somewhat, because I’m 99% finished sewing up a summer outfit:

Yes, that would be shocking pink trousers and a cream stretch lace teeshirt, dear readers. I both hope look as good in the photos as they do in my head!

The other development of note is one of a more digital nature – for a while now some of you have been asking if it’s possible to get my new posts delivered my email (instead of RSS or just popping by when you remember to!), and I’ve finally got round to setting this up!

If you pop your email address into the box on your left (or, repeated below), then you’ll get a summary of all the week’s posts emailed to you every Saturday! My test version from last week looked like this:

Lacey Thong panty – construction tips & photos

Continuing on with Lingerie Week, I wanted to give you some extra construction tips on my Lacey Thong pattern that wouldn’t quite fit in the pattern itself (if you start adding in large photos, the Pdf filesize goes up really quickly!).

First of all, I wanted to start with two areas I’ve had some questions on:

“The 4cm ruler isn’t 4cm when I print it”. If the ruler on page 3 isn’t measuring exactly 4cm when you print it, then the print software you’re using is scaling the pattern! I use Preview on OSX, and I know it’s got its quirks – on this particular programme, if you enter in 100% and just click Print, it’ll still print at whatever the settings were before you changed them. You need to enter 100%, tap elsewhere in the print preview to watch the thumbnail resize, and then click Print. I’m sure other programmes have their quirks, too, but the bottom line is, if your ruler doesn’t measure 4cm, the pattern is not at the proper scale!

“Which size should I choose?” Sizing if difficult from a pattern creator’s perspective, because so many bodies wear a full range of sizes. I’m most confident of the Burda sizes recommended (much less so for the Big Four), so if you know your Burda size, go with that. The finished half-hip measurement is probably less helpful, but it’ll save some of you measuring it yourself.

If you’re unsure of your size, another approach to take it to “try on” the elastic before you start. Measure the waist elastic for the different sizes (pin or mark it, don’t cut!) and try it out by checking the feel around your half hip area (these panties sit over your hip bones, well below your belly button). The elastic should be snug and partially stretched, but not tight or loose.

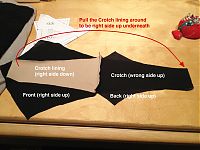
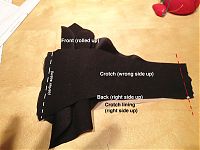
During the construction of my black pair I took some photos of the trickier construction tips so those of you who prefer photos to diagrams can have a better look (though perhaps choosing a black fabric with similar-looking right and wrong sides wasn’t the best idea, sorry!).

I’ll use the numbers from the steps in the Pdf pattern’s Sewing Instructions below so you can easily refer back. As usual, click any of these to view the larger versions.

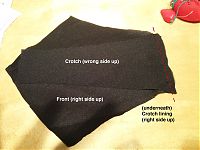
1. Join the Crotch to the Front

2. Join the Crotch to the Back

Purple lingerie set – camisole & lacey thong

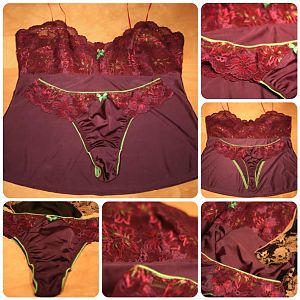
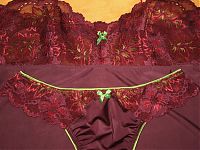
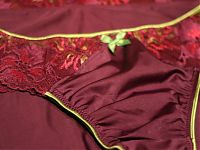
Here’s the second of my recent lingerie sets I sewed while I’ve been ill, which I hope will inspire you! This purple set is again comprised of my (free!) Lacey Thong pattern and the (also free!) Ruby Slip pattern, shortened to camisole length.

I’m so pleased to finally break into the lace and materials I bought at Kantje Boord in Amsterdam when I was there running the marathon in October! I was very restrained in the shop, buying only this lace, the purple lycra remnant, and coordinating lime elastic and motif with this exact camisole in mind!

I’ve definitely got enough materials left (okay, I had to hit up Danglez.nl* for some more coordinating bra supplies!) to make a matching bra in the next week or two, so I might whip up another pair of panties to make this set a foursome like the black lingerie set too.

The only real difference between this set and the black one you saw earlier this week is that the body fabric used here is a lycra rather than a woven. The lace bodices are strikingly similar, even though the laces themselves are so different!