Blog

Designer-inspired Colourblocked Sheath Dress

I started planning this dress way back in the first week of December when I got your opinions on all the different colourblocking options, and it should tell you everything about how crazy busy I’ve been that I’ve only actually been able find the hour or two to make it last weekend.

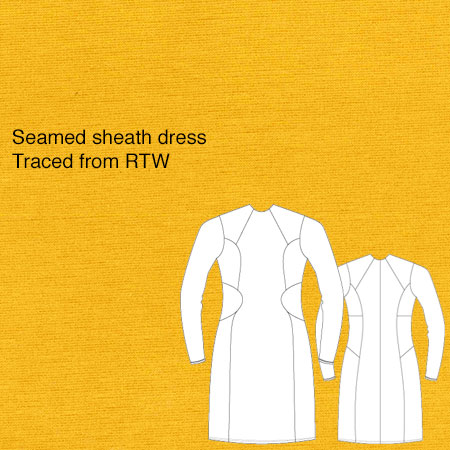
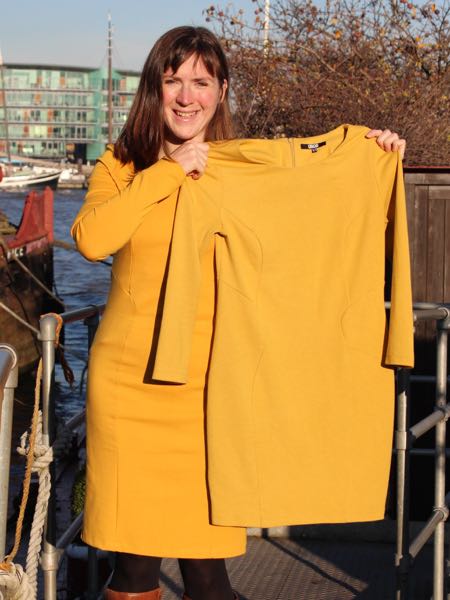
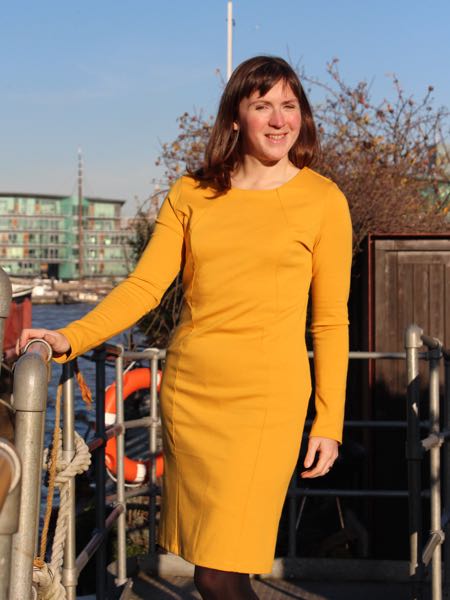
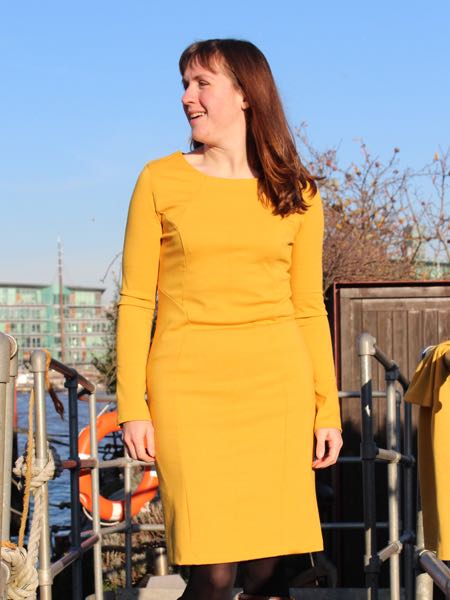
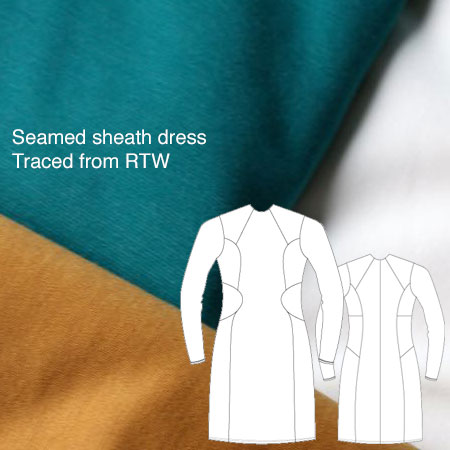
You may recall the story of this “pattern” from when I made it in a solid, mustard-yellow ponte the first time around – I had a very well-loved ASOS dress that I traced off so it actually wasn’t from a pattern at all. (Others have asked if I’ll release it as a pattern, but it doesn’t really fit with my brand sorry!)

What I didn’t show you is that I tested my few pattern changes afterwards with a version of this pattern colourblocked in random ponte scraps from my stash, shortened to top-length, minus the CB invisible zip, and with a teeshirt-bound neckline instead of a facing.

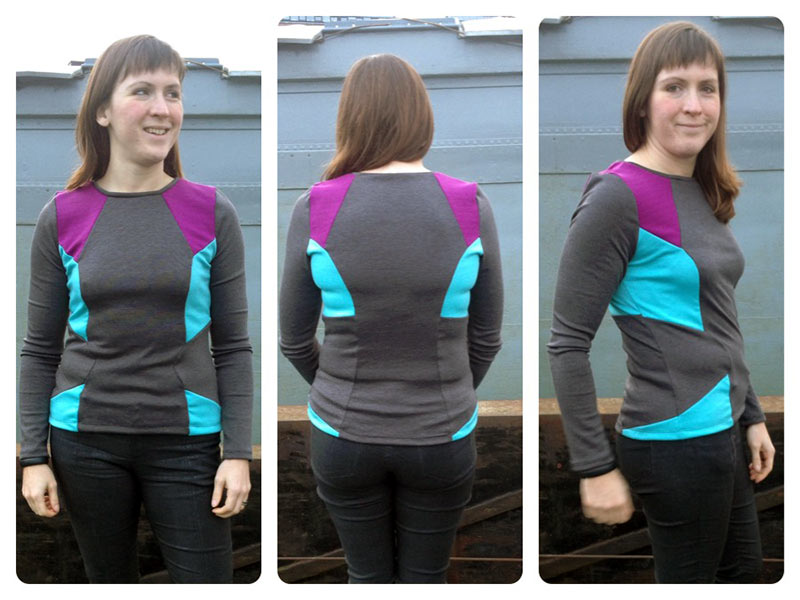
It actually works quite well as a top (though I think the pieces near the hem could be better thought-out), but I wasn’t quite sold on the colourblocking choices, which were mostly decided based on fabric scrap sizes. It felt a bit… starfleet commander. And that’s a look only Catherine Daze can pull off!

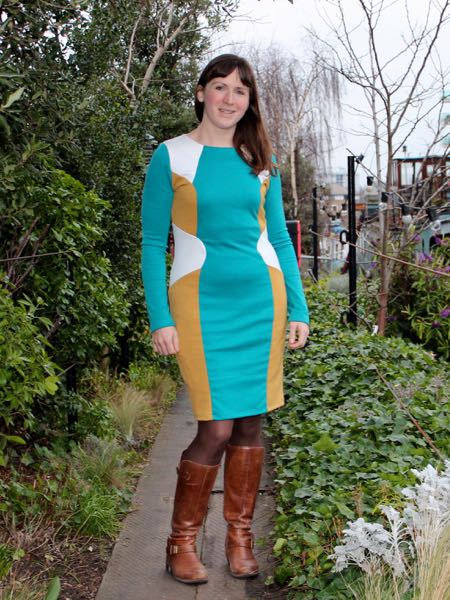
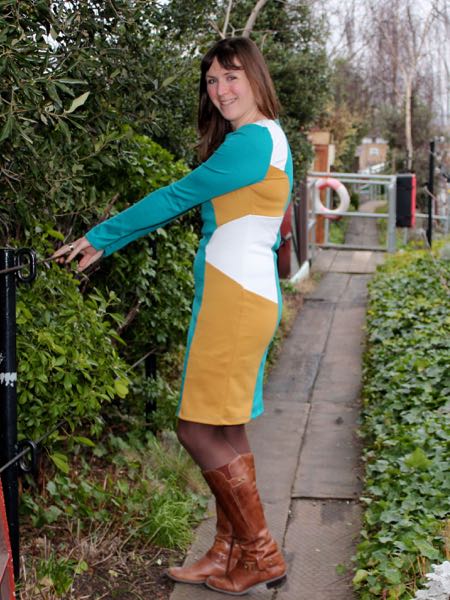
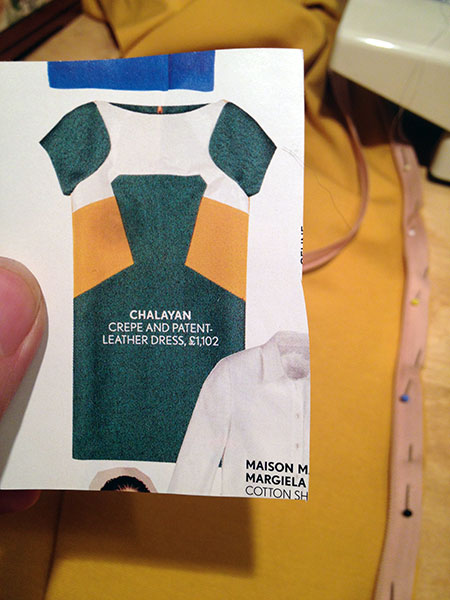
But the original goal was to make another dress similar to the mustard-yellow version, inspired by this Chalayan dress that’s been hanging on my sewing room wall for ages:

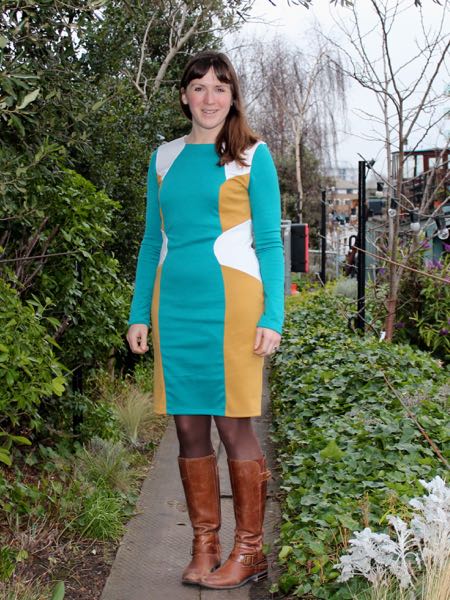
I had the perfect teal viscose ponte leftover from a client commission, but I went out and bought a half metre of white and a metre of mustard ponte at Goldhawk Road to make up the other pieces. I really wanted the yellow at the waistline curve, but that would’ve meant having the white at the hem (instant grime!), so I ultimately went with the second colourblocking option!

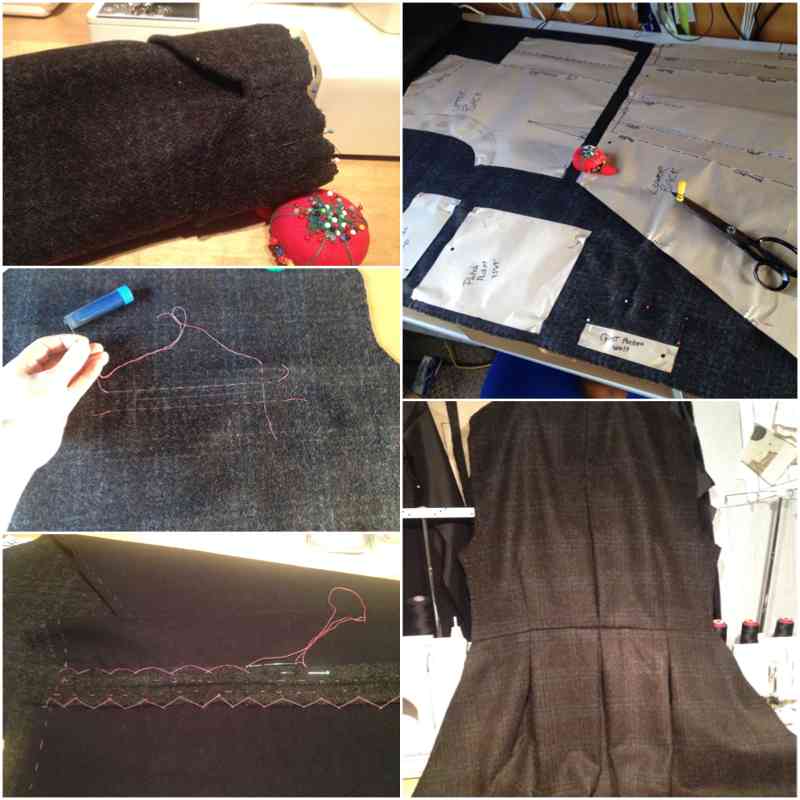
I finally got a few minutes to cut out the pieces in mid-January (having been ill for the entire Christmas holidays!), but then I had to fly to the States for my Granny’s funeral a few days later, and the pieces were waiting for me when I got back. I finally had two hours spare last weekend to close myself into my sewing cave, so this was a great pick-me-up to get me back on track.

Mustard ponte seamed sheath dress

Like many of my most well-loved dresses, this one was quite a long time in the making. A few years back I’d bought a yellow ponte sheath dress from ASOS that had some amazing seamlines. I don’t often buy clothes anymore these days (preferring to spend my time sewing than fighting my way to the shops, or waiting days for an internet purchase that’s low quality or not quite right), but I really liked this dress, and wore it often despite the sleeves and hem being too short. Inevitably, the yellow also got dingey and pilled over time, but I still liked the overall design.

So I traced it! I literally just laid the dress over brown paper and ran a serrated tracing wheel over the different sections, leaving an impression underneath, just like how I trace patterns. I remember I traced James’s well-loved linen shirt at the same time, so it was a few months ago, and even though I had this mustard ponte in my stash for even longer, it took me a while to get around to sewing it up.

It may look like a complicated design, but it’s actually really quick to sew up on the overlocker, and only the back invisible zipper takes a little bit of sewing machine time.

Here you can see me holding the original dress, whilst wearing my copy!

All the things I loved about the original dress are present here – the figure-hugging design, the flowing, curved panels, the vibrant colour – but the sleeves are nice and long instead of “unintentional bracelet length”, and the hem doesn’t go scandalously short when I bend over!

In progress bits

Contrary to the amount of time I’ve been spending behind a computer recently, I actually have been finding some time here and there to sew, too. It’s just, well, most of it is for my next pattern, which is going well, but is still at least three weeks off going live (sorry!). It turns out that, even though I can reuse some parts of the pattern between the men’s and women’s versions, there still an awful lot of extra work involved in creating two versions!

You might reasonably expect that I’d have to make twice as many samples, but there’s other added time involved with “invisible tasks” like walking seam lines and measuring finished garments, for instance. While both are made considerably easier done digitally, and even moreso if you’ve organised yourself a nice little Excel spreadsheet to do the heavy calculating and imperial converting, there’s still an awful lot of measuring to be done. But it gives me a little thrill when I can see my finished garment measurements vs body measurements equating to ease, down to 1/100ths of a mm!


This is just a small portion of my spreadsheet – the other bits gave too much away!

If you want to be the first to hear details of my new pattern, then now is an excellent time to sign up for my FehrTrade patterns mailing list, which which you’ll find at the bottom of my Shop front page. If you ticked “Yes” to marketing emails when grabbing my free Running Armband Pocket pattern, then you’re already on it. And I absolutely promise you that the email volume will be really low volume and only important stuff, like sneak previews and special voucher codes.

So on top of getting my next pattern ready to send to my two teams of pattern testers, organising athlete-models, and sewing up more samples, I’ve been spending my office hours working on an upcoming sewing book (not mine!) for a publisher, too. So it’s good practice in double-checking instructions and illustrations, but it is rather brain-taxing to be doing all day!

I’ve managed to squeeze in a few “Fun Sewing” projects, though, including a pair of leggings made from some luuuuuuuuuscious Funki Fabrics lycra (bought with my own money).

A Lime Linen Men's Shirt

James has a black linen shirt from Muji that he utterly loves. He’s worn it very nearly to death over almost ten years, though, with it rather faded and with a hole worn in in one place. So he asked me if I could copy it, as it’s a design that he’s never been able to find it shops again.


I’m so proud that my Illustrator skills are such that I can whip up a tech drawing like this in a few minutes now!

It’s an over-the-head design with a front button placket, stand collar, back yoke, and short sleeves with little button tabs on the sleeve hems. The only change I made from the original was to introduce a small pleat at the back yoke, as I just think men’s yoked shirts look weird when they don’t have them, plus it gives a bit of wearing ease back there.

I traced out his existing shirt with craft paper and my serrated tracing wheel, and made a quick muslin, which miraculously needed no fitting changes! Then it was onto the first real version, made up in a lime-green linen-blend mix from Ditto which he chose when we were in their Brighton shop earlier this year.

Plackets always tend to intimidate me as they seem like a bit of witchcraft – how can this weird shape turn into that in just a few steps?? So I put off sewing it, until I remembered that I’d scanned and digitised the placket template from David Page Coffin’s excellent “Shirtmaking” book. This is one of my clever-er ideas, as it means I just just adjust the width and length of the placket in Illustrator and print myself off a fresh template. Because obviously the dimensions for sleeve plackets for men’s shirts are of a different scale than the neck placket here!

The Sherlock coat

Sewing a coat is always a big accomplishment, but this coat in particular has been a long time in the making. I first told James I’d finally make him a coat like Benedict Cumberbatch wears in BBC’s “Sherlock” for his birthday back in early December. I drafted up a pattern using the details provided in this livejournal post, then made a muslin for him later that month. With only a few tweaks needed for fit and style (I made the lapels too big, for starters!), I then moved on to purchasing the wool coating, cotton flannel underlining, and black acetate lining.

But this is also where the first delay came in, as he wanted a black wool coating with faint blue and brown checks from Crescent Trading, who turned out to be closed over the full Christmas period, when I was hoping to get a lot of the work done. All of the above are detailed more
in this “progress report” post from January.

I then had more hurdles involving the hem bubbling (which meant I had to baste it in place, flip it back wrong-side out, handstitch, re-press, etc), waiting for some woman on Etsy to make more replica buttons (which we finally gave up on and just made our own with gold enamel paint), and getting the right upholstery thread to do all the buttonholes.

But it’s finished, it looks fantastic on James, and the proportions are really flattering on him, too! So the lengthy making process shall soon fade away in the light of the finished coat. He definitely prefers it open (as dos Sherlock himself), but it can be buttoned up in the coldest of days, too:

It’s a very warm coat, having underlined the body and sleeves in flannel, a trick I picked up in previous coats to stop the wind.

I can’t take the credit for these, as James was having fun with photoshoot ideas!

The Sherlock coat – progress report

I mentioned briefly back in December that, for James’s birthday, I gave him the promise of a custom-made coat in the style of the one Benedict Cumberbatch wears in Sherlock. Or as it will henceforth be known, “the Sherlock coat”.

A few others online have made this coat (including a few FehrTrade readers, hello!!), but I found the most helpful resource to be this livejournal entry from a lady who sketched and measured a lot of the details after analysing screen grabs. This was a big help in taking James’s TNT short jacket pattern and adapting it to look more like the coat on screen!

I first made an approximation on his paper pattern and sewed up a muslin. From this the only real fitting problems were that the upper back was too tight, and the Centre Front needed to be shifted by about an inch, but it was otherwise fine. I guessed a bit wrong on the collar and lapel shape though, but it was fairly easy to just draw a nicer shape onto the muslin itself and transfer it to the pattern.

Once the muslin was settled, I then bought the wool coating (delayed a bit as Crescent Trading were closed over the holidays) – not the exact black and grey small houndstooth used in the original (simply because I couldn’t find any locally), but instead a black/grey/brown check which still had the same feel. I also bought the black acetate lining at the same time, but the black cotton flannel for underlining came from Minerva.

I then settled in for the mammoth task of cutting out all the pieces in wool, underlining, interfacing, and lining, then fusing the crap out of everything that needed interfacing. With two patch pockets (and flaps), plus two welt pockets, two back belt pieces, sleeve cuffs, and a collar, (not to mention facings!), there was a good day taken up just by fusing alone!

The Donna Karan red vixen dress (Vogue 1280)

I don’t often sew Vogue patterns, but I am a massive fan of the Donna Karan patterns’ design and execution, so it’s no surprise that I added Vogue 1280 to my Wish List the second it was announced recently!

Happily, my mom saw there was a pattern sale where she lives in the USA and offered to buy a few patterns for me at US sale prices – she paid less than half the price for the pattern + shipping to the UK than I’m charged just in postage to the UK for the same pattern! I wasn’t planning on sewing a dress right now, but I got so excited when I saw Vogue’s numbered pattern marks for the first time (possibly in response to my complaints regarding Vogue 1259’s instructions), that this dress moved quickly up my Must Sew list.

Like all DKNY & Donna Karan Vogue patterns, this one’s a great mind puzzle to put together! It also has the joy and wonder of looking like a total mess until the very end, when it all comes together into a dress shape. I found it to be true to size, so go with your measurements, not some vague idea that all Big Four patterns have tons of ease. Most of the pieces are cut on the bias (not that it means much in a jersey!), and it hugs the body very closely. If you’ve got any lumps and bumps, though, this is not the pattern to hide them, and so you’ll probably be wearing Spanx underneath in addition to the strapless bra the bodice requires (Full disclosure: I’m not wearing Spanx in these photos!).

Burda's Roland Mouret "Macha" knockoff dress pattern – detail photos

First of all, thank you all so much for all your comments and praise on my Charcoal pinup dress! I knew I really liked it, but it’s nice when so many others agree.

One thing that I hadn’t realised in the magazine discussion, nor sewing, nor wearing it out, however, is that this dress pattern is a very close knockoff of the Roland Mouret Macha dress, which was shown in his Spring 11 RTW show!


(Photo from Style.com)

Really, the bodice seaming is all identical, but there are a few differences:

  • Burda’s pattern is for wovens, RM’s dress is a stretch woven
  • Burda’s has long sleeves, RM’s is sleeveless
  • Burda’s has a back V neckline, RM’s has a square back neckline
  • Burda’s is princess-seamed in the skirt, RM’s appears to be one panel in the skirt
  • Burda’s has a centre back invisible zipper, RM’s has a centre back exposed zipper

My aqua pleated skirt

I’ve been talking about making this skirt for months now – I really liked it when it first appeared in the September 2010 issue of La Mia Boutique (#26), and then I thought I’d make it this winter, but my chosen fabric seemed too summery… But finally, its day has come and I’ve made it a reality!

It’s hard to see in the magazine photo, but there are pockets integrated into two of those pleats, too, which I really like!

And then someone on Pattern Review was asking for a pattern suggestion to knockoff this Karen Millen skirt, and I realised that my LMB pattern was really very fashionable indeed!

My pattern has more pleats, plus the added pockets, so I think it’s a better design, but I still appreciate seeing similar clothes in high end RTW, especially if I already liked the design anyway!

The Hour – my new Fall style inspiration

I have a new style crush – The Hour, a new BBC drama starring Dominic “McNulty” West and Romola “her that wasn’t Keira in Atonement” Garai. Yes, there are a lot of comparisons with Mad Men, but it’s a fantastic show in its own right, and being set in 1956 London, barely out of rationing and in the publicly-funded BBC, means there’s a lot more quirk and ragged edges than you find in the ultra-slick Madison Avenue counterpart. The best part is that this series isn’t even about fashion – it’s about the shift in the purpose of television news around the time, where it went from being a government puppet supplying newsreels to a subversive, investigative element in its own right. It’s a riveting, wonderful show, and James is just as addicted as I am.

Still not interested yet? Well, you soon will be – American viewers, set your DVR of choice to record BBC America on 17 August at 10pm Eastern, because I have a feeling the style blogs are going to go nuts for this once it’s gone international (and UK viewers, you can watch the latest episode tonight on BBC2, or watch the previous episodes on iPlayer as it’s a series catchup show).

The thing I love most about the fashions on show here are that they’re not what you imagine 1950s fashion to be – this is as far removed from June Cleaver as you can get! Just like Mad Men changed our view of 1960s fashion from hippies and go-gos, The Hour takes us out of the mentality that the 1950s was all about Dior’s New Look silhouette. Think more British vintage style – impeccable pencil suits with nipped-in waists, stylish blouses and power dressing, plus a nod here and there to more noticeable 50s styles like the teddy-boy “Grease” look and even a Marilyn Monroe-a-like!