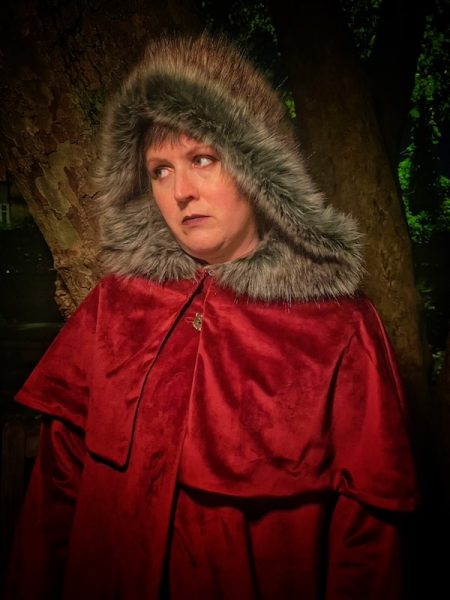
As promised, after sharing our usual daytime photos to document all the different ways it can be worn, the seamlines, and details, etc, I really want to take some photos of my recent Wolfkiller Cloak at nighttime, too. I mean, it’s a coat inspired by a vampire AND it’s nearly Halloween, so what better way to capture the vibes than to do a photoshoot in a local graveyard??
The Wolfkiller Cloak – by night
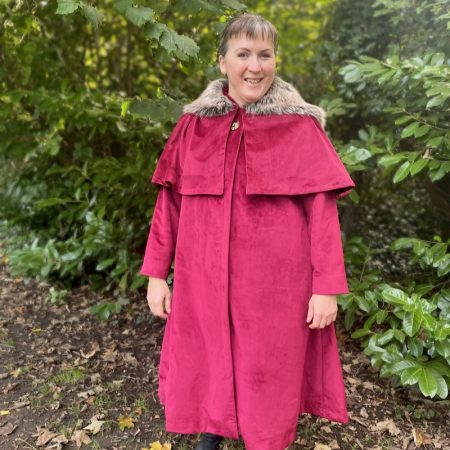
The Wolfkiller Cloak – by Day
Yes, you read that right – these are just the photos from the daylight shoot – the nighttime shoot photos will be coming coming up shortly! Even so, this is a very photo-heavy post with a lot of detail to cover, so grab a cuppa and settle in…
As you recall from my earlier post, I planned to sew a tribute to the iconic Wolfkiller Cloak from Interview with the Vampire, but adapt it to be a swing coat with a detachable fur-hooded capelet in order to make it warmer and more wearable. Honestly, if you haven’t read the other post yet, you really should!
The construction
One of the first parts of the actual construction (after all the flannel underlining basting I did as prep) was to create the bound buttonhole in the swing coat, so no pressure there! Since it’s been a while since I’ve sewn one, let alone in velvet, I thought I’d make a buttonhole in test fabric first, and it’s good I did because I needed to make it a bit longer to accomodate the thickness of the wolf button. I swear I was only pushing the wolf button through to double-check it fit easily through the bound buttonhole I just made, but then his little fangs went over the edge and I had a little giggle! Yup, this is a Lestat coat already. 😂
Planning a tribute Wolfkiller cloak
Yes, this is both a big project AND yet another make inspired by “Interview with the Vampire“! Big enough that you’re going to get at least one In Progress post, in addition to the final reveal. I’m really excited about this one, though, and in a way that I’ve not been fired up for a long time…
The Inspiration
So what is the “Wolfkiller cloak”? In the second novel of Anne Rice’s Vampire Chronicles series, the (still human) Lestat heads out into the woods to kill a pack of wolves that were terrorising his village in 18th c rural France. After barely escaping with his life, the villagers thank him by presenting him with a cloak (and boots!) made with the pelts of the slain wolves. This scene is absolutely iconic, and it’s his wearing the cloak later in Paris that partially attracts the notice of the man who attacks him and makes him a vampire.
Now, because, in the show, they’re not adapting The Vampire Lestat book until season 3, no one was expecting to see anything of Lestat’s 18th c past, let alone THE cloak. But we got a surprise taste in episode 3 of season 2, as part of a 15 minute flashback sequence (entirely in French, too!)
A trio of teeshirts
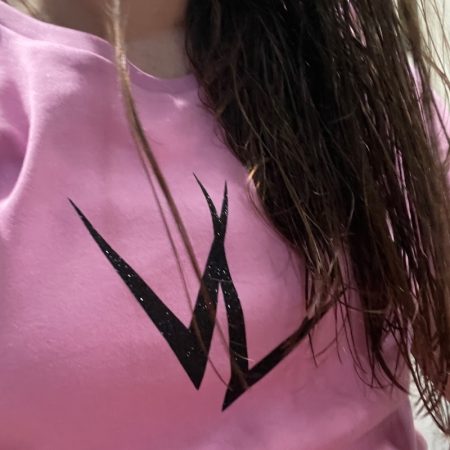
My final summer sewing this year came in the form of three separate teeshirts, all in the basic colours (pink is a basic, right??). Please forgive me that I’m not modelling these – I’ve had several utterly awful weeks fighting multiple infections on top of the Long Covid I’ve been fighting for the past 11 months, and I didn’t want to hold up posting about these!
None of these teeshirts took more than an hour of sewing time nor cost more than a tenner, but I guarantee you they’ll last years longer than anything bought at those prices!
A Claudia tribute outfit – the cape
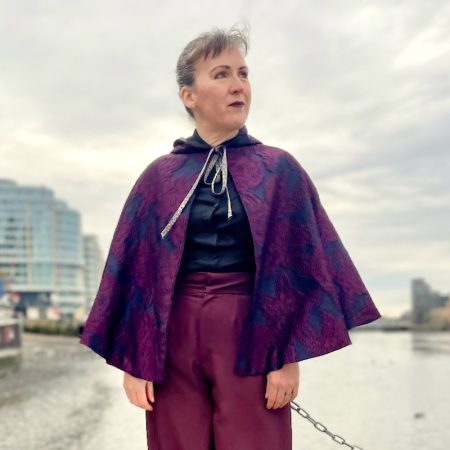
After yesterday’s post detailing the inspiration and fabric sourcing for this outfit, today I’d like to talk about the standout piece – the cape!
As I mentioned in the earlier post, I sourced the exterior cape fabric from MacCulloch and Wallis’s Soho shop after finding a few that I liked online. But before I cycled up there, though, I noted that all of my candidate fabrics were a) expensive! and b) 140 or 135cm wide. Because of both of these, I didn’t want to buy too much or too little fabric, so I drafted my pattern pieces first to ensure I only bought exactly what I needed.
I drafted this cape myself, using the same principles of a standard circle skirt, except the “waist” would be my neck, and the length would be my neck to wrist measurement. The fabric width meant I couldn’t get a complete circle, so I kept changing the angle until I could fit it into the 140cm.
Developing the Tenacity Leggings
Thank you all so much for your enthusiasm for our Tenacity Leggings and eBook launch last week! I’ve got so much more to say about both because omg, they were both so much work! but today I wanted to talk a little bit about the development of the Tenacity Leggings pattern.
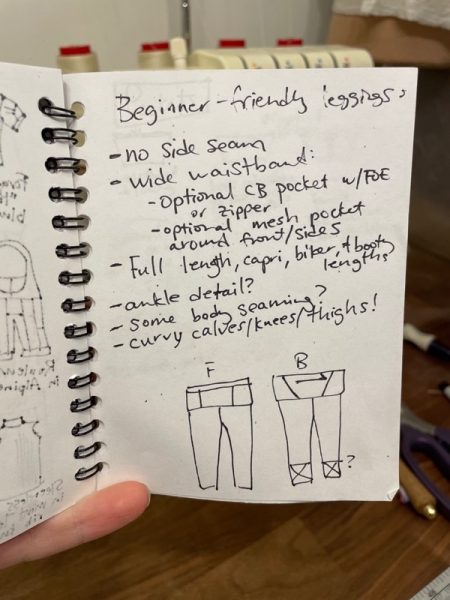
Throughout 2020 and my 14 months of shielding, I had zero creativity. But then I suddenly got hit with an explosion of it in spring and threw myself into a crazy complicated, advanced pattern. I went through about 4 test muslins but it still wasn’t quite right, and I felt like it wasn’t the right time to focus on it when so many people felt like they couldn’t even get started sewing activewear. So I parked that pattern (hopefully I’ll release it next year!) and started work on a leggings pattern that would be beginner-friendly, but with enough options to keep myself and other intermediate- or advanced-activewear sewists interested, too.
I loom knitted a sweater!
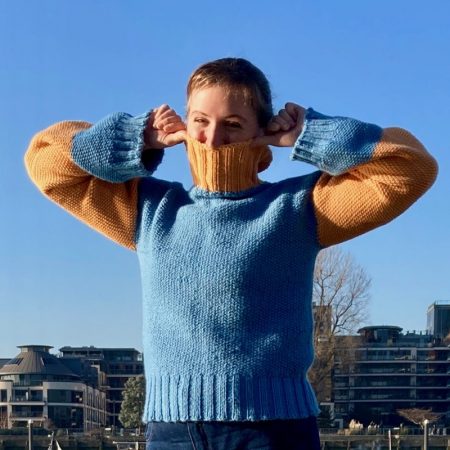
Strap in because this may be my first finished make of 2021, but it started in 2019, and it’s a whopper.
I learned to loom knit a few years ago because I was really only interested in making socks, and I have zero desire whatsoever to learn “regular” needle knitting (I am beyond bored of people telling me I should – I don’t care – there’s the door!) so to discover there was an old-fashioned method to do so got me excited and I made a LOT of socks over the years. I also made a few hats, and a cowl, and a pair of weird mittens, but then the worm of an idea grew in my head – “You should make a sweater.”
Another set of sofa slipcovers
After wrestling with the sticky velvet upholstery fabric last summer to make a set of slipcovers for our sofa, I swore it’d be a long, long time before I voluntarily sewed home dec again. But that was before we moved back into the tiny Captain’s Cabin on our boat (while renovations are still ongoing in the much larger, main living portion), and I had to stare at the hideous sofa fabric every single day.
Twin pairs of cycling jeans
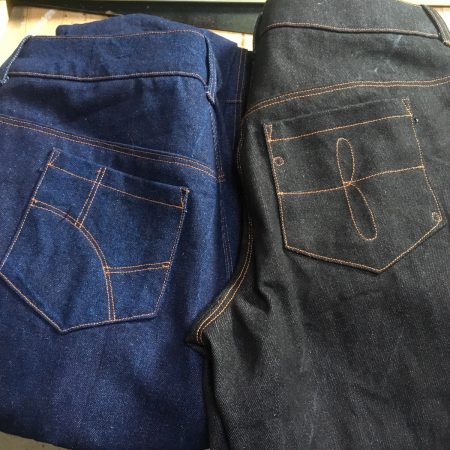
I’ve been sewing my own jeans for something like twelve(?) years now. Over the years I’ve built up my own preferences in how I like to construct them, but also how I like to wear them. And since I took up cycle commuting a few years ago, I really dig the ability to, you know, move in my jeans. I love know I can hop on a bike or break into a run at any time and my clothing isn’t going to slow me down (which also cuts down on the amount of clothing I have to haul in to the office!).
So I started making adaptations to my standard jeans pattern (which at one point started life as a Burda mag pattern but has morphed so many times it’s probably more accurate to just call it self drafted) to make them easier to cycle in (more on this later). By my count, these two are my 4th and 5th pairs of cycling jeans building on the ones from…
Pleated denim-look leggings (again!)
Apologies for my absence recently – I only really have Fridays to devote to all things FehrTrade (writing blog posts, answering emails, boring admin, developing new patterns, answering B2B requests, etc) and I had a few Fridays where I took on some paid work, and now I’ve been sick for the past two weeks, and frankly, blog posts are the bottom of the priority pile so they’re what gets dropped if I run out of time.
And also I’m still playing catchup with garments I made quite a while ago, which isn’t the most motivating to write about even though I love the garments themselves. Like these, which I’ve worn at least once a week since I finished them. These leggings were actually the last garment cut out before we moved out of the flat in December, and the first garment sewed back in my little floating sewing cave in January!

