I am both back from our trip to the States and feeling back on form now, so I’ve started to tackle documenting the absolute mountain of finished makes from the last four months. I have some garments from early January, some made more recently and well, I’m just going to share them with you in no particular order! The photos are a bit more slapdash than usual, but I know that if I waited to do proper photoshoots of all of these then it’d be another 6 months before you’d get to see them!
So I’m going to start with a garment that was the longest in the planning, and also quite possibly my favourite of the early 2016 makes. It all started back in summer 2014, when I bought some fabulous navy wool coating & vintage silk twill from Ditto when I was down in Brighton. I knew I wanted to use them together for a transitional, short coat, but then I had quite a journey in finding the right pattern!
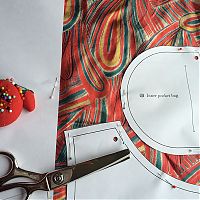
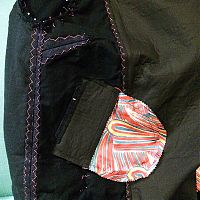
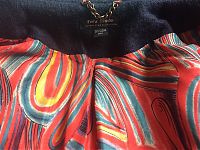
The psychedelic 1960s vintage silk twill lining that was originally made for neckties!
Over the course of 18 months, I ended up making five different muslins before I was happy enough to cut into the wool and silk:
- StyleArc Audrey (the silhouette and proportions were just so bad on me. So bad.)
- Burda Jan 2015 jacket in size 42 (way too small for non-stretch outerwear, oddly, though Burda’s fit is usually very standard)
- Burda Jan 2015 jacket in size 44 (traced ALL the pieces again and it still fit very weirdly)
- Patrones 342 No23 dolman sleeve coat (ridiculously tiny sleeves and zero arm mobility even with the underarm gusset)
And then finally I muslined Named’s Harriet lumberjacket pattern, bought during a flash sale during their advent calendar promotion. And I was like Goldilocks, it was juuuuuuust riiiiiight.
I’ve only made one Named pattern before (their Jamie jeans, twice) but I felt confident that size 42 would work for me, and it did. This pattern fits closely in the shoulders, bust and sleeves, and a more boxy silhouette in the waist and hips, which I really like. I did have a bit of a faff getting A0-sized Copy Shop pdfs from Named but eventually they sized them correctly and all was well. My only real change was to use my wool coating throughout instead of the sheepskin/fleece on the outer collar – mostly because I couldn’t find it for a decent price for such a small amount, but I’m really glad I did because I think it’s a much more versatile jacket as it is.
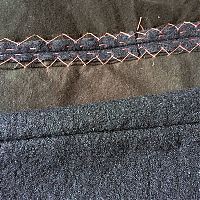
As with all my coats, this one is entirely underlined in cotton flannel to keep out the wind – it takes a lot of extra effort, but I’m thankful every time I wear my coats along the Thames wind-tunnel. And hey, I was sick, so a lot of sitting and hand sewing wasn’t really a problem. I first basted the wool and flannel together by hand along all the edges, then once a seam is sewn on the machine, I catchstitch open all the seam allowances so they lie perfectly flat and reduce bulk (and annoyance when worn).
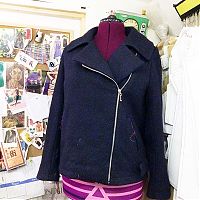
Nearly finished on Susan, you can still see some pink basting threads!
The zipper was bought from Zipperstop in NYC way back in 2010 and was very close to being perfect (only an inch short, but c’est la vie) and I love the effect it gives! Great pull on this, too, and it’s easy to grab with gloves on. The pockets are also nicely sized, as well as being faced and with separate inner and outer pocket bags so the edges line up nicely on the angle. The attention to detail in the drafting of this pattern was readily apparent – the Named team did a really nice job on this.
I’ve been wearing this jacket a ton, pretty much every day since I finished it. I’ve found that I wear it equally as often partially zipped with the collars out (as below), and completely zipped up for warmth (which you can see in the Barry Island photo).
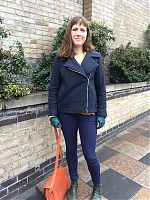
Worn on its first outing, when I was still feeling awful
On top of just wearing it on my daily commute, I also took it along to our weekend away in Cardiff for my birthday weekend (which, against everyone’s best efforts, was a thoroughly rotten day I didn’t feel like documenting this year, sorry), and the flannel interlining really came into its own on windy Barry Island while we waited for our table at Hangfire Smokehouse to be ready.

Barry Island on a cold, windy, and wet March day
Then I took it along on our recent trip over to Baltimore, PA, and DC, where it got a lot of use, too!
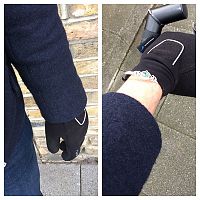
One thing that I wanted to illustrate on Instagram at the time was that I sometimes get comments from people asking why I draft the sleeves on my patterns to be longer than normal. Cycling in this jacket illustrated perfectly that sleeves can be the “right” length for your arms when standing, but when you’re on a bike, your shoulders and arms are elongated, making your previously “perfect” sleeve length, well, a bit too short.
Since my patterns are intended for exercise, including cycling, I make the sleeves a bit longer so you don’t get cold wrists. But I digress – back to the lumberjacket!
I also had fun with my labels, adding a little “dry clean only” one since I had some lying around, and I made a posh chain hanging loop affixed with short lengths of lining lops to hold it into the seam. You can tell I was happy with this coat if I used some of my chain!
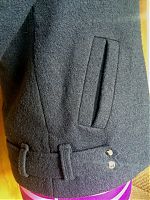
Here’s a side view of the partial belt, which is caught in the side back seams and extend just round to the front, held in place with functional, metal snaps. I added an extra belt loop to each side, mostly because I misread the cutting instructions and had extra, but I like it!
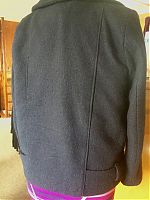
And because none of my holiday photos showed the back, I took Susan up into the lounge so you can see the subtly angled centre back panel:
So yes, I think it’s safe to say that I L-O-V-E this jacket! It was lots of work, a ridiculous number of pattern pieces, but it’s incredibly well designed and drafted and it is an utter workhorse in my wardrobe when I need a transitional coat (it’s still ~40-50F here in London).

