After over week of agonising waiting, I’ve finally now got a revised admission date (29 June) which means I’ve got two more weeks to sew!
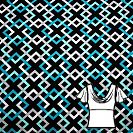
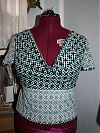
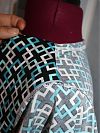
First up is a modified version of Simplicity 2580 (which my mom brought me from America), sewn up in the £1.70 lycra knit remnant from Brighton! I realised wearing it to work yesterday tht the pale turquiose here matches my spring coat exactly, too…
I took the front and back bodice pattern pieces from View D, plus the sleeves from View C, then lengthened the back by about 8 inches (though if I do this again I’d make it 9 or 10 inches), and eyeballed a new lower front pattern piece to make this a top (by “eyeballing”, I mean I made sure the top edge was the same as the underbust seam in the front, it was about 8 inches tall, and curved at the side seams to look okay).
I sewed this together in an hour or two using my overlocker (serger) and coverstitch machines, assembling it the way I saw fit, and only looked at Simplicity’s instructions afterward. GAG. Ok, people often rant about Burda’s magazine instructions being terrible, but at least they don’t usually result in a crappy finish if you can understand what they mean.
So in the interests of freeing home sewers from extraneous raw seams, here’s how I asembled my top:
- Fuse vilene bias tape onto the back shoulder seams and back curved neck edge to prevent them stretching out of shape
- Throw away their back facing pattern piece, and just cut yourself a stretchy strip of fabric an inch or so wide, and long enough to fit the back neckline (make it longer and cut it down after you’ve pinned it in place if you want to save yourself some hassle!). Place the right side of the bias strip onto the right side of the back neck edge and serge (or zigzag stitch) in place.
- Flip the strip to the inside and coverstitch (or twin needle!) 1/4” or so from the folded over edge
- Unfold the upper front (cowl) piece so it lies flat. Pin one set of shoulders to the shoulders of the back piece, then bring the other set of front shoulders around to sandwich around the same back shoulder seam. You should now have the fold of the front drape around the coverstitched edge of the back shoulders. Serge in place through all 3 layers.
- Flip the right sides out. Take the “eyeballed” lower front piece, and pin it to the right side of the outer upper front, right sides together. Then bring the lining side of the upper front around to the same lower front seam, right side facing wrong. Serge through all 3 layers, and flip right sides out.
- You should now have nicely concealed seams on the shoulders and under-bust seams!
- Fold under the outer edge of the sleeve and coverstitch (or twin needle), then serge the inner edge to the armscye, treating the upper front pieces as one. (if I were making a sleeveless top, I’d cut a stretchy strip for each side and do the same as I did on the back neck edge)
- Serge the side seams, then fold up the bottom edge and coverstitch (or twin needle) the hem!
I have a huge weakness for cowl necks, and I’ve got a stretchy RTW cowl top that I’ve never fully been able to replicate to my liking, but I’m definitely going to reuse this pattern. The drape of the cowl is just perfect for me, and for once, the fit on a Big 4 patterns isn’t crazy baggy! This modified top took up less than a metre of fabric, too, so it’ll be a great use for those odd bits of knits that are too big for the scraps bin but not really enough for much else. Oh, and another PR member also pointed out that becuse the upper front is doubled, it’s also a good pattern for lightweight lycra knits, too.
Coming up next (I think): a quick sweatshirt bolero and a Breton top…


