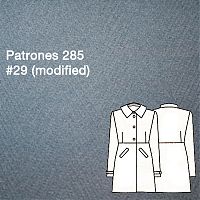
About a year ago I bought some gorgeous, ex-Burberry wool coating fabric from Ditto with plans to eventually make another winter coat. The muted turquoise wool has a patterned herringbone weave on one side but it’s also very thick and un-drapey but has the advantage of not fraying at all (almost like a boiled wool or Melton).
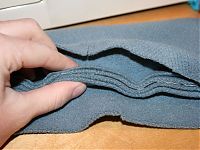
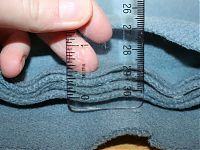
The fabric is so thick that I knew had to choose my pattern wisely, leaving out coats with lots of pleats or gathers that would’ve meant lots of bulk here.
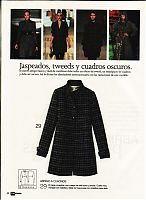
As soon as I saw the Armani knockoff coat in the September Burda issue, I thought I’d found the match for my fabric, but as you recall, that pattern was just downright awful. So I started looking through my coat patterns again for something suitable, and Claire (Seemane) suggested I combine Patrones 285 #29 with some elements of the other coats in that issue, which is more or less what I ended up doing (though I need to change my tech drawing here to show the applied welt pockets I finally decided on rather than buttoned welts).
Pattern changes:
- Added 2” walking ease to the lower fronts along the centre front (essentially I added a triangle in the lower skirt so the coat doesn’t gape open so much while I walk)
- Eliminated their vertically-opening pockets in favour of 45 degree angled applied welt pockets
- Added the collar from pattern #28, turned this band collar into the collar stand, and eliminated the button on the collar
- Cut the under collar and under stand on the bias with a centre back seam
- Raised the shoulder seam by 1cm front and back at the armscye to account for the shoulder pad
- After my muslin fitting, I lowered the waist by 1” so that it sits on my natural waist rather than being oddly empire
- I lowered the bust dart point and widened the legs (my boobs are by no means low hanging, but their dart point was a good 2 inches above mine!!)
- Totally redrafted their wack sleeve pattern (see below)
When I went to insert the sleeve on the muslin, there was a whopping 2 1/2 inches of ease there that just did NOT want to go in nicely! (Kenneth King recommends 1” at the most). But even worse, there was ease in the underarm section, so the notches didn’t even line up properly!! So I measured all the different sections on the sleeve and body pieces, worked out where the ease was situated, and redrew the sleeve cap so I only had an inch of ease, and only where it should be (between the notches at the top!). But to my surprise, the bicep girth was okay. Figures, the one time I actually remember my mantra of “Patrones’ sleeves are freaking TINY!”
Interfacing
One of my Christmas presents was Kenneth King’s “Cool Couture” book (albeit with the awkward UK title of “Home Sewing Couture Techniques: Create Design-Quality Fashion”) and in it he recommends using wool or goat hair canvas as interfacing on jackets. Furthermore, he has a technique which uses alternating layers of horsehair canvas to create shoulder shields so you don’t get that sinking divet around your clavicle (which I’ve always had and not known how to fix, wee!).
So on one of my days off I headed up to MacCulloch & Wallis to buy 2m of chest canvas (made of wool and goats hair, yay!) and 0.5m of horsehair canvas (made from actual horsehair. Bosco went mental rubbing his face all over it!). Couture does have a price though – I left there having spent £20 on interfacing and another £10 on my brass buttons! But proudly, I didn’t buy anything else there for the first time ever…
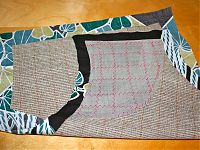
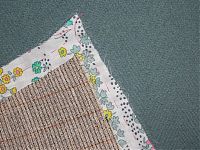
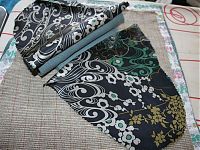
It’s definitely worth buying “Cool Couture” for Kenneth King’s method of installing the hair canvas, but essentially you create a frame of thin, scrap fabric around the canvas so that it gets sewn into the seams rather than the stiff canvas. It leaves you with nice, pliable seam allowances, but keeps the canvas in place. And it was a good opportunity to use up some big scraps (remember these fabrics?)! But then I had to baste all the edges onto my wool, of course. I’m finding Radio 4 podcasts are a good way to occupy the mind whilst doing tedious hand stitching.
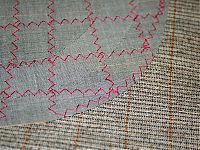
I also made an upper back stay from more thin, scrap fabric and basted only at the neck and armscye – this is so the wool doesn’t distort as you reach your arms forward or arch your back in normal wear.
(There’s no serpentine stitch on my machine so I used a wide zigzag instead.)
Three animals are represented here – sheep, goat, and horse!
Lining
Then I started to feel like my progress was depressingly glacial because I’d spent three solid days on this and not yet sewn a single seam, so I decided to make the lining first so I could feel I’d accomplished something! A lot of people recommend doing the lining first so you can check the fit and get the boring bit out of the way first, but I always want to jump right in on to the fun stuff like bound buttonholes and pockets so I never quite get around to taking that approach.
I’m not quite sure what the cause is (maybe errant jeans rivets?) but I destroy coat linings. Seriously, both of my winter coats have had patches in the same area, and now I’m in the depressing state of needing to patch the patch on my Russian greatcoat, guh. So for this coat I needed something slippery but super, super strong, and the perfect lining presented itself in the form of some Hong Kong silk. One of our neighbours appeared at our door one night a few weeks ago with a bundle of two silks her husband had bought in Hong Kong years ago but had been festering in their spare room ever since. She was cleaning up, came across them, and figured I’d make more use of them than the spare room! So I gave them a wash and a press, and the two silks came up beautifully. I don’t know what you’d call them, though – they’re darker and kinda slubby and matte on the back, and lighter with a directional satin weave on the front, but with occasional bits of yarn like dupioni or shantung on the front. So I’m using the more satiny side against the body and hoping for the best. There was a bit more of the pale pink than the mint green, so I did the body lining in pink and the sleeves in green. My friends always say that two different lining fabrics “feels” more expensive somehow!
Coat Shell
After the lining was complete (including a luxe hanging chain at the back neck!) I moved to the wool and sewed the bodice seams and darts. Because the fabric is just so thick, I had to catchstitch all the seam allowances so they’d actually lie flat instead of making great bulky bulges everywhere. Which is a great trick I learned from sewing my wedding gown, but it does take a lot of hand stitching!
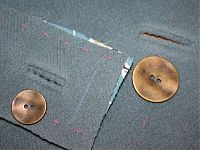
Then I made the bound buttonholes – three on the bodice for the large brass buttons, plus one on each sleeve tab for the smaller brass buttons. Which of course required more hand basting to get the “ladder” accurate plus a ton of steam and pressure to get the welts flat!
Collar
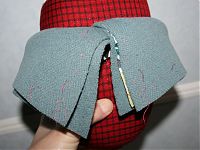
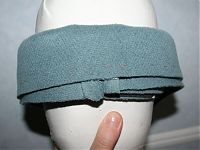
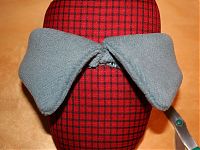
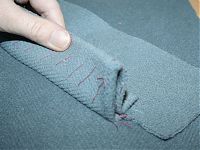
Check out the “turn of cloth” difference on my collar:
Yep, that’s just down to the thickness of my wool. Some patterns give you a separate, smaller undercollar pattern, but I’ve never had the luxury of one of those so I have my own method. I like to make my collars the same size, then trim away the excess from the undercollar after curving it around the pressing ham like demonstrated above. Only after the undercollar is trimmed do I put the two together, lining up the edges, to sew the outside seam (sewing directionally from the centre back to the tips so you don’t get a wonky curl in your collar!).
I used David Page Coffin’s method of insertion where you sandwich the sewn collar between the stand pieces and reach inside to sew together all four seam allowances. Only I was now starting to regret not sewing my undercollar from thinner lining fabric…
I think this method actually works better for shirts than for coats, though. I’m not delighted with the collar like I am a lot of other aspects of this coat…
Sleeves
I’d at this point give you a big rundown of how I meticulously eased in the sleeves, but… between my fixing the sleeve pattern and my wool being so damned lovely and pliable (honestly, I challenge anyone to get an accidental tuck in this fabric!), they went in beautifully on their own, first try. I didn’t have to baste or ease or use a million pins or anything. They just inserted themselves.
Pockets
I ordered some lovely Spoonflower silk print way back in November to use as my pocket linings for this coat, but every time I order from them I forget how glacially slow their international shipping is (is their domestic this bad?). It’s bad enough it takes them over a week to print your order and post it off, but it’s been two weeks since they posted it and nothing… It’s only US -> UK, and it was before the ice and blizzards and whatnot, so I’m just annoyed now. With that still lost in the ether, I didn’t want to delay any longer so I substituted in some scraps of silk satin (charmeuse) from my stash.
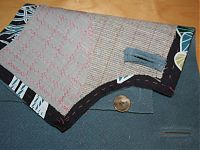
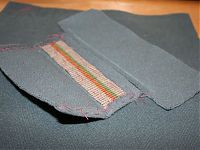
I had originally thought I’d do double welt pockets with a looped button for these, but I didn’t like my loop options and thought perhaps a standing welt pocket might be a better look. The Foolproof Single Welt Pockets section in “Cool Couture” made my brain hurt though (I don’t do it if I can’t visualise it!), so I used Susan Khalje’s Applied Welt Pockets section in “Couture Sewing Techniques” instead.
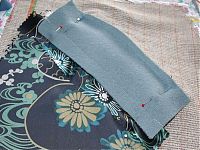
Because I’m a masochist, I used the chest canvas on these welts, too. Yes, that meant loads more basting and hand stitching.
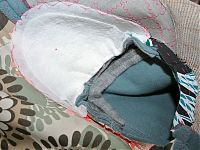
For the part of the pocket against the body, I cut the top from wool and the bottom from the silk satin so you won’t be able to see the silk at all when it’s finished. And because of that very reason, here’s some shots for you now (remember when I first made this silk blouse with it? I then used more to line my 30th birthday dress).
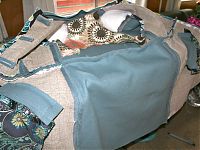
(Mostly) Finished shell
I used Kenneth King’s method of attaching the shoulder pad (which was graciously donated by Claire (Seemane)!) and of attaching the sleeve head.
Upcoming
Still to do/document:
- Attach the facing to the lining
- Sew the facing to the coat edges (except the hem)
- Fasten together the collar stand seam allowances inside (by hand)
- Understitch the facing seam (and possibly prickstitch if underlining isn’t enough. Please god, let it be enough!!)
- Attach the sleeve tab buttons (by hand)
- Tack together the armscye and lining armscye seam allowances (by hand)
- Baste the sleeve hem in place, then invisibly hem the wool. Then attach the sleeve lining to the wool at the hem.
- Baste the coat hem in place, then invisibly hem the wool. Then attach the lining to the wool at the hem.
- Cut the buttonholes in the coat facing and stitch in place (by hand)
- Attach the big brass buttons to the left side (by hand)
- Collapse, then sew a quick knit top for my mental health and wellbeing
With all this hand stitching and basting, I’m actually running out of both colours of Gutermann silk thread! Sob! That, and I’ve got a blister on one of my fingertips from the millinery needle. I wish I was joking. (Yes, I have a bog standard metal thimble, but it’s awkward and I tend to push with my middle and ring fingers equally, and have a tendency to use whichever isn’t wearing the thimble. Hence the blister. I really need to get two leather thimbles! Has anyone tried making their own? I’ve got plenty of leather scraps…)
I was kinda hoping to finish this before I went back to work, but I lost a few days due to an upset stomach and going for the gung-ho interfacing option. Every time I make a coat, I try to raise my game a little and try new things, and already here this is the first time I’ve ever used hair canvas or horsehair, made an applied welt pocket, or made a hanging chain! But with all the hand stitching yet to come, it gives me something to do while we watch tv after work I suppose.

