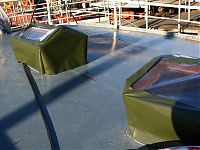
I’m very excited because this is the first opportunity I’ve had to crosspost anything between this sewing site, and our site for our boat, Hendrik!
We’ve got a total of six skylights on Hendrik – four flat metal ones in the front of the boat where we live, and two peaked, wooden framed ones in the back captains cabin which we rent out to our lovely lodgers. We’ve largely been able to keep our front skylights from leaking too badly, but the age and design of the ones in the back meant that they really needed some covers both to limit the drips and to protect the woodwork and the original 1930s patterned glass.
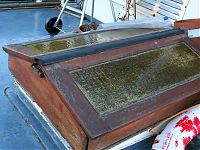
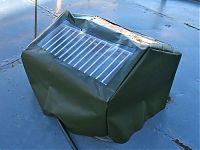
(this is the larger, saloon skylight)
So a few months ago I got some swatches from Pennine Outdoor to have a look at their tent fabrics, and decided that the “UV Treated Window Material” (P49) and “PVC Coated Polyester” (P9) would work best. Importantly, since I had the swatches I also tested to make sure I could sew through these on my regular domestic machine! I bought two metres of the green and one metre of the clear, which came to £23 including shipping (and this gave me plenty enough for these two skylights, and probably enough for at least one of our flat skylights).
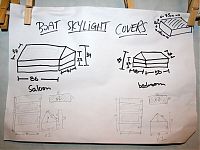
I went and had a look at one of the neighbours’ skylight covers and saw that theirs didn’t have any special stitching or seam tape to prevent drips (and they didn’t have any leakage problems), so I made my measurements.
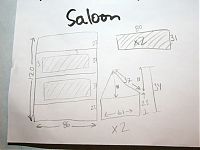
Then I thought about how the pieces would unfold to 2D, and drew out what I’d need to cut (without seam allowances, as that’s how my brain works!).
The shaded sections are the clear vinyl “windows”. Once the windows were inserted into the rectangular green frame, it was really just a matter of sewing that big rectangle around the triangular ends. And luckily, both skylights have the same overall shape, with the bedroom skylight on a smaller scale.
Since it was the smaller of the two, I decided to sew this one first in case I needed to make any changes for the big saloon one. I probably should’ve done a muslin for these first, but rectangles and triangles are so boring to sew that I just couldn’t bring myself to do it. (Seriously, does anyone actually enjoy home dec sewing??)
Because the materials themselves are waterproof, I didn’t really want to use pins apart from in the seam allowances, so I held the clear vinyl in place with some cellotape (scotch tape) to keep it in place as I sewed. For the windows, I sewed from the back, overlapping the seams. You also absolutely NEED a walking foot for this! The needle wasn’t really as important, but I used a denim needle here so it’d be a bit stronger, but I’m sure you could use a hefty universal needle and probably be okay, too. But seriously, do not attempt this without a walking foot, or you’ll be tearing your hair out.
Anyway, on this smaller scale, the cover fits great! It was (dare I say it) almost enjoyable to sew.
So then I cut out all the larger pieces and sewed together the larger saloon skylight cover.
Oh dear. This was an utter nightmare to sew.
First of all, the pieces were bigger than the size of my sewing room (I’m not kidding – my sewing room floorspace is exactly the size of a double bed)! To make matters worse, the clear vinyl sticks to EVERYTHING (including the body of the machine and itself), and is so stiff that it just won’t cooperate or fold or roll up the way you need it to in order to get it under the machine’s arm, and then once you’re sewing a seam, the length of it kept hitting the back wall and physically moving my super heavy, metal body sewing machine all over my desk! At times I was at full stretch of my arms and leg, holding a roll of vinyl in one arm and just letting the machine do the best it could without my hands anywhere near it.
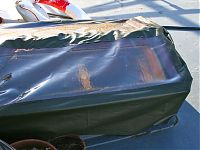
So I’m not really that surprised that this cover isn’t quite as accurate as the smaller one. In fact, this cover turned out to be a bit too small (arrrgh) so I had to split one of the corner seams to get it on, but it’s Good Enough and doing anything further on this would’ve had me in tears.
But at least they’re finally done, and keeping our tenants dry and our woodwork protected!
With this project comes a new distinction – velvet has finally been surpassed and I have a new Least Favourite Fabric. Congratulations, clear vinyl!

