If you recall from last week, my next project is this maternity coat from the August 2008 issue of Burda, which I promised a very good friend:
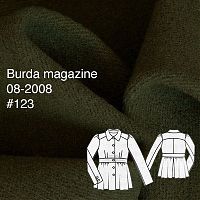
(The issue date is still wrong above – it is indeed in the 2008 issue…)
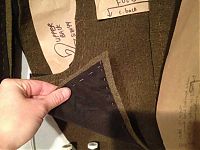
After we sorted out the fitting and design alterations (including a second, quick muslin fitting of just the upper bodice in the pub toilets on Saturday night!), my first step was to cut out all the pieces in the green wool and then again in the black cotton flannel I’d bought to underline the spongey wool coating and give it a bit more structure. The coating is wonderful, but I’m a bit concerned about it bagging out in places, and I wanted to give it some added stability as well as a bit of extra warmth (though if warmth were my primary concern, I’d call it “interlining” and attach it a bit differently!).
Here’s all the pieces hanging on the line in my tiny sewing room:
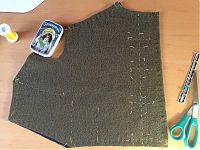
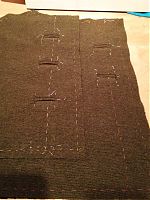
I then hand basted all the layers together around the edges of the pieces, plus through the darts, and then also marked out the placement lines for the five bound buttonholes:
To my dismay, I actually ran out of both colours of silk thread, so I had to finish up with regular Gutermann Sew-All thread (Oh the humanity, first world problem, etc!). As I was nearing the end of the second spool, I prioritised the silk for the stitching I knew I’d need to remove later (like the bound buttonhole markings), as the biggest advantage of the silk thread is how easily it slides out when you need to remove it. I then finished up the outer edge basting with the Sew All, since it’ll be hidden in the seam allowances anyway.
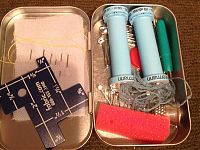
Here’s a view inside my trusty little Gutermann hand-sewing tin (which you can see closed in the left photo above) – all the things I need to sew on the go!
Then, after I finished the boat’s insulation on Sunday (yeeeeaaaaahh!!), I sat down and made the bound buttonholes.
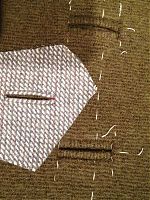
I’m happy to say that I’ve progressed in the last few years from never doing these before, to now not having to refer to any instructions to do them! Though this time around I went with 1/4” welts rather than my usual 1/8”, as the coating is quite thick and I thought it fitting on a coat like this.
That’s a sample buttonhole from my silver tweed jacket for comparison’s sake. The buttonholes are the same width – just the welt thickness is changed. I’ve had this sample buttonhole in my button drawer since I made the jacket and I’m not entirely sure why I’ve kept it, but it’s useful here for seeing the real-life difference between the quarter- and eighth-inch welts.
There are actually going to be six buttonholes on the front of this coat, but the sixth lies very conveniently at the empire joining seam, so I’m going to make that an in-seam buttonhole instead.
A housekeeping note:
Thank you all so much for your wonderful comments on my green Clover trousers! There are so many emails I really need/want to reply to, but I’m frustratingly extremely busy and stressed and overwhelmed with work right now, and I’m struggling to find ten minutes spare to sew a week, and if given the choice between sewing and emailing, sewing wins every time. So please accept my apologies for being a bad emailer, I just have to accept that I can’t get everything done in a day that I want to, and leave it at what I can achieve.
And Holly’s getting cold and her belly’s getting bigger, so you know where my priorities lie.


