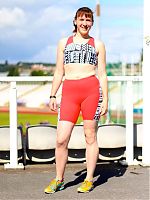
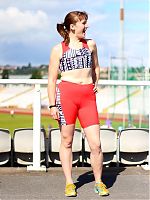
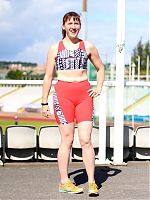
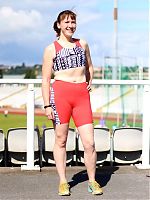
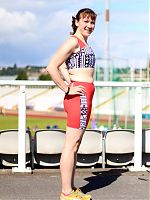
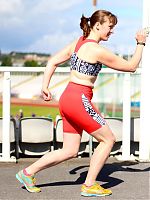
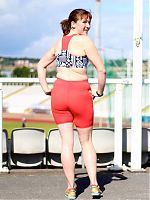
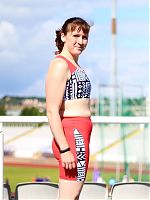
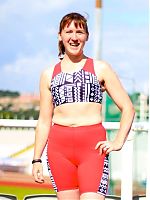
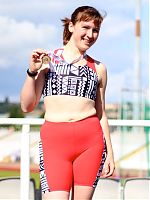
Wow, thank you all so so much for all your hearty congratulations on my double gold medals at the British Transplant Games! It was definitely a confidence boost winning the first one, enough that I had the courage to wear my rather-more-revealing-than-I’m-used-to new running shorts & bra set for the second days’ track races.
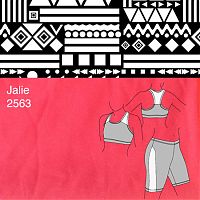
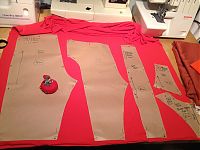
I used the Jalie 2563 pattern for both the sports bra with racer back (View A) and the shorts with thigh insert (View C), and there’s also another bra view included in this pattern, too, so it’s great value to get three usable views in one!
I’d made this set after completing the swirl sheath dress, but before the super simple skirt, so I’m glad we waited for a photoshoot to be able to use Sheffield’s amazing Don Valley Stadium as the backdrop, even though it’s scheduled to be demolished next month for lack of maintenance funds (so, so sad!).
Even though I’m wearing these as a set on their own here, I think for regular runs I’m more likely to wear them as separates – a great sports bra to wear under a low-cut vest to let a pop of colour peep through, and a great pair of running (or cycling!) shorts I can pair with a longer top.
Jalie actually call this a “crop top” and not a “sports bra”, but I found it really easy to turn it into a compression-style sports bra that’s actually supportive enough to run in! If you’ve got a larger bust, your mileage may vary, but for me, this is the perfect mix of support, style and comfort.
My first change was to line both the front and back in power mesh. However, when I tried it on (before adding the elastic edges), it didn’t pass my “bounce test”. So I consulted with a sewing/running industry friend, who recommended I try adding a second layer of power mesh lining, with the stretch running in the opposite direction to the first layer (power mesh is stretchy in one direction, but rigid in the other).
This was the a-ha moment, and after adding the second layer, the girls were secure!
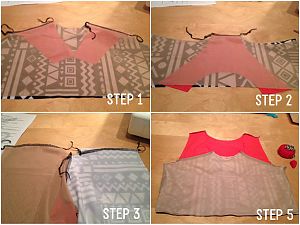
The other change I made was to the order of construction. I’m not sure why Jalie didn’t sew it this way, to be honest, because it’s really pretty easy to enclose the seams if you add the back lining.
Order of construction for concealed, “burrito method” seams
- Sew the front angled seams with lower front and upper front right sides facing, then the right sides of the mesh lining(s) face down on top of the upper front
- Repeat for the mid-back seam
- Sew the sides seams – attach the front to back, right sides facing, and the lining front(s) to lining back(s) also right sides facing. There should be a little gap at the underarm so do this in two steps
- Sew the shoulder seams
- Zigzag baste the raw edges together
(Then follow the rest of the instructions for the elastic edges…)
If you follow this, the only raw seams you’ll have against the skin are the shoulder seams, where you don’t really have much rubbing/chafing anyway.
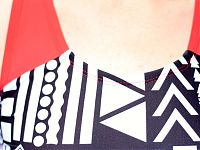
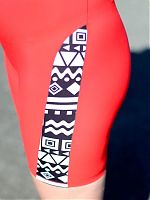
This pattern is great for scraps – the tribal print lycra is leftover from my wildest leggings ever (and only bought 1m to start with, too!). This came as a digital print from Funki Fabrics and you might also recognise it because House of Pinheiro recently made a swimsuit from it, too!
The red fabric is a neon red wicking lycra that I was gifted by my industry friend – frankly, it’s fabulous stuff, though I’m glad the right side was marked with a sticker as it’s impossible to see the difference! I had to be quite methodical in marking the wrong side with big Xs in chalk as I went along. I only used 0.5m of my 1m gifted yardage, too, so I’ve got enough for a second set or accents on longer leggings.
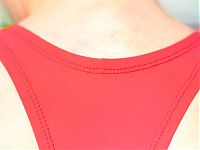
Jalie’s method of using 3/4” (1cm) elastic to finish the arm and neckline edges of the bra is really similar to those in my recent KwikSew top, but having learned from that one that overlocking + coverstitching leaves too much thread against the body, I tried zigzagging then coverstitching (instead of serging & coverstitching) to try and reduce the amount of threads against skin and prevent chafing). This feels a lot better to me this way so I must resist the urge to use the overlocker at every opportunity!
I absolutely love the contrast thigh panel on these shorts – it’s so stylish and really gives them an expensive look, and also showcases little scraps you may have lying around. It’s also not obvious from the line drawing, but instead of an inner-thigh crotch seam, there’s an extra panel there (maybe about 4 inches wide) which I assume is to cut down on any chafing. The longer length of these shorts also prevents any “chub rub” in the inner thigh. Bravo, Jalie!
If you’ve made the Jalie running skirt pattern, these shorts are a few inches longer than the ones included there, and are a distinct draft from those, as these have the inner-thigh panel and also have side seams.
The only thing I don’t like about the shorts are that they have a weird hanging, front lining that I left off – I was afraid it’d bunch up when worn since it’s only connected at the front waistband and the crotch. The shorts are very tight-fitting so any extra lumps would show, lining included. And yes, I have to be very careful which underwear I wear with these because everything shows!
I forgot to take a photo, but I inserted small, hanging pocket into the back of shorts waistband for a gel or coins. I recently discovered the pockets inside my Nike shorts after weeks of wearing them and thought it’d be an easy feature to have. Though anything in the pocket will definitely be a lump on show!
Overall, this is a great pattern, and I will totally be using the sports bra portion again, as this was about the only piece of running kit I was still buying from shops.
Even though it’s body-conscious, I love the look – it’s so sports boutique!

