I often see other sewers complain about tracing patterns from magazines like Burda World of Fashion, KnipMode, or Patrones, and I thought I’d share my method for tracing patterns. I don’t have a big window, and carbon paper is just way too messy for me, so I’ve gradually come up with this method and it’s quick and easy enough that I trace out all my patterns this way – even the tissue envelope patterns.
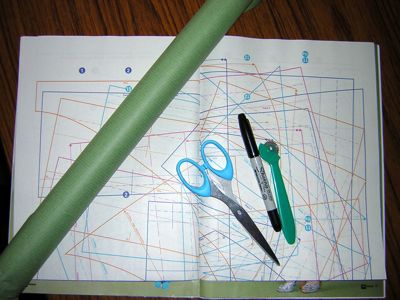
Step 1 – Gather your materials
You’ll need a big roll of paper – I buy a big roll of (usually brown) craft paper from Staples, but you can also use rolls from the post office or doctor’s surgery paper or anything else similar. You’ll also need a serrated tracing wheel (found in haberdashery shops), a marker pen, a pair of scissors, and a few weighty objects to keep the layers from slipping around (not shown).
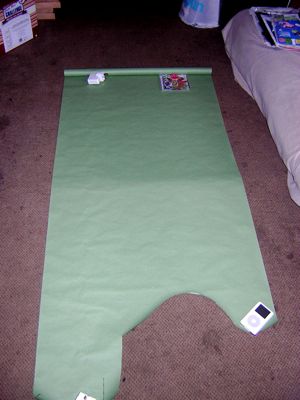
Step 2 – Roll out your paper
Find a nice big carpeted space and roll out your paper. You may need to weight it down to keep it from curling up.

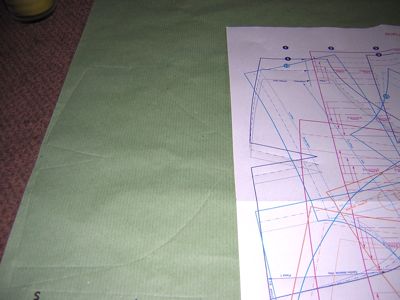
Step 3 – Lay out your pattern
Lay your pattern sheet on top of your paper, making sure it doesn’t go off the edge or overlaps a previously traced piece. Place some weighty objects on the pattern sheet, making sure it doesn’t obstruct the pattern piece lines.
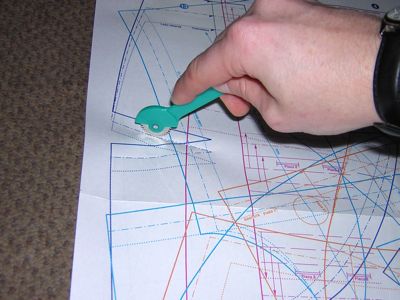
Step 4 – Trace with the serrated wheel
Using your tracing wheel, follow along the pattern sheet lines, making sure to also trace all pattern notches and darts.
Step 5 – Compare against the original
Remove the weights and compare your tracing with the original. Your traced pattern will be shown with a series of bumps (and possibly tiny holes, depending on the pressure you used!) on all the lines.
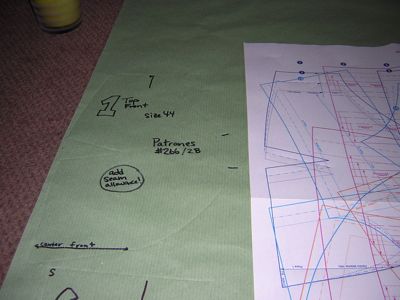
Step 6 – Write info and highlight notches
Use your marker pen to write down the piece number, piece description, pattern number, size, grainlines, and any other relevant info. Also highlight any notches, dots, or special instructions. I like to mark any fold lines with a big obvious arrow and remind myself to add seam allowances if the pattern calls for it!
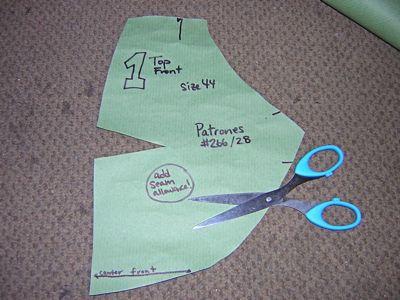
Step 7 – Cut out
Use your scissors to cut out the piece. Repeat for all the pieces in your pattern.
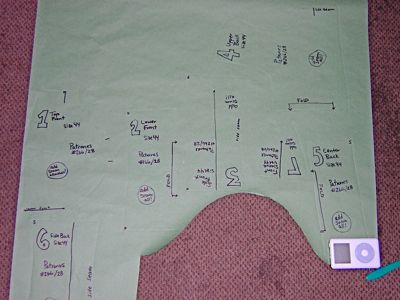
Here’s all seven pieces from this top traced out, which took me about 15-20 minutes to do.
And in other news, since we’ve been spring cleaning today and I can’t go any further on James’s shirt until I pre-wash the fabric, I decided to attack my “big scraps” box (these are bits that are less than a yard, but too big to chunk into my “tiny scraps” bag for rags or soapnuts bags).
I was pretty ruthless and unless I could come up with a specific use for the fabric length in the box, it got added to a bag to give to a guy in my office who makes very creative refashions. I think he’ll be pleased with his haul: