Believe it or not, this blouse is my last project from 2009, and I wanted something both simple and silk, which isn’t a common combination! But the cover blouse from Patrones 276, #3 was exactly right:
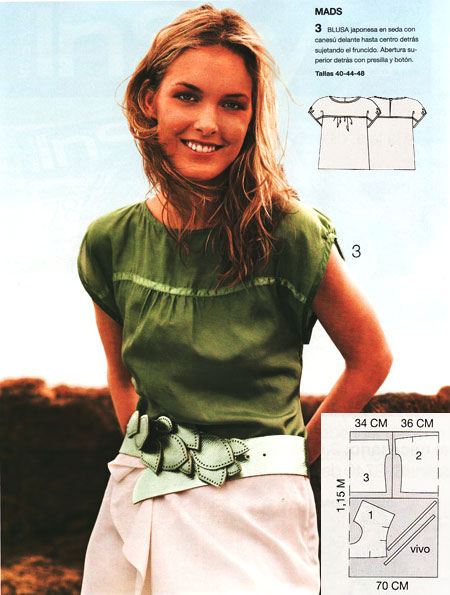

Apart from being a really nice easy-going top, this pattern only has three pieces – lower front, lower back, and a yoke that’s got a slit opening at the back and goes over the shoulders seamlessly to the front. So not only is it great for <1/2m cuts of coordinating silks, but the yoke is perfect for prints you don’t want to interrupt with seams. And if you’ve got a healthy trim stash (which I’m strangely not really into), then the ribbon across the front provides the perfect showcase.


Detail of the three silks:
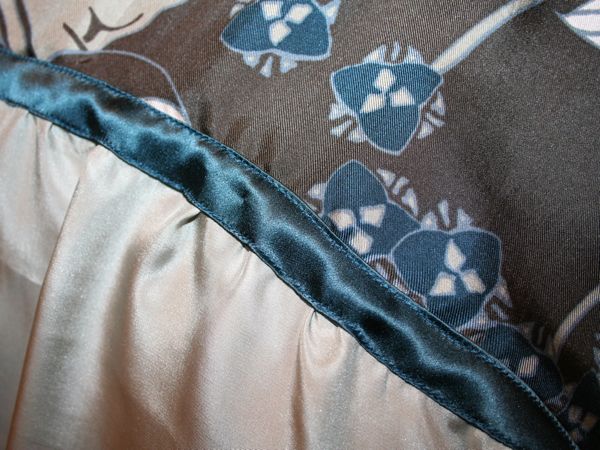
The print silk twill was a gift from Zoe (fitting, really, that I used a Patrones pattern for her silk since it was she who introduced me to them in the first place!), and it just so happened that it matches not one but two silk satins I’d bought at Goldhawk Road months earlier!
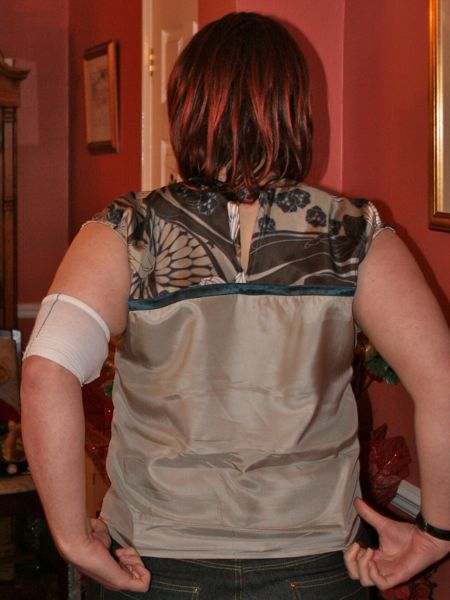
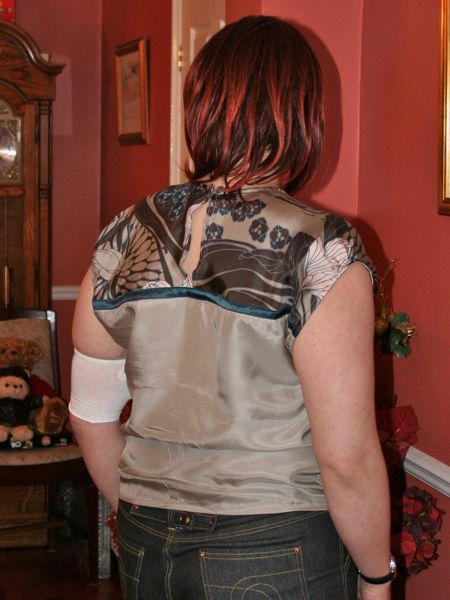
Here’s the keyhole back opening with button and loop closure:
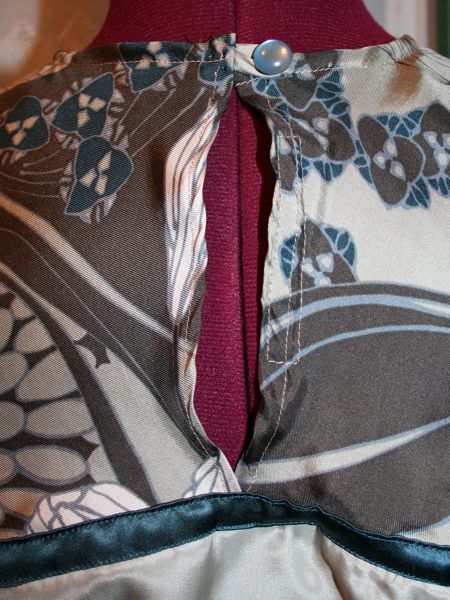
You can’t see on the tech drawing, but there’s gathering on the sleeve (because of which, I had to bind the sleeve hem rather than just fold under)

And a glimpse of the inside, where you can see the shiny side of the champagne silk charmeuse:
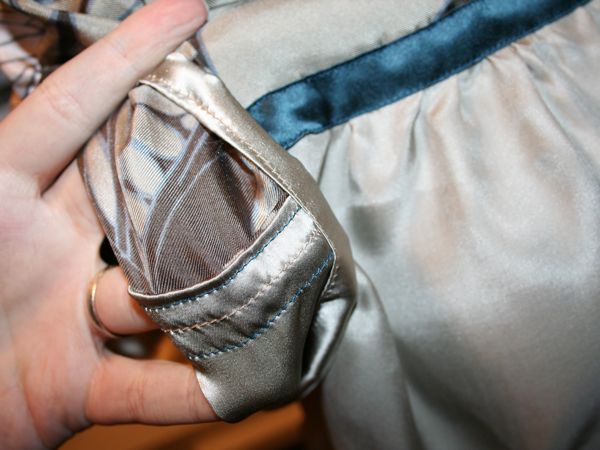
I chose to use the dull, crepe side of my silk charmeuse for the body of the blouse because the shiny side just looked too harsh and brassy next to the muted sheen on the silk twill yoke. And after looking at it a while, I actually think the wrong side looks classier, even more exensive for its subtle glow. Mark my words, crepe silk is an underrated fabric!
For the teal constrast strip I decided to take Patrones’s lead and use the shiny side – my life would be easier if this was a ribbon though!
My hips are a tad too big for the bottom of this boxy top, which is why you see all the pooling wrinkles around the waist, but for the sake of a few more weeks, I just can’t be bothered to alter up. At this point I’m much happier to alter the body than the garment.
Since this is silk and I learned the hard way years ago, all the seams here are French and the neck and sleeve hems are bound for a fray-free finish. I always use a method I picked up in a Burda magazine ages ago – Cut a bias strip 5cm wide, and press in half (hotdog-style) with the right sides out. On the right side of the garment, lay the cut edge of the folded strip along the cut edge of the garment and sew down the centre. Trim the excess, press, and fold the strip to the inside. From the inside, topstitch as close as possible to the folded edge of the bias strip. Et voila! A nice neat curved edge.
And in fact, the neck opening is really the only curved edge here, so it’s a perfect pattern to practise on silk charmeuse (satin) and French seams if you’re a little bit rusty and want a brush up before a bigger project (ahem, like that Marni blouse)!
I mentioned that this was the last project of 2009, and I can’t believe how much my looks have changed in a few short weeks. In the above photos from New Year’s Day, I’ve got my wig, glasses, and PICC line (the white bandage on my arm), and now I’ve got my pixie cut, contact lenses, and am free of all lines (the PICC line got infected and put me in hospital last weekend, but the upside is it got taken out). I’m even starting back to work tomorrow! Yayy!
And thank you all so much for your comments on the Marni blouse muslin – I really like the suggestions to make the flounce detachable, in particular. In the pattern, it’s sewn onto the front button placket (so I can just extend it and put buttonholes down that edge of the flounce and button through both layers), but also into the neck and shoulder seams. I don’t really want buttons there when it’s not being worn, but I think sewing hooks onto the flounce and having thread loops on those seams would be a fine compromise.
But then my neighbour Helen came over yesterday for a cuppa and our conversation turned towards fashion and now she’s got me thinking that the blouse doesn’t really work with the skirt pattern at all… The skirt is high waisted, and the flounce is too long for it and too big to pair with such a wide A-line skirt. So I think I need to head back to the drawing board with this partnership – maybe make trousers instead or choose a different, more slimline blouse pattern?
So in the meantime, I’ve finished my bra and pants, and I’m just waiting on a few notions to make the camisole, and I’ve instead started on the bottom partnership – the techno fabric skirt and sequin trompe l’oiel jersey top (using the Simplicity pattern).
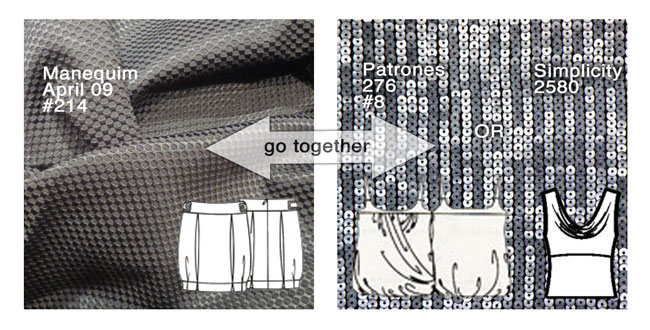
I’m loving the Manequim skirt pattern! Of course I’d fall in love with a magazine that’s so difficult to get…