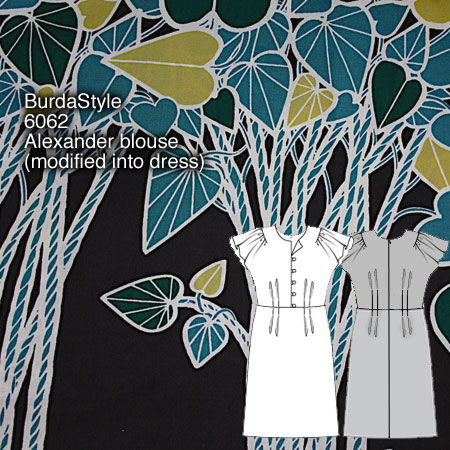
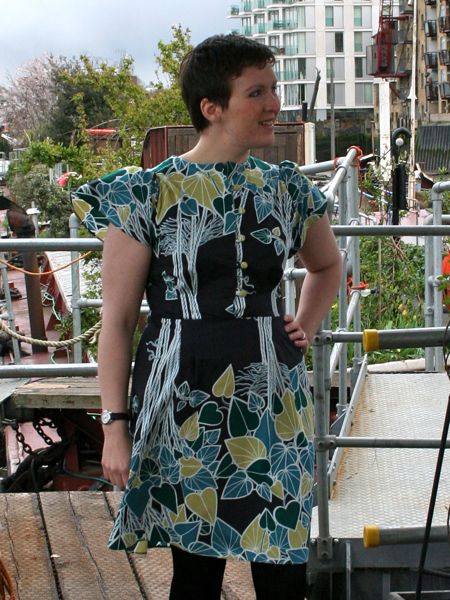
As soon as I saw BurdaStyle’s “Alexander” blouse I feel in love with the floaty gathered sleeves and the retro-styling, but I also knew this blouse was meant to be a dress!
I had some pretty IKEA “Josefin” fabric in my stash since last June that I’d bought for £3.99/m and was just waiting for the perfect pattern to come along. This seemed like a great match, and as a bonus, I probably only used a little over 2m of the 3 I bought here, so there’s enough left over for something else, too.
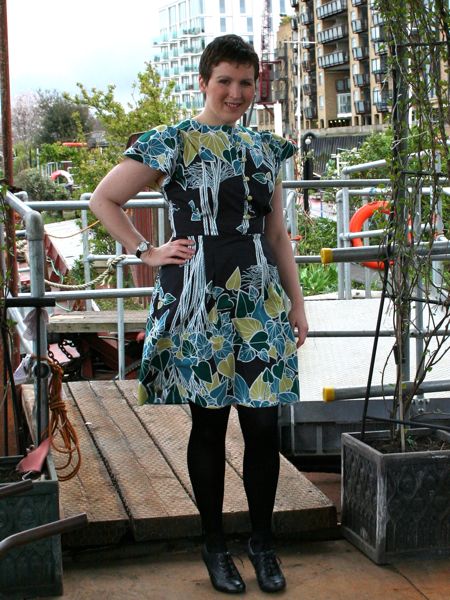
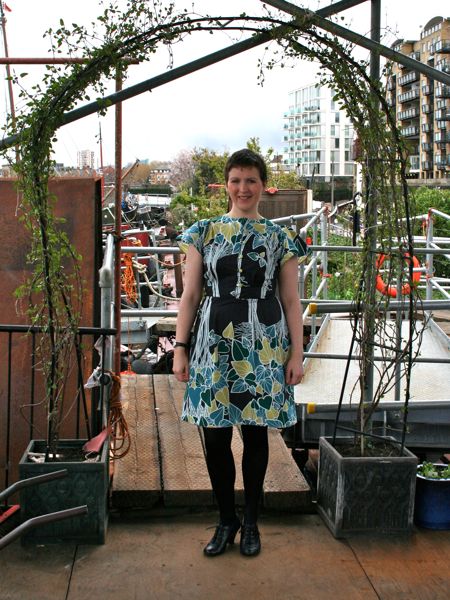
When I was in IKEA’s textiles section, I must’ve felt a thousand heavyweight upholstery prints before finding this lightweight cotton with a really cool, refreshing leaf/vine repeating motif. I also quite like that the leaves are cleverly designed to also be heart-shaped, but the black/white/green/teal/lime colourway stops it from being too “Valentine’s” (ugh).
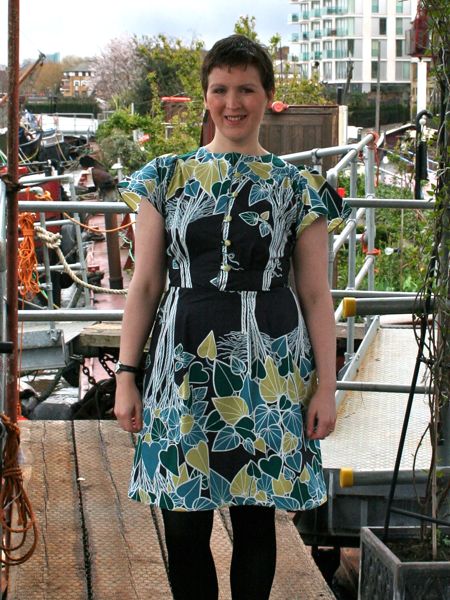
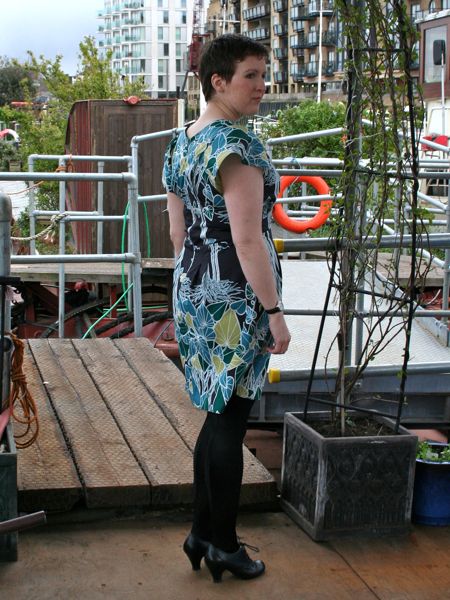
This fabric did pose a few layout challenges, however. I knew with such a bold repeating print that I’d have to pay close attention to get the leaves at the best places. Here I opted to have them lie at the shoulders/bust area in front and back and around the lower skirt, with the darker vine portions around the waist. I could’ve killed myself trying to line up the vines exactly at the waist seam, but I felt that was a bit too much work at the time, but looking back now, I kinda regret not doing that since the waistline is a bit visually jarring (or maybe I just need to buy a black belt).
I’d made it as the blouse the pattern intended first (read the other post for the grainline and design changes I did there first) but I followed through with my plans from before and made a few stylistic changes to turn this into the best possible dress:
- Decreased the facing widths by 3cm
- Shortened the waist by 5cm at the designated lines to bring the waist seam up to my natural waist
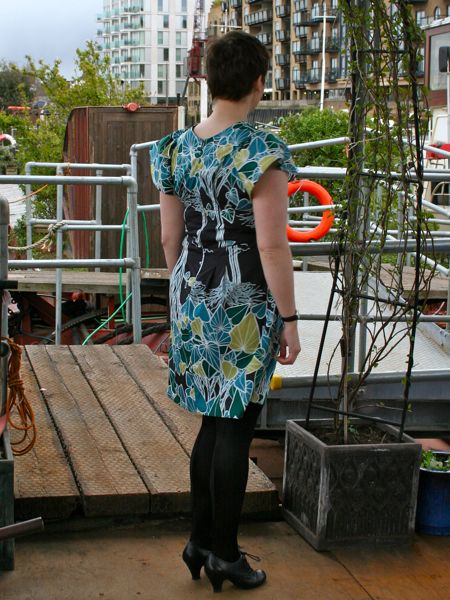
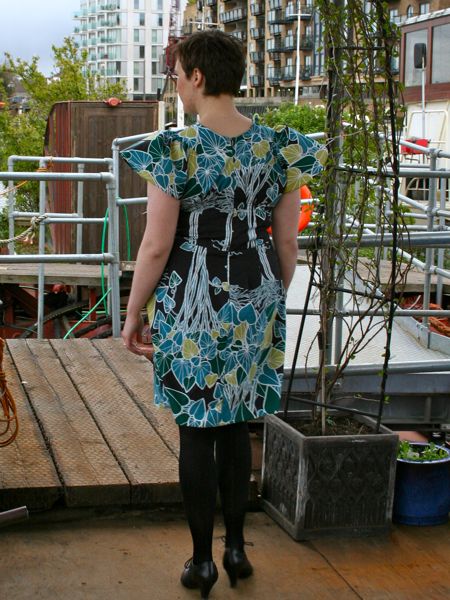
- Stitched the back pleats 10cm higher to create a slimmer back waistline
- Used an invisible zipper in the centre back seam and left the centre front buttons just as decoration
- Brought out my covered-button kit to make the centre front buttons all in the lime portions of the fabric
- Left off the peplum
For the skirt, you could use any basic A-line skirt or dress pattern with waist darts, but I used the skirt lining piece from BurdaStyle’s Heidi pattern because it was handy and it was the same front and back, which made things a bit simpler.
I first chopped the skirt pattern off at the marked waistline so my joining seam would be exactly at the waist, then I sewed up the side seams (leaving the back seam open to insert the invisible zipper near the end of the construction). I disregarded the pattern’s darts since I wanted to turn them into double pleats to mirror the top, so once the top was done and I was ready to connect the top and skirt together, I pinned the waist at the side seams, centre front, and centre back edges to make sure those were aligned, and then I pinned together the sections that I wanted to lie flat. Since the pleats were already marked and sewn on the top, I was then left with a bubble of fabric on the skirt around the pleat area. I then just kinda eyeballed and pinched the skirt fabric to make the skirt’s pleats match up with the top’s, stitched these in place from the wrong side, then sewed the waist seam.
If you’re mathematically-inclined like my friend Sharon, then you might prefer to work out the pleat placement on the pattern piece before sewing, but that just seemed like too much measuring for me when I could visualise an easier way to do it!
The only other change came when I was getting James to pin the centre back seam in preparation to insert the invisible zipper – when pinned with the usual 5/8” seam allowance, both the upper front and back were a bit too big and blousy (if you are ahem rather blousy, then this would be perfect for you as-is!), so I had him pull in the centre back seam in the upper back by about 2” on both sides and the front and back both magically fixed themselves. So I inserted the zipper with a curvy, variable seam allowance (2” at the upper back fading to 5/8” at the waist and below) which worked great.
I’m happy to report that I got lots of compliments on this dress when I wore it to BurdaStyle’s London event on Wednesday night, and I even stumped both Carol and Nora on the “guess which pattern this dress is?” front (though both admit Alden is the real pro at identifying patterns in real life!), bwahaha! There was a roving photographer there so there will probably be a gallery up at some point where you can see more of the dress, too.
I know I’m going to inadvertantly be really dim and forget someone here, but it was SO SO SO MUCH FUN to chat with all the sewing and fashion people collected there, like Nadia, Houkje, Susannah, Zoe of Patrones benefactor fame, Clare from Selvedge magazine, the girls from UK Stylelist, the London College of Fashion crowd, Buzz from All the Fun of the Fair, Amy from the East London BurdaStyle Sewing Club (which I’ve now joined), Helene, and the aforementioned Carol and Nora from BurdaStyle. We really, really need to do this again. Weird egg pod toilets included.