There’s been only slow and steady progress on my draped suit (Burda September 2011 #126 and 127) this week as there’s been little time to sew, but I did get a few hours of “me time” in on Sunday evening after my insulation work was done for the day.

Those few hours were enough for me to finish the entire shell of the jacket and skirt, but I needed a clear surface to cut out the lining fabric, so that was delayed until last evening (my running group was cancelled this week, freeing up an evening). Since the wool suiting has stretch, I didn’t want to negate the benefits of that with a non-stretch lining, so I pulled out one of the few stretch wovens in my stash – a blisteringly hot pink stretch satin I’d bought from Fabric.com last year (and came across in my mom’s suitcase before the wedding). Despite it being polyester, it actually feels wonderful and it was worth the price to be such a high quality lining.
I’d already cut into it for the pocket linings of the jacket and skirt, but when I laid it out full, I realised exactly how narrow it was, and that there was no way I could fit all the jacket and skirt pieces out of the 1.5 yards I had. So at this point I resigned myself to having mixed linings. Strangely, home sewers tend to avoid this, but every time I’ve done this in the past, I’ve gotten tons of compliments on how “designer” it looks! I thought about where I’d need the stretch the most – the skirt and the sleeve linings, and cut those in the pink satin, then had a rummage through my bag o’linings for something suitable to line the body of the jacket. I had to reject a few outright (not enough fabric, too white, too red, not slippery enough, etc) and settled on some dark green Cupro that’s been in my stash for years. I know I used it to line my faux fur jacket, so it’s been there at least three years!
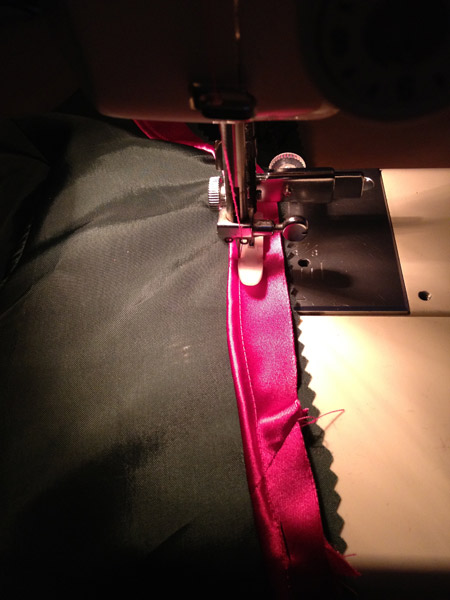
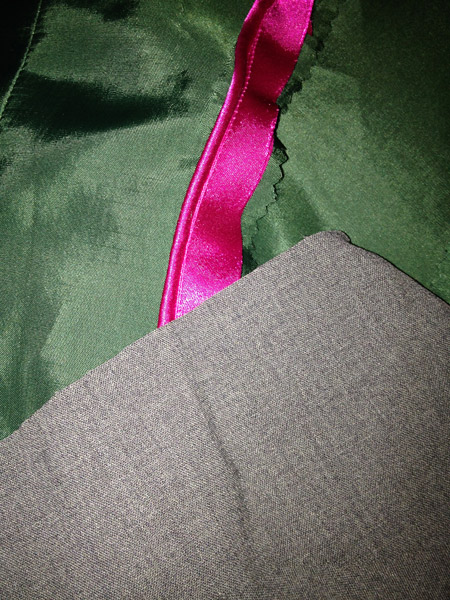
Happily there was plenty enough there, it feels nice on the skin, and didn’t look awful with the grey and hot pink. As I was sewing together all the green pieces, it occurred to me that it would really tie the two lining fabrics together nicely if I added a pink piped edge between the green lining and the front facings on the inside. It’d make the green/pink lining look more intentional, give a splash of colour when I open the jacket, and because the facings go fairly far inside, a bit of piping wouldn’t affect the draped edge.
I had just enough pink satin leftover to make a length of piping long enough for both edges of the front lining, and I basted these in place to make my life a bit easier when I go to join the lining to the jacket later this week.
(The green looks quite black here, but that’s just down to how dark my sewing room is at the moment!)
Funny, but constructing and basting the hot pink piping really took me back to the first time I’d ever sewn piping, which was also hot pink, paired with green – my world-famous Glastonbury dress!
So by my count, what’s left to do on this suit:
- Construct and attach the sleeve linings to the rest of the lining
- Interface, baste, and hand stitch the jacket hem
- Attach the lining to the jacket around the front facings and neck edge
- Hand stitch the lining hem to the jacket hem
- Anchor the lining to the seam allowances at the underarm
- Hand stitch the sleeve lining hem to the sleeve facing
- Construct the skirt lining and baste to the skirt at the top edge
- Attach the waistband
- Baste and hand stitch the skirt hem
- Machine-hem the skirt lining
- Hand stitch the lining to the zipper tape inside
- Attach two large snaps to the jacket opening
It looks like a lot listed out like that, but in my mind, it definitely only feels like another few evenings to completion!
Even though this suit is dragging on a bit for me and I’m itching to move on to something else, I’ve already decided to handsew the hems rather than bag the lining, as I always think it gives a nicer edge when I take the extra time. We’re off to Sheffield this weekend to visit some friends, so I’m hoping I’ll have some of this suit at a point where I can work on it in the car. Hand sewing in the car – it’ll be like our French road trip all over again!