Three days before we left for Paris, I got it into my head that I should sew this cape! And then I ended up not taking it along anyway, but for the record, I did finish it in time…
The pattern is the FibreMood Delma Cape, from the same Essentials issue as the Lara sweatshirt and the million teeshirts I’ve sewn already – or if you don’t have the magazine, you can buy the pdf individually in the link above.
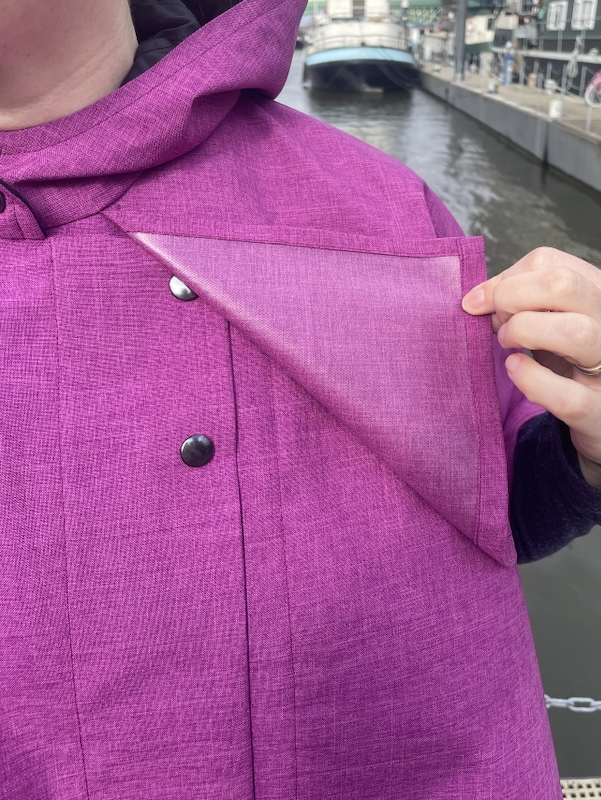
I’ve had some purple breathable waterproof fabric in my sportswear stash for a LONG time. I can’t recall the name of the US-based activewear fabric shop I bought it from but I know they went out of business at least a decade ago. It’s got a tight woven right side with a slight crosshatch texture, and a thin plastic coating fused to the wrong side to make it waterproof. This may sound similar to the waterproof wool I used on my Carly jacket, but this is nowhere near as rubbery or sticky as that wool’s backing.
I think I probably bought 2.5 or 3yd, but I was able to barely squeeze the full Delma into this yardage by just being a bit smarter with my layout (and lining the hood with a different fabric).
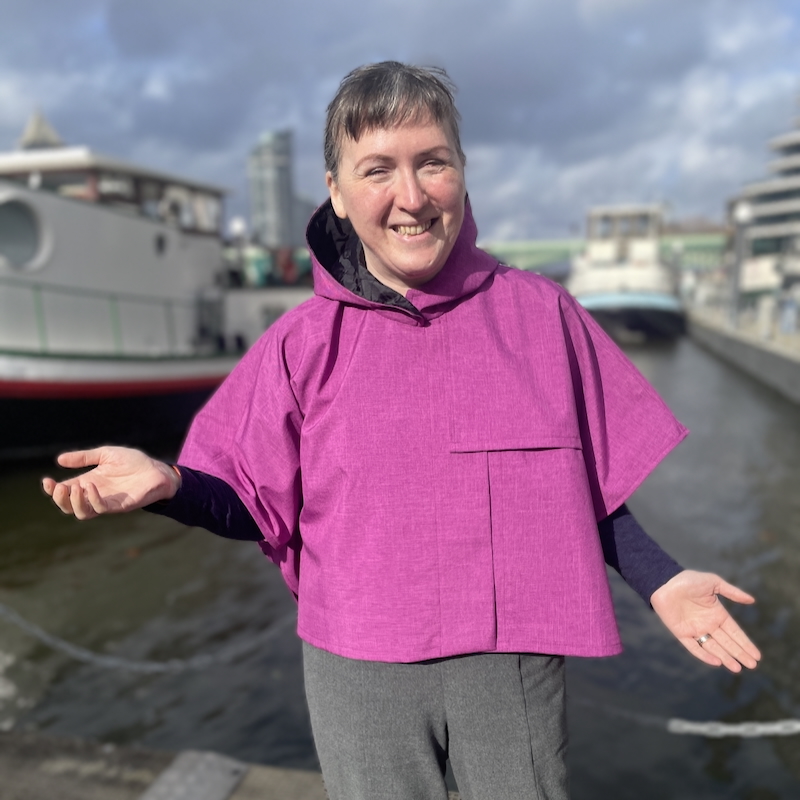
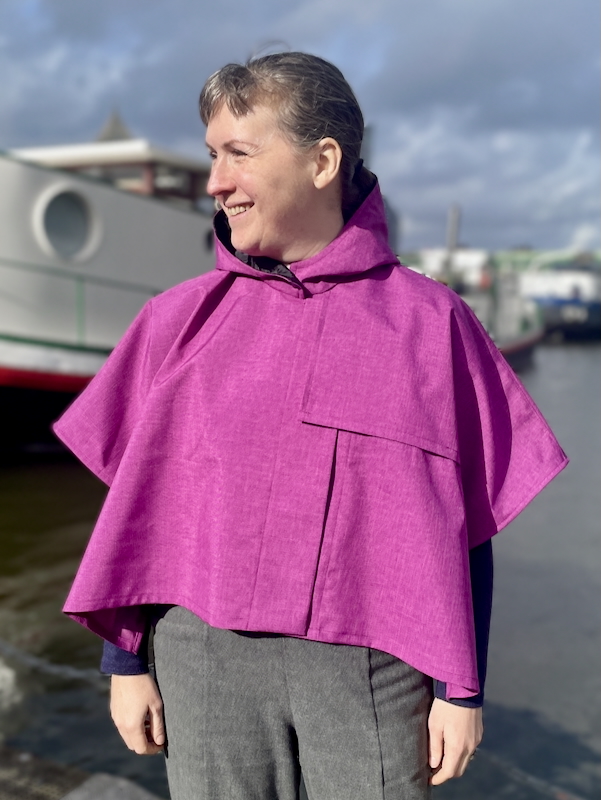
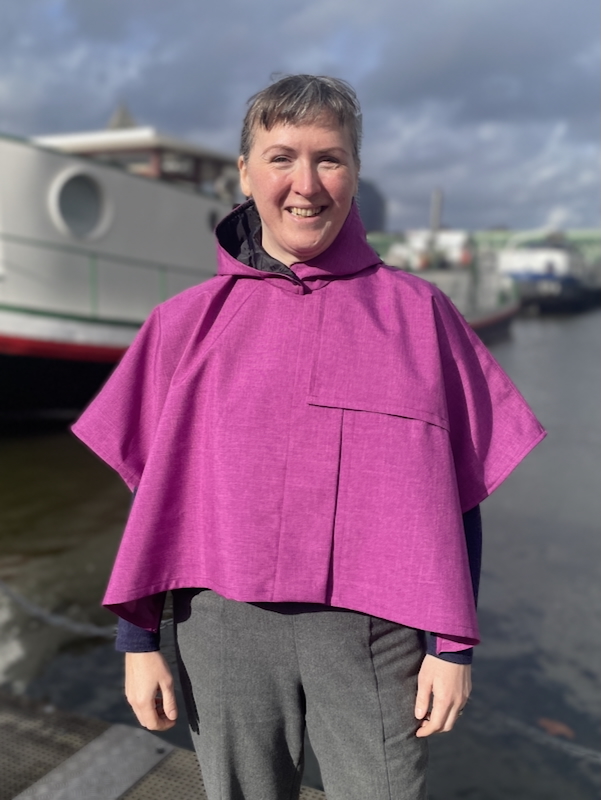
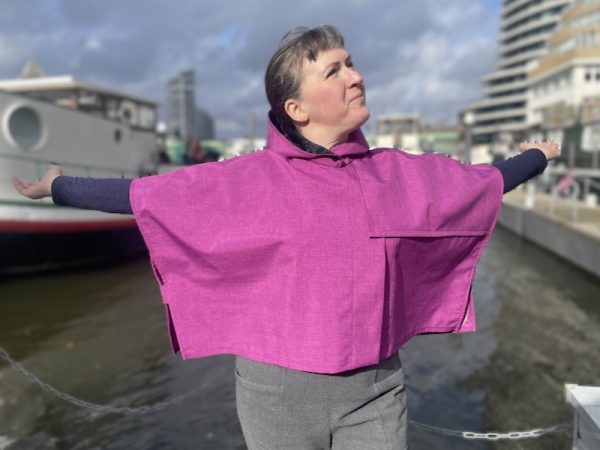
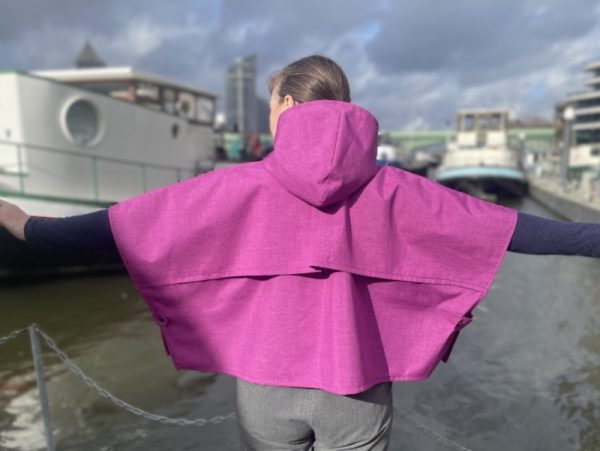
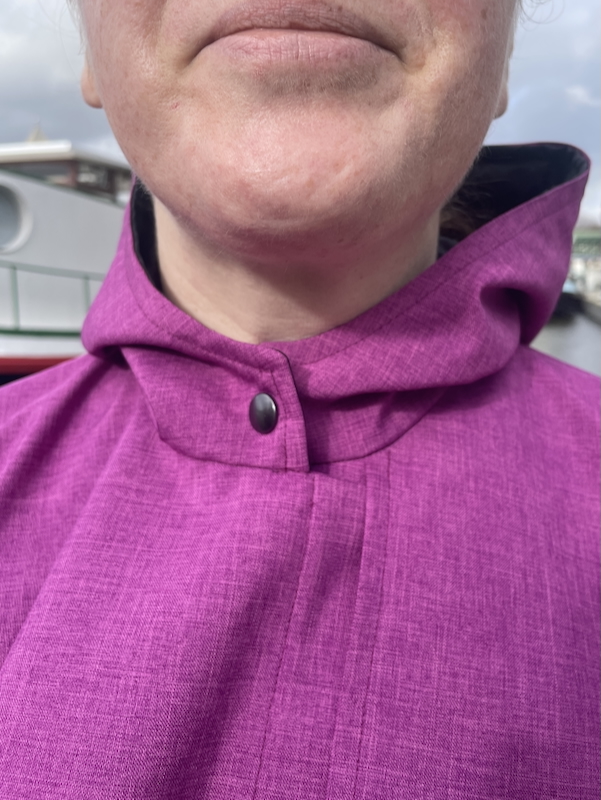
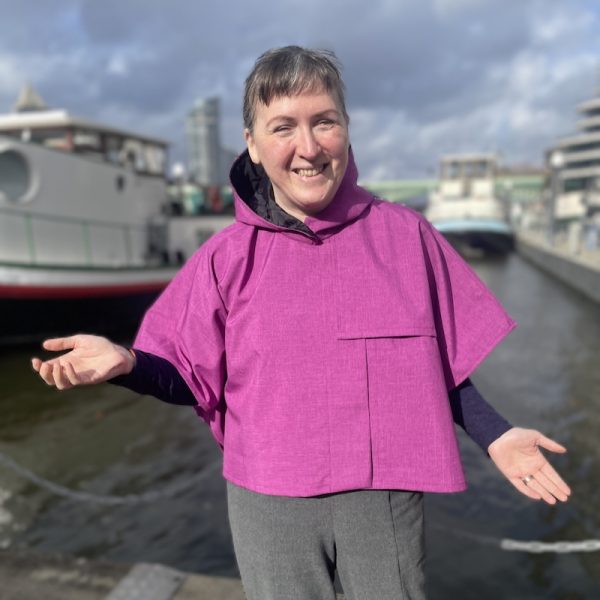
The pattern is a really cool design – oversized and drapey with storm flaps in the front and back, and no side seams (just a button flap on each side to keep the “sleeves” from blowing off your shoulders). There’s a choice of either a traditional collar and stand, or a hood. I chose the latter because I find them more useful for wet weather, personally.
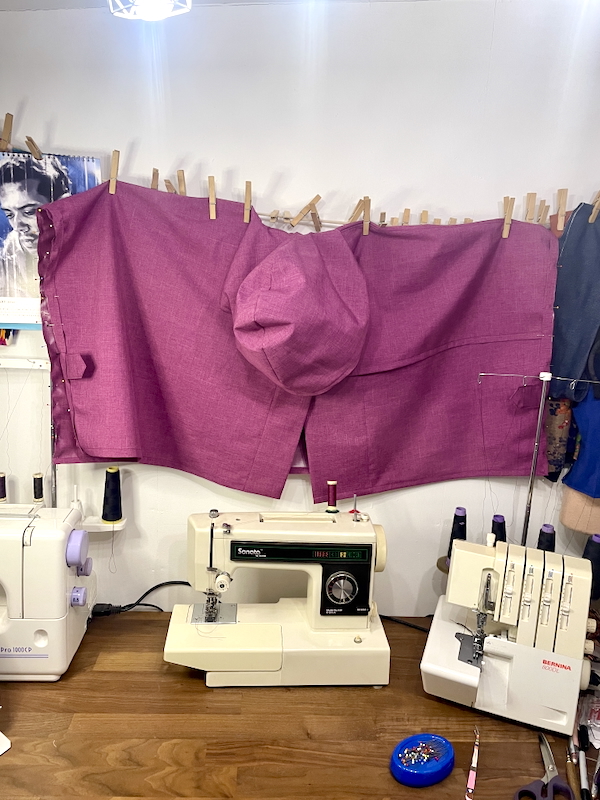
Because it’s so oversized there’s only S, M & L, and I had already traced out a Medium at some point in 2024 (and approximated the pieces onto this fabric to even see if it would fit!) so I could just cut with confidence. Because of the asymmetric fronts and storm flap, half of the layout is cut with the fabric folded, then unfolded to cut the rest as single layer.
The problem with wanting to sew something like this, in a technical fabric I’ve not sewn before, is that there were a lot of questions, like: Can it take a press? Will I need to use tissue paper for every seam? And I’ll need to go buy matching thread, too. Three days before we leave for Paris…
As it turns out, yes it CAN take a press, and fuse interfacing (with a press cloth) and the backing glides rather than sticks to the machine! Which was excellent news since there’s a TON of pressing in this pattern! So this pattern could’ve been a much bigger headache had the backing been rubbery instead of plasticky!
And it was absolutely worth me cycling up to buy matching thread (my first non-ebike cycling yayyy!!), as there was a lot of topstitching in this pattern, especially finishing all the rectangle edges.
The pattern instructions say to press in “to the V-mark” quite a bit but I double checked and the pattern doesn’t have a bunch of these that are referenced – but I worked out that I think they mean to mark the seam line/edge with a V and then press to that. Other than that, everything was super clear and straighforward – it’s just a lot of finishing rectangles and seaming them together!
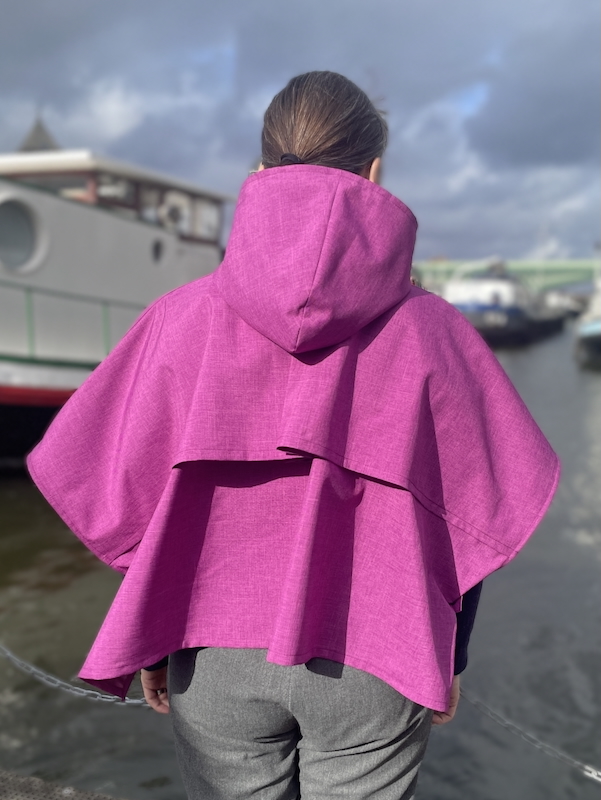
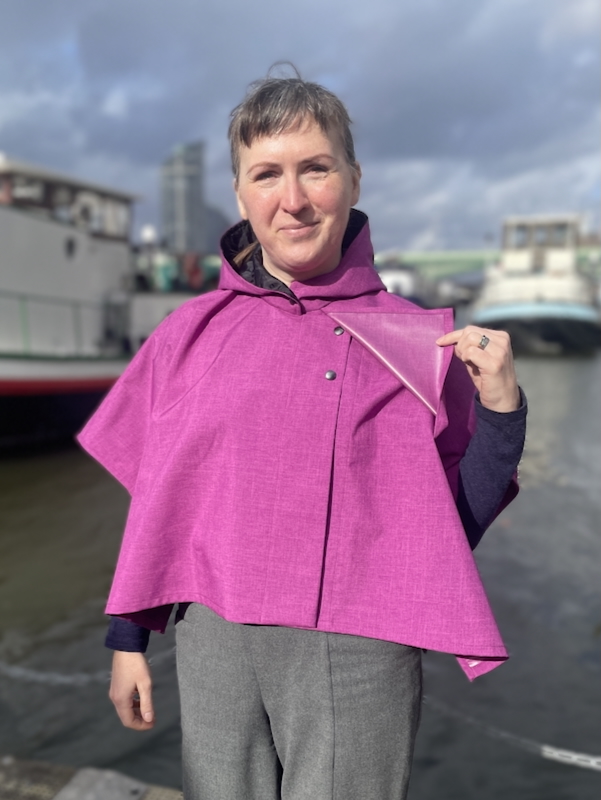
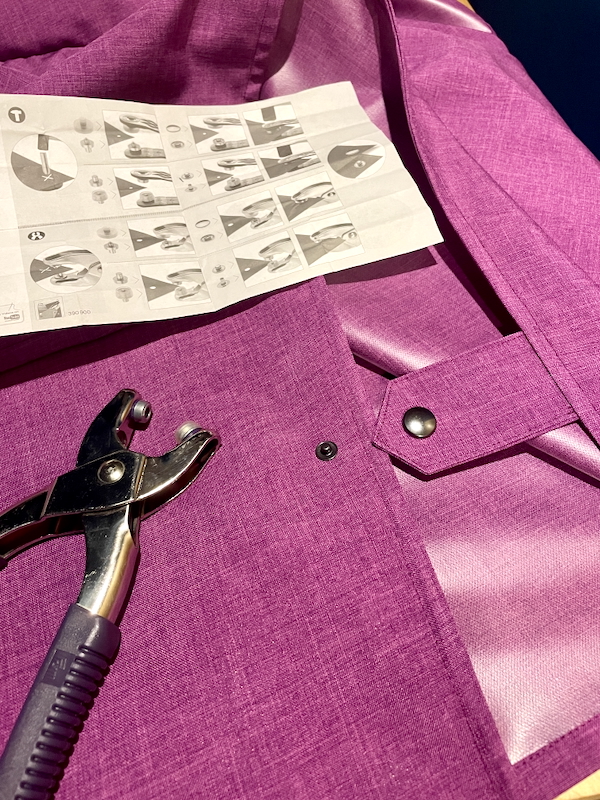
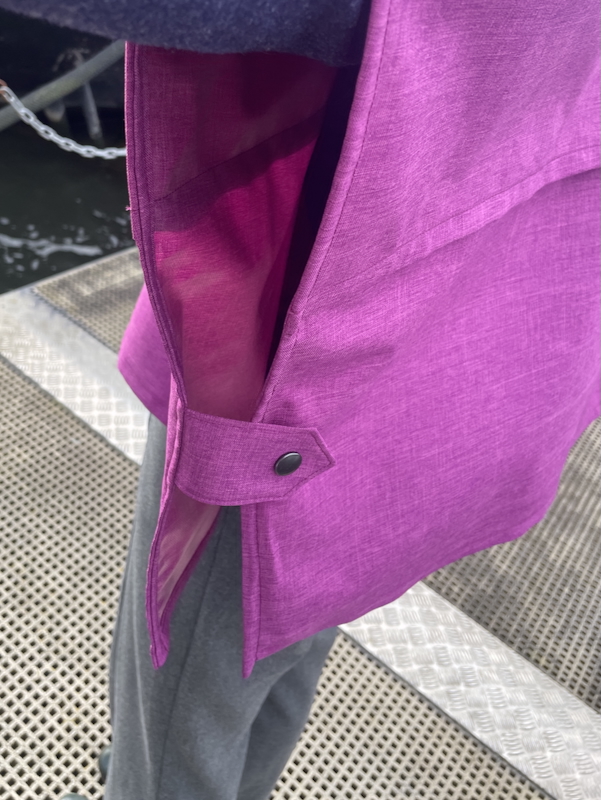
The pattern calls for buttons and buttonholes but I thought snaps would look nicer here, so I used Prym anorak poppa snaps in gunmetal grey. There are two on the side “seam” tabs, one on the hood closure, and two to close the upper front, nicely hidden under the gun flap.
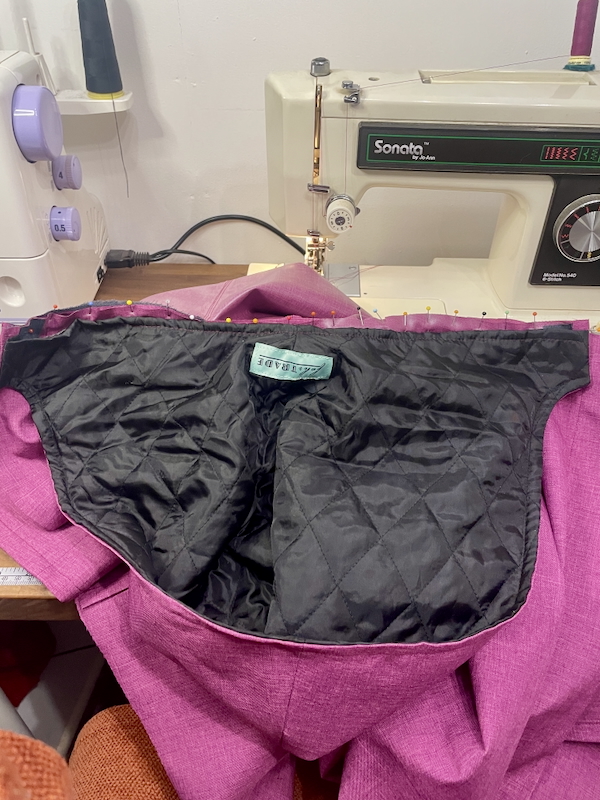
I opted to line the hood in some of my pre-quilted black lining fabric (leftover from my reflective winter cycling jacket I still wear all the time!) as I didn’t want just a raw plastic hood inside. I always like the look of a lined hood if I can find the right scraps to coordinate.
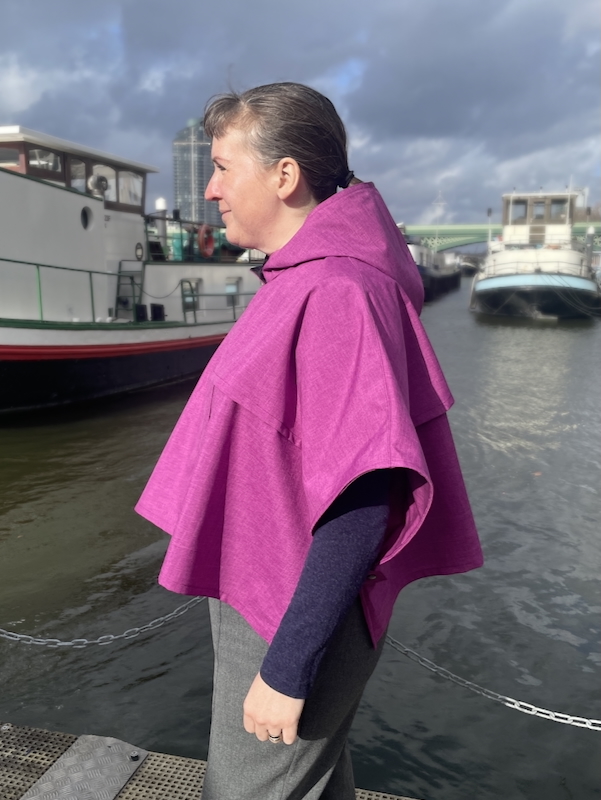
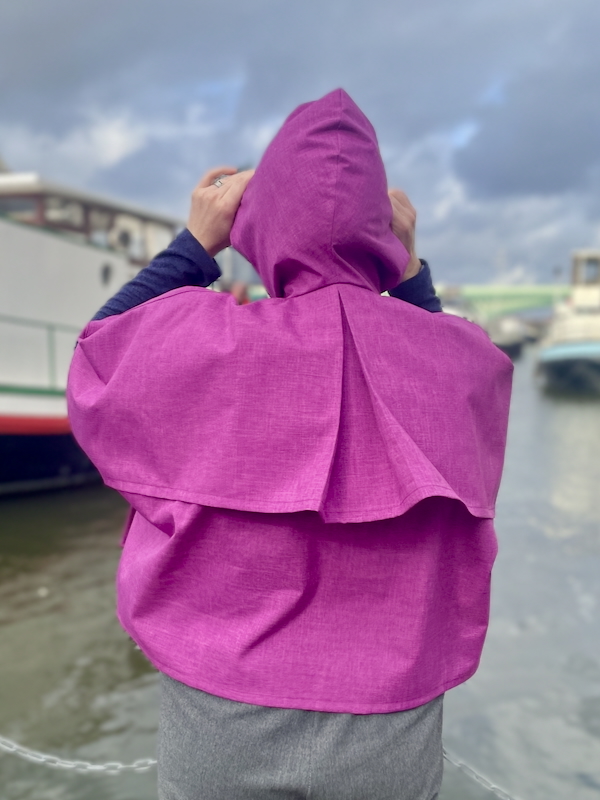
The hood falls back off my head a bit, leaving my face exposed to the elements, which is a shame. If I ever make it again, I’d alter the hood shape a bit to have more room in the back of the head to fix it. I thought about attaching a stiff brim extension (and might still someday) as this hood really does leave my face exposed.
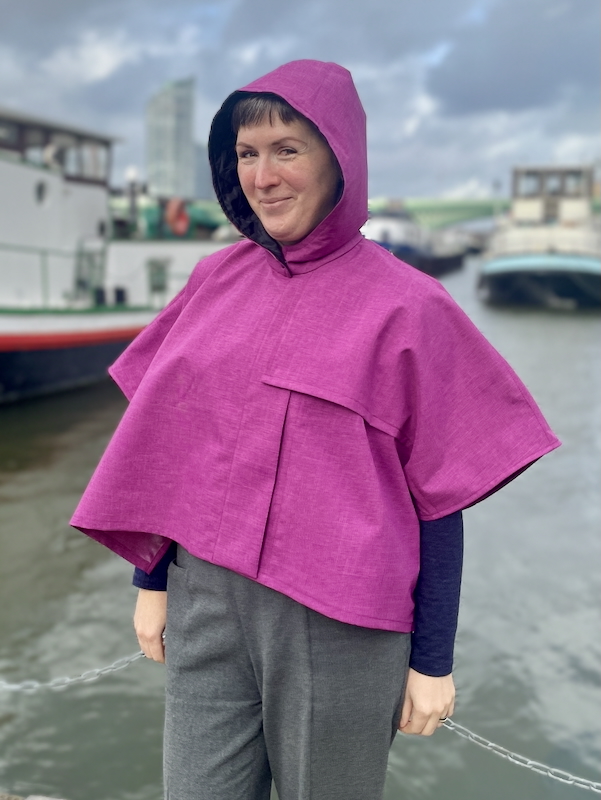
I could definitely fit a big jacket or fleece under it, but I was trying to pack light and I’ve already got a warmer waterproof wool jacket I sewed last summer so I brought that to Paris instead. The only downside to this cape is no side seams means no pockets! But whatever I wear underneath it can do that heavy lifting of carrying my phone and mask.

This is a super cute design for wet summer weather (hello England!) and I’m so pleased I found a perfect use for this waterproof fabric that’s been in my stash for so long! I know I’m going to wear this a lot this summer!
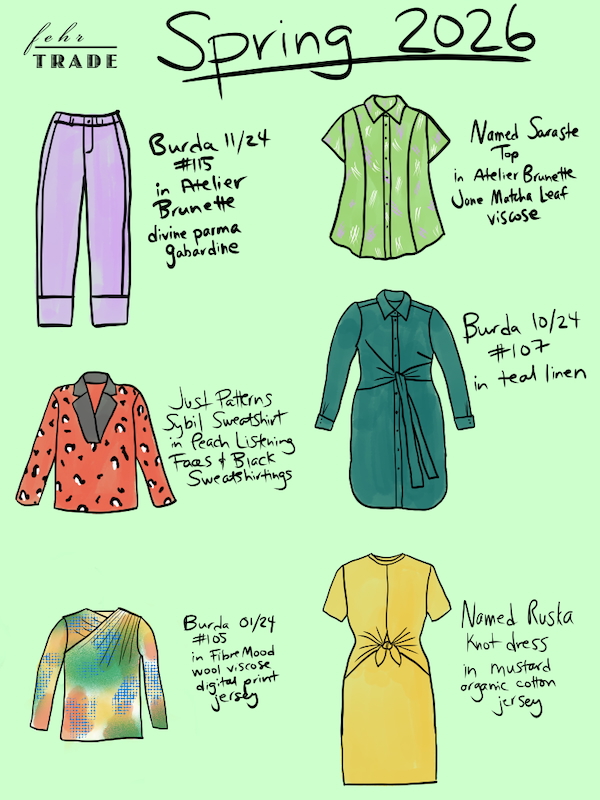
And with Paris acting as a nice break point between winter and spring sewing, I put together a little plan that incorporates some of the fabrics I bought there too!
Which are you most looking forward to seeing?