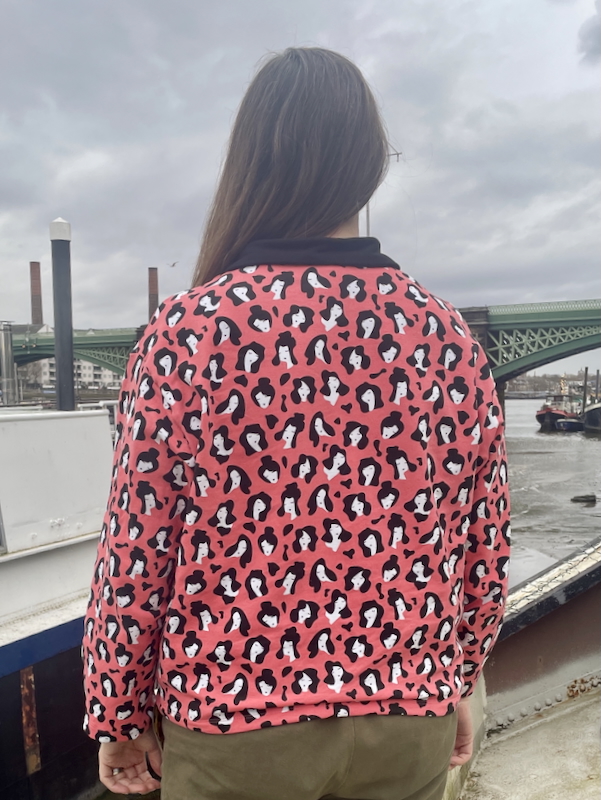
I saw a couple of other people’s versions of the Just Patterns Sybil Sweatshirt come across my dash and I really loved the unique styling of the notched collar on a ponte/sweatshirt top. So I waited, and pounced when there was a storewide sale at the end of last year, and combined that with a sale on large format printing, too!
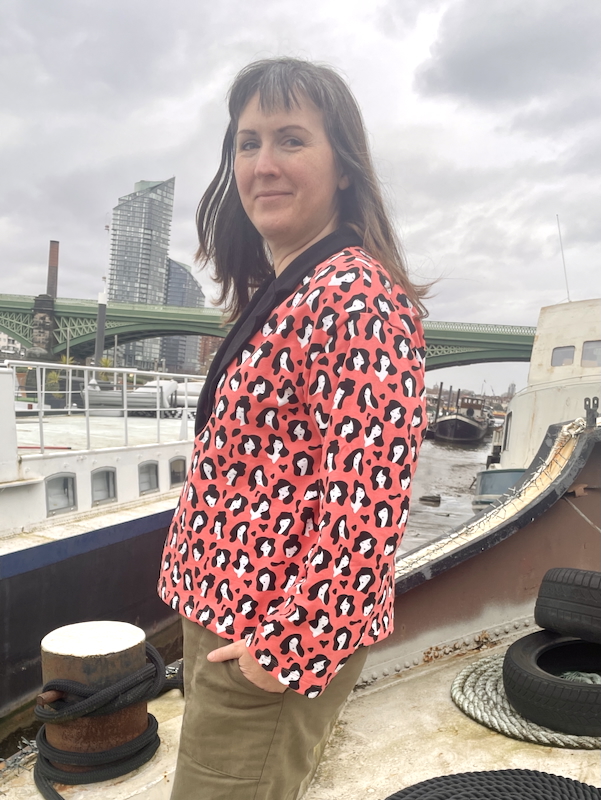
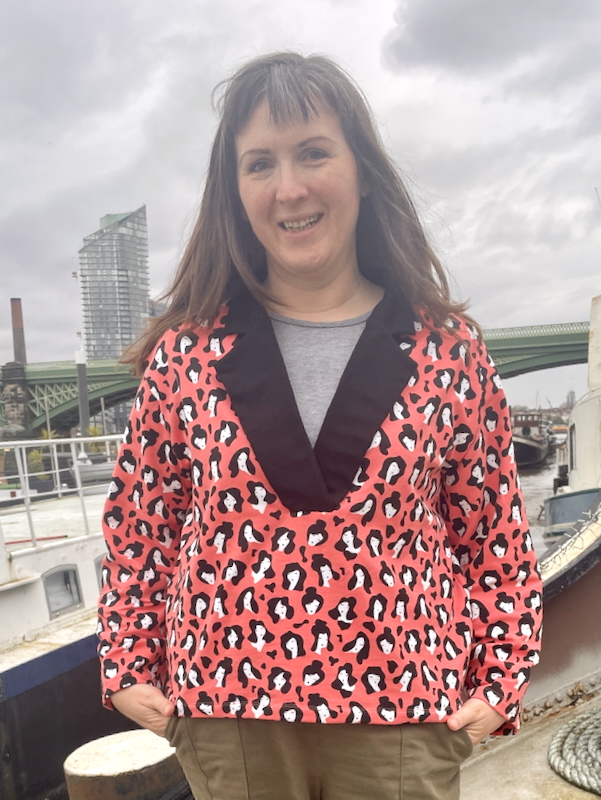
I’m glad I read other people’s comments before sewing this, because literally everyone says this is super oversized! I went down 1-2 sizes to a 42 instead, and tbh, I could’ve sized down even further because this still feels too big (especially in the sleeves and hips).
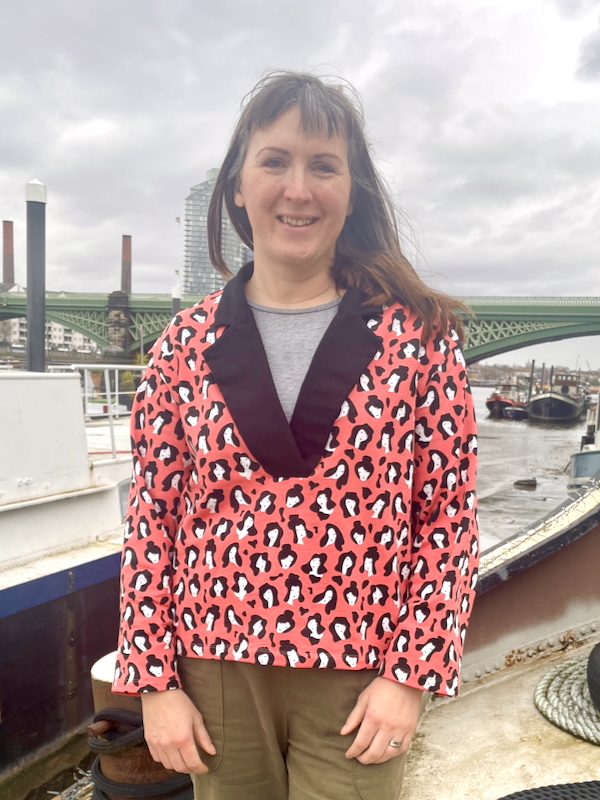
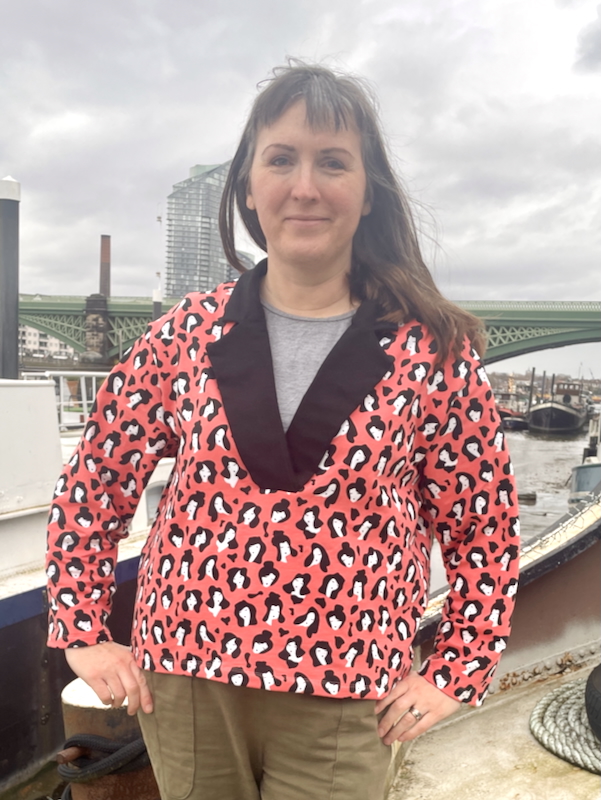
I used the “Peach Listening Face” brushed back sweatshirting I bought from Fabrics Galore in their end of year 50% off sale – my 1.5m was a bargainous £12 total! There was even some leftover because I opted to cut the collar from leftover black sweatshirting (also from Fabrics Galore) that I had leftover from my Lestat looming head sweatshirt. I love that this print looks like a leopard print from a distance, but the closer you get, you realise it’s a bunch of female faces!
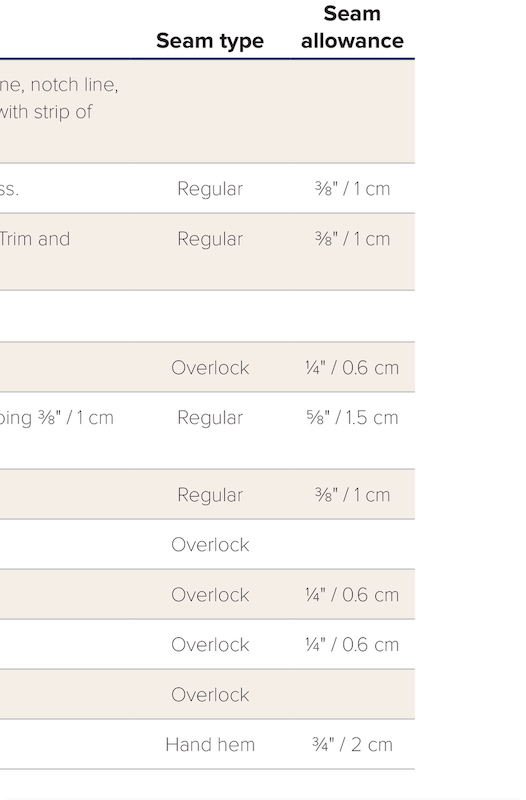
This is my first time using Just Patterns and the drafting was good, and the instructions are clearly illustrated. But whyyyyyyyyy do the seam allowances change for literally every step?? 😩😵💫 This needlessly turns a really simple pattern into one that requires a ton of mental concentration. Just because the industry might have variable seam allowances doesn’t mean home sewers want to!!
Also the under collar & upper collar pieces are identical? Why are there separate pattern pieces for them?? This is just a baffling choice, especially as it means everyone has to print more pages… I could understand it if the undercollar was slightly smaller, to account for the turn of cloth, but nope – mine are exactly the same.
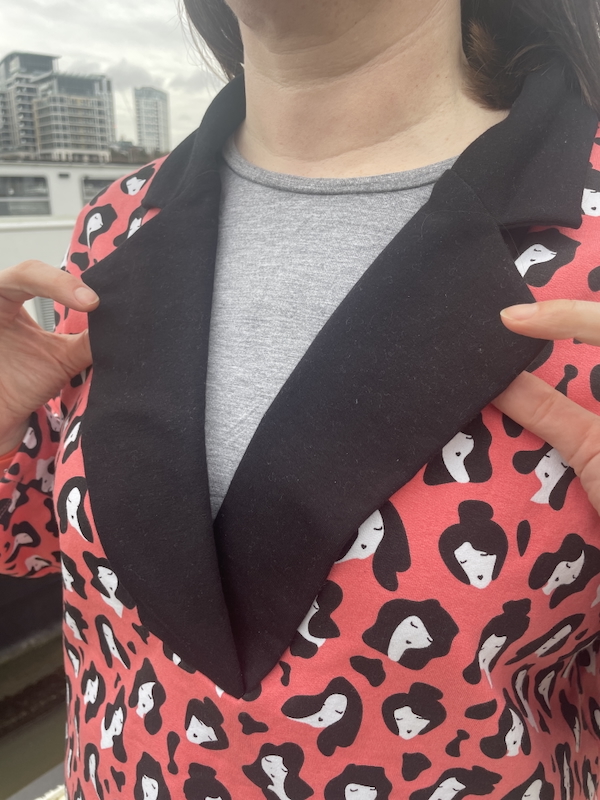
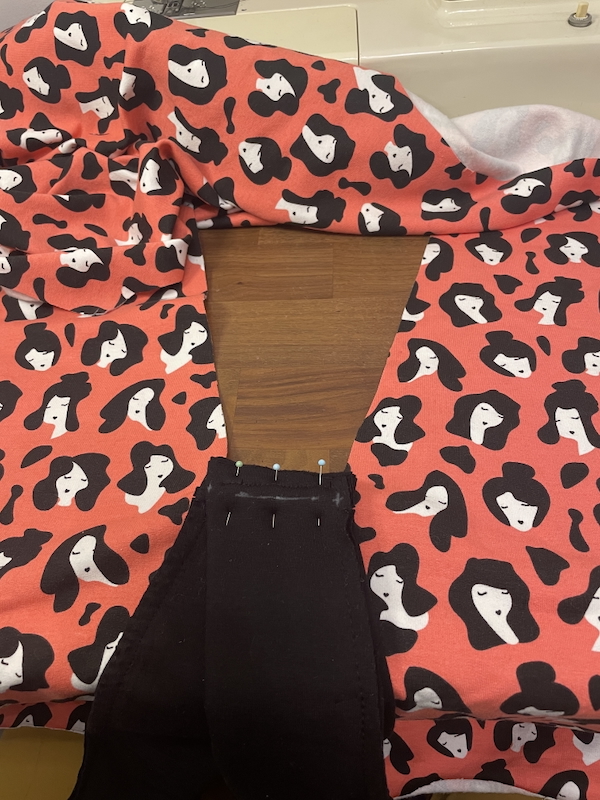
Another gripe is that when you’re basting the bottom edge of the collar together it’s a whopping EIGHT layers of sweatshirting to sew through! My fabric is even on the thinner side thankfully, but my god. Add a ninth layer when attaching it to the Front and my machine could barely sew through it all, even with a walking foot. Are they literally only testing this using industrial machines or something?
After the collar is inserted, the rest of the sweatshirt is thankfully a no brainer – the sleeves insert nicely (no excess ease! yay!), which again, tells me it’s been drafted well. The sleeves are a little wide at the wrists so I might take them in later if they annoy me and catch on things. Or even unpick the coverstitching and just attach a black cuff to it instead…
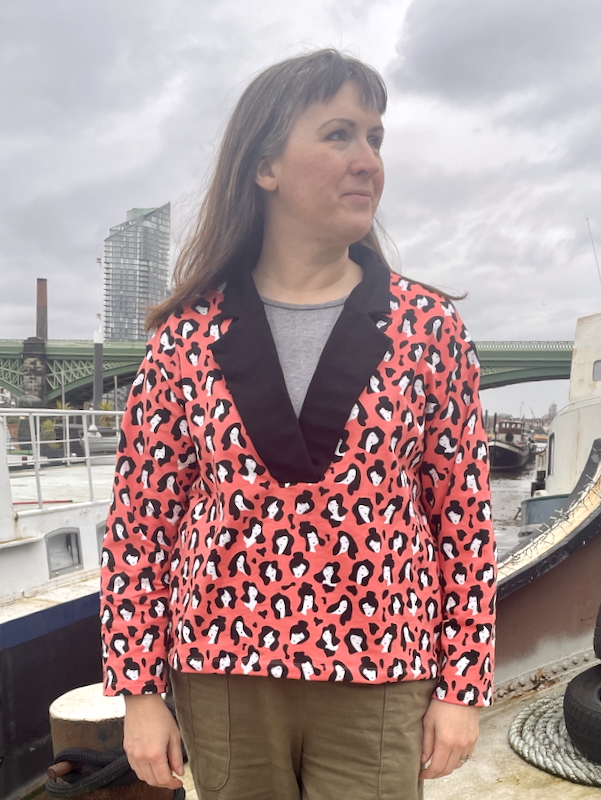
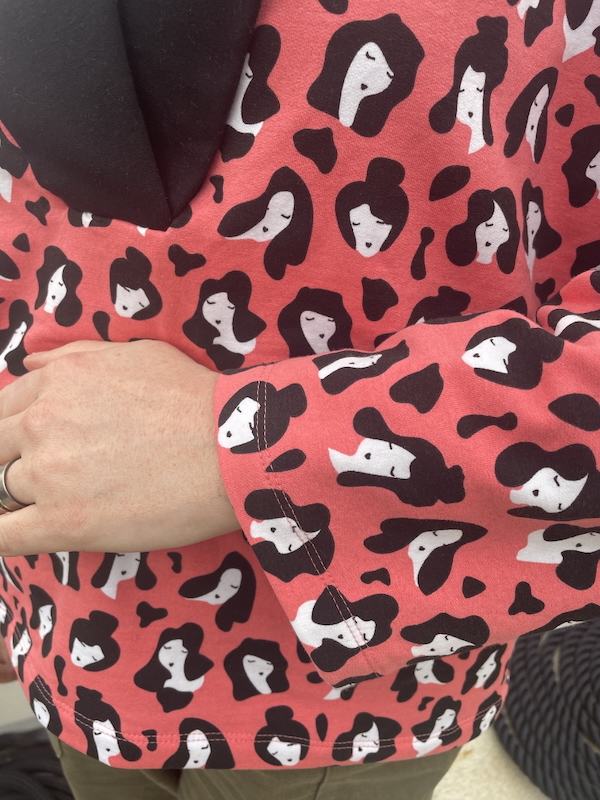
The instructions say to blind hem the sleeve & body hem, but… no. I used my coverstitch machine because it’s a freaking sweatshirt!?! Even a twin needle or a machine zigzag would be a more robust finish.
Because the neckline is so low, it needs to have a tee or cami worn underneath. So I feel like I need to choose my under layer carefully to coordinate with the sweatshirt colours… Which kinda limits the wearability in my wardrobe.
This actually sat in my sewing room awaiting hems for quite a few days, and even longer after it was finished and awaiting a photoshoot. I didn’t find this a particularly enjoyable garment to sew, which I think is bleeding into the finished sweatshirt right now. I like the finished top, but I don’t love it. I’m hoping that might change as I wear it more.
But this was the first of my Spring 2026 sewing plan, done!
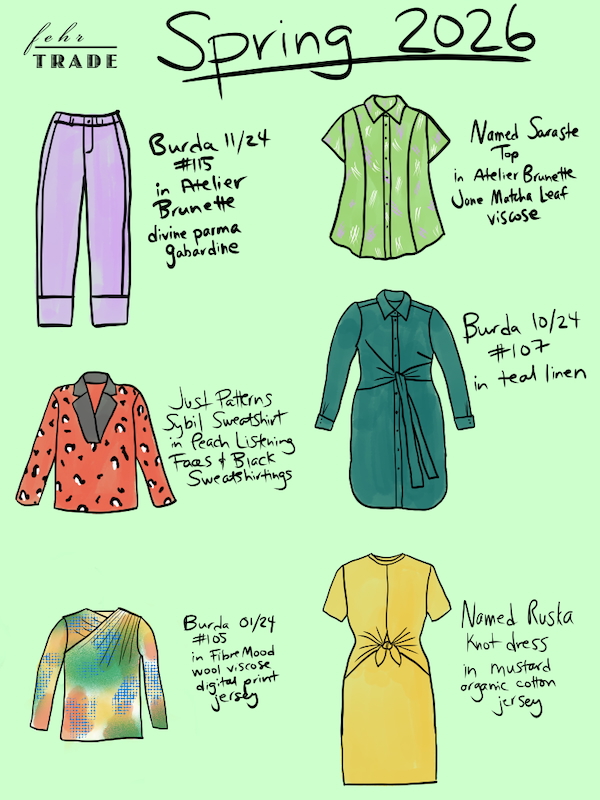
Which do you think I”m sewing right now (no cheating if you’ve been watching my Instagram Stories!)?