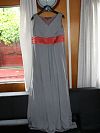
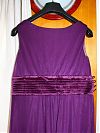
Both bridesmaids dresses for my September wedding are now finished! Since I’m sewing both of these plus my own gown, I stipulated that these had to be knit so that I could sew them early and my girls could feel free to gain or lose a few pounds without too much last-minute alterations hassle.
To refresh your memory, the three of us chose the Gant exclusive design dress from the Sept 08 Burda magazine:
The previous posts about these dresses spanned over a year (from our pre-illness, original wedding date), so to help you find them, here’s a handy list:
- Choosing the pattern
- Going fabric shopping and choosing their colours
- Tackling those pleated cummerbunds
- Finishing the first dress
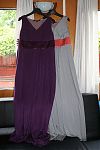
Here are both dresses together, so you can see how nicely their colours will go together on the day:
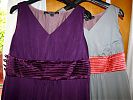
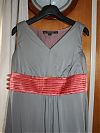
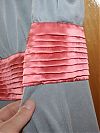
Here’s G’s dress, in silver silk jersey with salmon silk satin (charmeuse) cummerband, lined in the same mauve lingerie tricot as P’s dress:
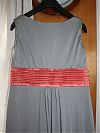
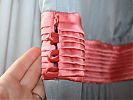
Here’s a detail shot of her button loops and the other side of the cummerbund where you can see there’s no side seam. The salmon colour is most accurate in these two photos – it had a tendency to go HOT PINK in some of the shots, but it’s really not!
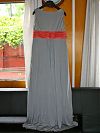
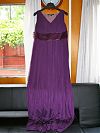
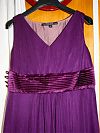
You’ve already seen the details of P’s dress, but here’s some full length views of hers:
Once again, I apologise for the hanger photos, but these dresses won’t fit onto my dressform with her annoying unsquishable bosom, and the girls aren’t available with hair and makeup until the big day, so you’ll have to settle for these pretty shapeless forms on a hanger until then. These were only on their hangers for the photos, then went right back to being laid flat – with the sheer weight of the silk jersey skirts on them, I don’t want to risk distorting the bodice by hanging them. But trust me when I say they look really nice on them! And considering that the fabric bill for these came under £100, I don’t think we’ve done too badly at all!
Since P and G have very similar body types, I ended up doing almost exactly the same alterations for their dresses, even though they had their muslin fittings independently.
- Cut the front bodice on the fold, and raised the point of the V neckline to 9cm
- Took 3cm off the bottom of the bodice (front and back) to raise up the cummerbund
- Raised the armscye scoop (front and back) by 3cm at the underarm with a bit more added to the front scoop so that their bras won’t show
- Omitted the invisible zipper called for in the pattern and instead opted for four 11mm satin-covered buttons and button loops on the cummerbund (the bodice and skirt are stretchy enough that they can get them on over their heads without those seams needing to be open).
- A 5’9”, P needed the full length of the skirt, but G (about 5’6”?) had me take about 4 inches off the hem
- My only stylistic changes were to omit the side seam on the cummerbund, and to increase the number of pleats to 8, so it would look a bit more full
So these dresses are put aside now until their final fitting shortly before the wedding, when they’ll be hemmed and the buttons sewn on while the girls are in their final shoes and underwear/shapewear/whatever (the tiny satin-covered buttons are in little baggies pinned to the dress lining so they won’t get lost!). And maybe if I play my cards right I can farm those duties off to my mom or sister-in-law, who are also handy with a needle and thread!
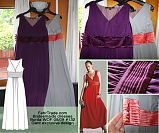
And finally, here’s the composite view I made for the PR Formalwear Contest.
Winning their Lingerie Contest makes me ineligible to compete in this one, so I treated it more as a supportive Sew Along to keep me on my time schedule, and it worked! I allotted May and June to sewing these dresses, and I finished with only a week to spare! Let’s hope I can similarly stay on schedule when I go to start on my gown in July…


