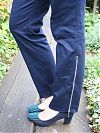
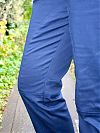
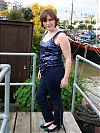
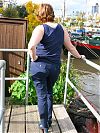
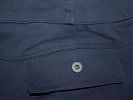
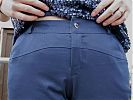
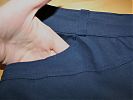
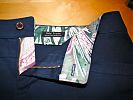
Jacquie made these trousers as part of her recent wardrobe collection (she’s “dingyadi” on PR) and I instantly knew I had to make them, too. Like her, I was put off by how skin-tight these looked on the Burda model in the magazine, but in real life, they fit really nicely! Unlike her, I left off the front patch pockets, though, as I figured there was enough going on everywhere else!
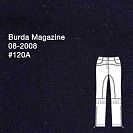
They’re from Burda magazine 08/2008 #120A:
(The navy matte sequin top is from Express and the shoes are United Nude, in case you were wondering…)
They’re great trousers, but there’s just so many freaking pieces, omg! And the topstitching!!
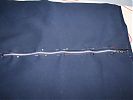
Take the front leg, for instance. On a normal pair of trousers, it’s one piece (maybe three if you have a pocket). On these, the front leg is comprised of three pieces before you even get into the pockets (so 6 in total for mine, or 9 if you chose View B with the added pouch pockets with the flap!). There’s a scooped pattern piece at the inner thigh in the front and back, and lots of horizontal topstitching across the knees in addition to topstitching pretty much every seam of the trousers, too.
I don’t normally follow pattern directions at all these days, but I’ve been feeling pretty braindead in the evenings with a big push at work combined with finally going back to 5 days, so I decided to just follow along with whatever craziness BWTF threw at me. Because of the exposed zips on the side seams of the lower legs, I couldn’t construct these in my preferred order anyway (pockets, centre front, fly, centre back, inseam, side seam) because getting access that far up the leg with the inseam sewn is really tricky.
But even taking that into account, the construction order was pretty weird, but it worked. And seriously, if you usually make a sway-back adjustment (pinching out a triangle of fabric at your centre back), then this is the pattern for you, because the CB (centre back) seam is done dead last, midway through attaching the waistband! So by that point you can try on the very-nearly completed trousers and just make adjustments then and there (though I didn’t need any changes – I’m a Burda 42 through and through).
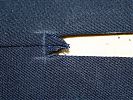
This pattern was very time consuming, but not very difficult. The only part of the construction that threw me for a loop was the instructions for doing the exposed lower leg zippers. Burda tell you to sew the side seam 1cm past the slit mark, then cut diagonally to a new slit mark, yadda yadda. What they actually want you to do is create a little frame and cut to the corners, like you’ve probably done a number of times before, but this time there’s a seam in the middle of it. So I found it helpful to work from the right side, measure out your fold lines and mark those in chalk, and just pretend the extraneous seam allowances weren’t there.
Also, I got these zippers from the Zipperstop rummage box when I was in NYC, so they cost me 41 cents each (Roughly 25p. They sell here in the UK for £3-5 each. European sewers, are you quietly sobbing yet?). Yeah, this is why I bought zippers like a mad woman in America.
I also got to use some of the nice Japanese quilting cottons that Sharon bought for me, too. This watercolour print was only a 1/2 yard, but that was plenty enough to use for pocket linings, fly underlap (the bit that goes between the zipper and your skin), and inside waistbands. I love using quilting cotton for these because it wears well, cuts down on bulk, and gives me a nice surprise whenever I visit the loo! The rest of the trousers are made from Fabric.com’s stretch cotton twill, in Navy. It’s got 3% Lycra content so there’s just enough stretch there to add comfort, but not sagginess. I bought 2 yards for $10, and this was part of the haul that my mom brought over for me in her suitcase when she came for the wedding, so shipping was free (or paid with motherly love, really).
I realised when I arrived back from America into colder weather here that I really need more trousers for Fall/Winter. And I decided back in the summer that I wanted to focus on navy, mustard, and grey for my colour palette, and these fulfilled both criteria.
Next up: Already traced and ready to muslin are my winter coat (the Burda 09/2010 Armani knockoff), James’s fantasy jacket, and my leather skirt (Burda 09/2009 #134 with the raw hem). But with my overocker working again, I may get distracted by my Parisian lace and the Burda September 2010 cover dress…
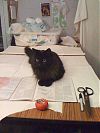
Bosco is not very helpful when it comes to cutting out fabric, though. When I turned my back for a second to get the coat pattern pieces to make my muslin, I turned around to this on my cutting table:

