The Ruby Slip is a free pdf pattern and comprehensive set of tutorials over at Pattern Scissors Cloth, and as soon as I saw it, I knew it was just the most perfect pattern ever for me and I had to sew it ASAP!
I had 2m of seafoam green silk in my stash that I’d bought at Bhopal Fabric on Brick Lane over the summer (at £6/m), so I took a swatch of that along with me to MacCulloch and Wallis just before Christmas to buy lace specifically for this. Their lace selection isn’t great, but I totally fell in love with this stretch lace, made up of seafoam green, grey, and brick-red flowers, and it was the required 18cm for the pattern. It was pretty eye wateringly-expensive at £14/m, but I ended up with a silk matching lingerie set for £40 exactly, so I think the economics of my decision were sound.
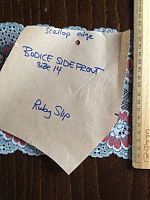
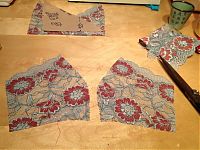
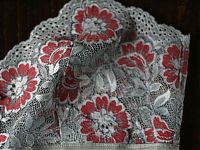
Sherry has done an incredible job going through all the ins and outs of lace cutting, bias silk sewing, how to do an FBA, etc, but I did get a surprise when I found that 18cm lace is not wide enough for the side front:
Since I went out and bought the lace specifically for this, I was a little annoyed, but I was also feeling flu-ish so I sat down with my copy of Bridal Couture and hand-pieced some lace from my scraps to make up the missing corner. It involved a ton of tiny hand stitches in both seafoam and brick to get everything to match seamlessly, but I’m pleased with the end result (she’s since posted some ways of dealing with narrow lace).
I also wanted to demonstrate how much you need to pay attention which cutting lace. I was paying heed to all of the scallops in order to get them in join up nicely at the seams, but I totally didn’t see that my motif was off at first. Happily, I had enough to re-cut that piece to have a nicer join over the seam (seen on the right).
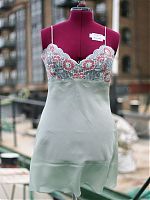
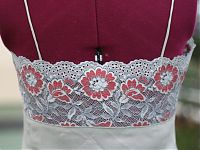
Right, all that aside, and let’s see some finished photos! But, er, not modeled on me since there’s see-through lace and I’m not an exhibitionist. So you’ll just have to take my word that I squealed with delight when I first tried this on, because the fit is just perfect! The bias skirt really just hugs my curves without being tight, and everything just fits like it was meant to be. I made the “short” version, and the hem lies about 3-4 inches above the knee, which is perfect for me.
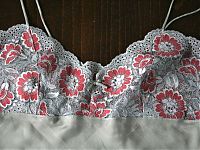
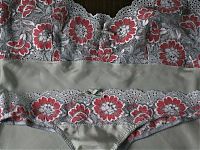
I had a bit of bias silk tube left over after I cut my straps down to size, so I tied these into two little bows and attached them as motifs on the centre front of the slip and panties. Oh, and I chose to have a centre front seam in my bodice rather than a crossover because I really liked the symmetry of my lace in the front. I probably wouldn’t have thought of this as an option had she not mentioned it in this post on variations on the pattern.
Throughout all of the tutorials, Sherry suggests using a serger/overlocker to finish the seams, but mine is threaded black and I really am that lazy to not want to rethread it just for this. So I finished my lace seams by trimming the allowances down, pressing to the side and narrowly topstitching. On the skirt, since it’s cut on the bias, there’s really no need to finish these at all since they won’t fray, so I just pressed the allowances open after letting the skirt hang for the requisite three days. On the lace/silk joining seam, I trimmed the seam allowances and pressed them toward the skirt, then topstitched on the silk to keep them from showing through the lace.
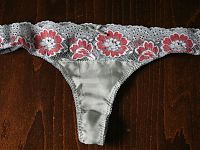
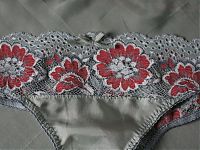
As alluded to earlier, I had some leftover lace and silk, so I made a pair of matching panties. Because I can!
I used my general TNT/go-to/whatever KnipMode thong pattern, but deleted the height of the lace (9cm, because I used one half for the back and the mirror edge for the front) from the pattern and made the rest in the silk. It was just a total stroke of good luck that I happened to have silver lingerie elastic in my stash that matched the grey in the lace fairly well…
In any case, if it’s not obvious – I totally love this pattern! So yeah, go and download it and make some luscious lingerie for yourself, okay? You deserve it!


