I’ve got a wedding rapidly approaching, and for once in my life, I actually bought a dress instead of sewing it (ok, technically James bought it for me when we were in France!). But I couldn’t let this occasion go by without sewing something so I decided I wanted a little cropped jacket to go along with it. Luckily there are a lot of colours in the dress to pick out, and a good friend gifted me this green, ex-Karen Millen piqué specifically for this purpose!
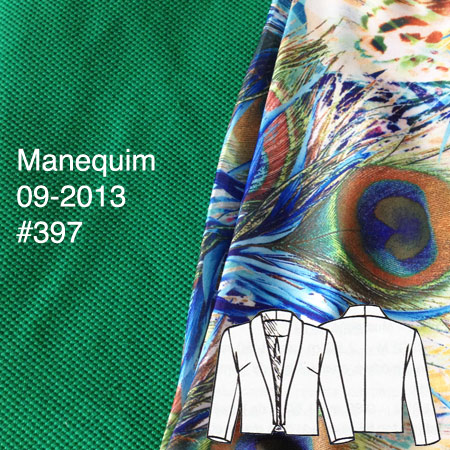
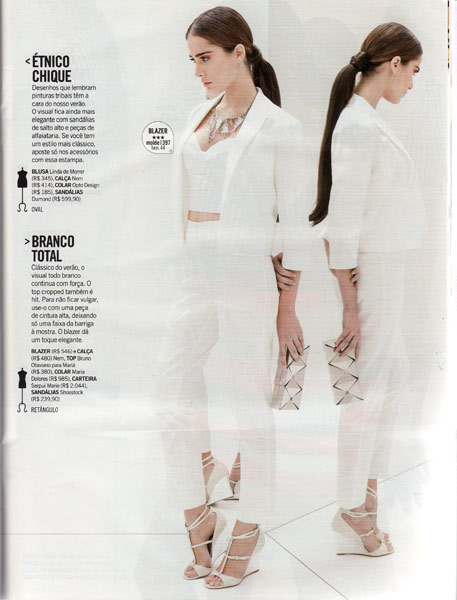
I sifted through my pattern magazine archive (made easier since I’ve got each issue overview online) and decided on a sharp little cropped blazer pattern from the September 2013 Manequim magazine (curiously I’d overlooked it when I reviewed the issue!).
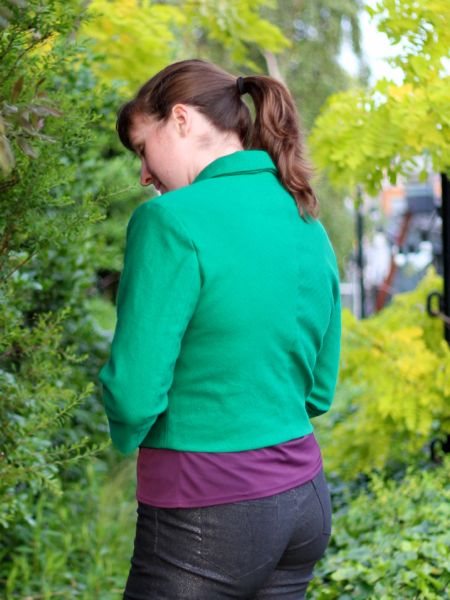
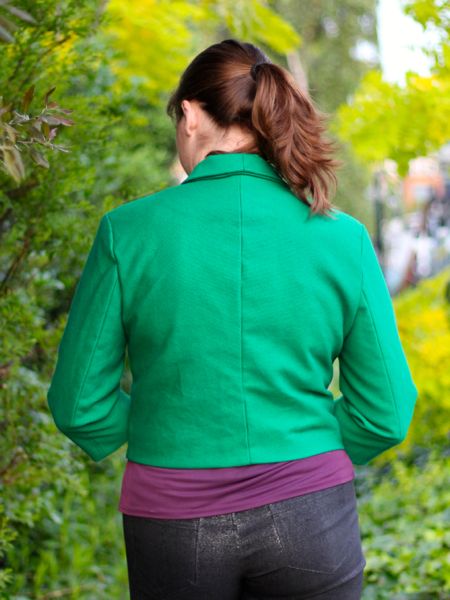
I love that this jacket is short in the body so it won’t interrupt the full skirt on my dress, has got 3/4 length sleeves which are so nice for summer evenings, and best of all – a shawl collar with little tuxedo styling at the bottom. There’s no front closure, either, so it’s a nice one to just slip on over the dress and not have it look like it should be buttoned or something.


Many of you ask how I deal with Manequim patterns that aren’t in my size – the short answer is, I don’t. I’ve got so freaking many issues and patterns to choose from that most of the ones I want to sew either either in a 44 or 42 (this one’s a 44), or if they are significantly smaller, I just graft the interesting features onto an existing base pattern that fits me.
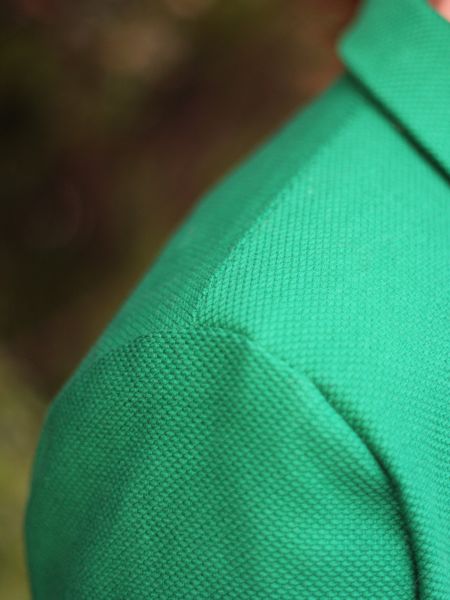
The first thing that struck me about this pattern as I traced it is how beautifully drafted this is. Holy cow. Not only does it have a two part sleeve, but they actually indicate you cut the sleeve lining about 0.5cm larger than the fashion fabric. This totally makes sense, but I’ve never seen it on a pattern before!
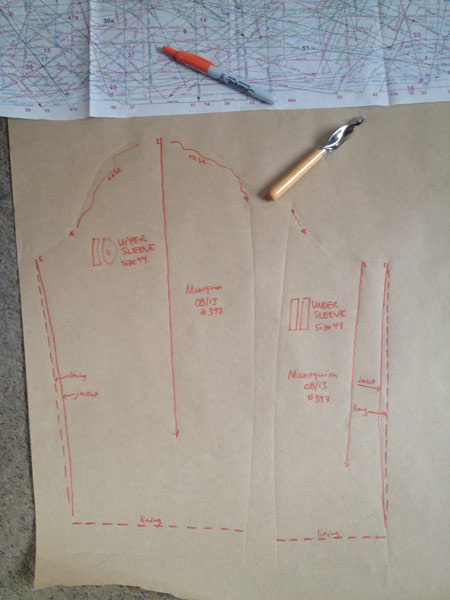
(Yes, those are the pattern sheets above it! This is how I trace patterns.)
The pattern also has you cut the lining hem significantly shorter than the fashion fabric, which gives a really nice, deep hem facing without any fuss whatsoever. Usually I have a bit of lining bubbling visible at the hem I have to take up later, but not this time! Another great feature is on the centre back seam of the lining – I always do a box pleat here for shoulder room, but I usually add it on the full length of the jacket or coat. Manequim curve this extension down to nothing at the hem, so the extra lining ease just fades away. Such a nice touch!

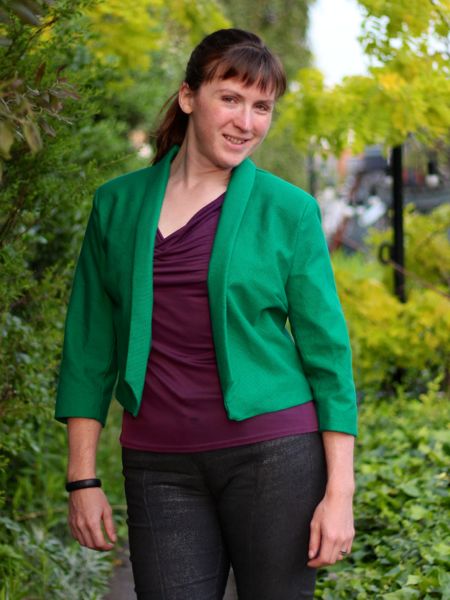

The construction of the jacket was pretty uneventful – once you’ve made a few, you don’t even bother with instructions anymore even if they are in a language you understand. Since the piqué was quite thick and a bit prone to fraying, I reinforced the inset corners of the shawl collar with some interfacing, and I also tacked the seam allowances in place where necessary. One thing that really bugs me in jackets and coats are lumpy sleeve seams, so even if I catchstitch nothing else, I tack those suckers down!

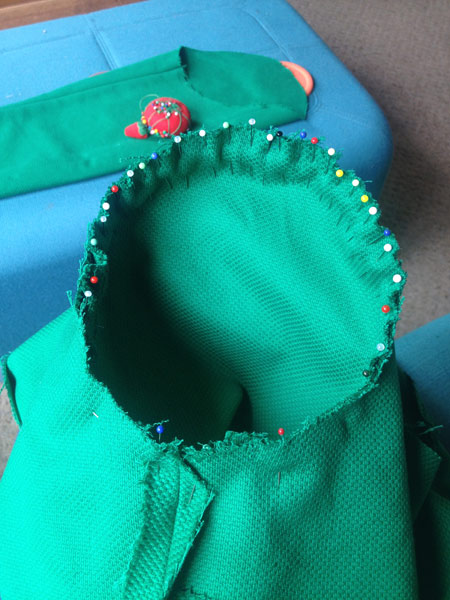
Whenever I see “ease” instructions on a pattern’s sleeve cap, alarm bells go off in my head. Unless it’s a jacket or coat, there should be zero ease in a sleeve cap (seriously, go read this if you haven’t before). Personally, in a jacket or coat, I’ll accept up to an inch – beyond that and I start hacking away at the sleeve cap to bring it down into line. So when I saw the ease marks here, I got the heebie-jeebies, and brought out my pizza wheel measurer… …and bless Manequim, because there’s a whole 1 centimeter of sleeve cap ease! I could’ve hugged them. It still required 30-ish pins in each sleeve to ease that centimeter in, however!
I still vastly prefer this method over ease stitching as it sews in without puckers, the first time every time. Which saves you any unpicking and resewing time. Give pin easing a try if you haven’t already!


When I went to sew the jacket shell to the facing/lining, I thought about the turn of cloth and that the front facing would be the exposed portion, and so when I sewed along the collar edges, I used a slightly greater seam allowance on the exterior side (so the finished portion would be shorter and underneath). This means the seamline rolls underneath the lapel edge, and you can’t see it as it’s worn. I’m rather proud of myself for remembering to do this!
I did make a quick muslin before sewing this, and the only fitting change I made in the final version was to bring in the Centre Back seam by an inch or two at the waist, tapering to nothing midway up the back. As drafted it just felt a little too boxy (there’s no back darts, afterall), and this little change made a big difference in my opinion.

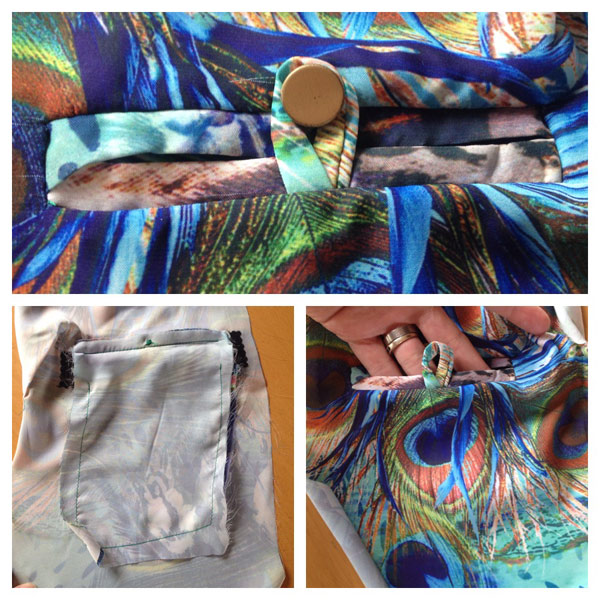
Let’s talk about the lining – even though I’m pairing this jacket with a busy-printed dress, I knew I wanted quite a wild, lush lining. I was already placing an order at Truro Fabrics for a client, so I bought some of this Peacock feather matte satin. Oh my gorgeous, it’s such a lush fabric! It frays like crazy and it’s the only woven I’ve ever seen that curls, but I’m thoroughly smitten with my choice here. If you like the look of it, it’s well worth the price and would make an especially nice blouse.
Since the exterior of the jacket doesn’t have pockets (let’s be fair – it’d interrupt the clean lines!), I decided to add a little buttoned welt pocket into the lining instead. It was really tricky to achieve with this slippery, lightweight silk, but I managed a fairly decent pocket in the end (just don’t look too closely at the welts on the left there).

I’ll try and get some photos taken at the wedding itself so you can see this jacket paired with the dress as intended, but I thought a few casual photos in advance would be a nice touch (and before all the construction details fly out of my mind!)

I’ve also cut out a Cake Patterns Red Velvet Clutch in matching green piqué and peacock lining, which I think should tie everything together nicely. I made the free, mini version of this pattern a few months ago for gifts and I loved the pattern, but I wanted a bigger one to hold more than just a phone and lippy for the day. I’ve got some other things to sew for the wedding before I can get to the clutch tough, so it might be sewn the night before!
UPDATE: See photos of the finished clutch and me wearing the jacket with the dress at the wedding in this post here!