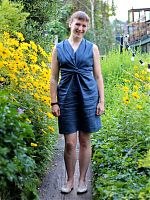
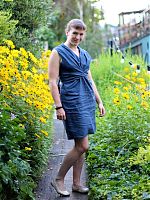
I must be the only sewist on earth without enough casual dresses, but alas, the weather has turned very hot and summery and I’ve taken to just wearing the same jeanskirt and pair of 17 year old shorts (no, really) around the boat while I work from home. I realised I could just make any number of knit dresses, but that’s too easy, and besides, my knit stash is a little low and my woven stash is spilling over.
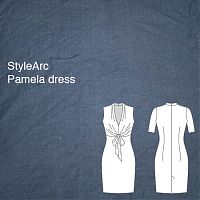
So I decided to pull out the StyleArc Pamela dress pattern I originally planned to make for my Mexico travel wardrobe last year, and pair it with the same blue linen (blend?) that was gifted to me by Veronica back in 2012.
It’s been ages since I sewed a woven for myself, so of course I forgot that they require pressing, which means heat and steam standing by the iron, ugh! But let me tell you, it was all worth it in the end because I totally love this dress. I think it might be the perfect summer dress, as it’s both casual and a little different, and you can change the look just by tying it either in front, or in the back.


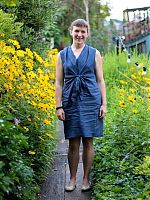
(Yes, I had been wearing the dress all day before these photos – including two lots of treadmill running to whilst shopping for new racing flats!)
I bought the pattern when I was a StyleArc size 14 (I’m closer to a 12 now), so the dress is a little bigger than usual on me, but this works for summer because you can get a looser fit by tying the integrated ties in a bow under the bust. Or, if you want, you can also cinch in the waist by wrapping the ties around to tie it in the back. I’ve been wearing it about 50/50 according to my whims.
There are a lot of great little details in this pattern – the shawl collar extends to the centre back neck, falling nicely into an inverted pleat at the inset corner.
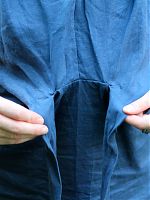
Those ties are really cleverly drafted so that they emerge from the underbust seam with no openings at all – it’s all sewn shut!
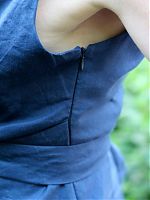
There’s a choice of either sleeveless or short sleeves, so you’re provided with either an all-in-one facing for the former, or just a neck facing for the latter. There’s an invisible zipper in the left side seam, though I can actually pull this on without it – whether that’s because it’s a size too big or not, though, I’m not sure!
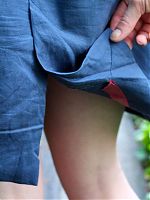
There’s a nice walking vent in the centre back, too, and I even took the time to mitre both corners, as well as use a bit of ribbon on the hem. I’d have used hem lace but I’m all out, and annoyingly there don’t seem to be any cheap stockists outside the US.
I did have an issue cutting out the upper front piece, because those ties are cut on and extend quite some way across, making it wider than my doubled fabric. Because of this, I had to piece the ties and introduce a seam there, but since the seam is at an angle and they’re tied up anyway during wear, it’s really not an issue!
The instructions were mostly sane, but I think perhaps they tried to be a bit too clever in making them work for both sleeved and sleeveless at the same time, which results in a poor finish for the sleeveless all-in-one facing. So after constructing both the front and back on their own, I instead opted to keep the centre back and side seams open, sew the shoulder seams together, then attach the facing at the neckline and armholes. I could even end up understitching the entire way along both the neckline and armhoes, too, which was a nice surprise! Once the facing was attached, I could just pull the backs through the shoulders and then sew up the remaining seams.
This is by far my preferred approach if there’s a centre back seam – I hate leaving the shoulder seams til last and fiddling with the hand stitching (ie: Burda’s “wooden spoon” approach!).
So, this dress may not have gotten to see the dizzying heights of Mexico, but as luck would have it, we’re off to Budapest, Vienna, Prague, and Berlin at the end of September, so it looks likely she’ll get rolled up in a suitcase and be taken on a Eurailing adventure instead!

