Despite my nonstop Work Sewing during the week, I still often get an itch at the weekend to sew something quick and Not Work for myself, often using up some fabric or pattern which I’ve been meaning to make for ages.
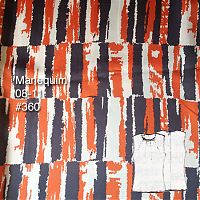
A few weekends ago this took the form of a shell top with a pleated neckline from the Manequim August 2011 issue (though I totally failed to spot its potential when I reviewed it!) and one metre of printed polyester satin which I’d picked up at a London sewists swap last summer.
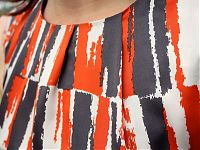
I really liked the colours in the fabric and the abstract quality of the print, and the fabric is nice enough that I had to do a quick burn test to determine that it wasn’t actually a silk! As for the pattern, it was one that I traced some years ago, but then never quite got around to making, so it got folded up in a drawer before I finally pulled it out a few weekends ago.


Worn here with my orange Sinbad & Sailor O’Keefe skirt from earlier this summer!
It’s a very basic shell top with four pleats at the neckline, and in hindsight I probably should’ve just drafted it up myself! The pattern includes a half lining – the back just uses the same pattern piece as the exterior, ending at the waist, but the front lining is a separate pattern piece with bust darts from the armholes so the exterior neckline pleats are held in place.
I didn’t bother to translate the instructions, and did this my own way instead. In case you’re ever faced with a similar lined shell top with a centre back seam (or zipper, like this one), though, my preferred order of construction is this:
- Sew the Front & Back together at the shoulder seams. Repeat for the Front & Back Lining.
- With right sides facing, attach the exterior to the lining around the neckline and armholes.
- Understitch to the facings as far as possible.
- Pull the Backs through the shoulders to turn right-side out. Press well.
- Sew the side seams of the facings and exteriors in one go
- Insert the invisible zipper into the centre back seam
- Sew the bottom of the CB seam below the zipper
- Open the zipper, fold the Back lining over to be right sides facing with the back, and sew to the zipper tape. Clip the top corner and flip to the inside
- Finish the bottom edge of the lining. Finish the bottom hem.
So I’ve ended up with a neatly finished garment with french seams on the side seams (the only portions not fully covered by the lining and thus, prone to fray), but when I tried it on, I realised the fit is actually not that great! I must admit, it looks much better in these photos than it feels when worn.
For the first time perhaps ever, the bust is too tight (are Manequim seriously drafting for an A cup, or is this an anomaly?!), and the back length is too long so the zipper pools a bit at my lower back. Neither of these are problems I usually have, which makes me think that it’s an issue with the pattern. I feel a bit stuck though, since size 44 is a bit too big for me, and size 42 is a bit too small (my galaxy print birthday dress was also a 42 and definitely on the snug side). As most Manequim patterns are one size only it’s not easy to just trace in between. And don’t even think about suggesting I grade one up or down – for that amount of effort I may as well just draft it myself!
But I still really like the fabric, and a beginning sewing friend really wanted my traced pattern, so I’ll see how the blouse beds in over time. I have a feeling it could be really nice paired with my grey midi skirt for winter if it doesn’t end up feeling too constrictive after a few hours. Still, at least it was enjoyable to sew and I’m glad I didn’t make this in my Liberty silk twill instead!

