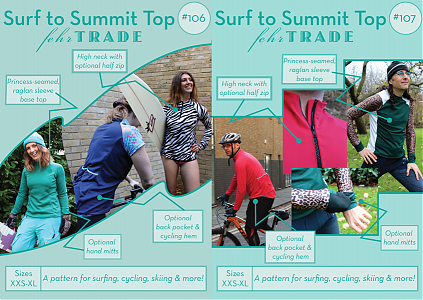
Phew! It’s been one heck of a few weeks! I’ve shown you all of the many different versions of the Surf to Summit Top pattern that I’ve made not only for myself, but also my athlete-models. So far you’ve seen versions for snowboarding and cycling, and surfing, but today’s versions are all for winter running.
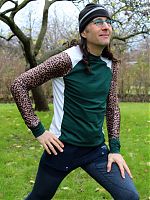
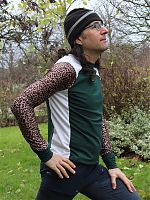
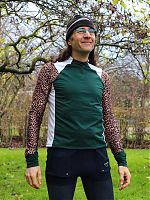
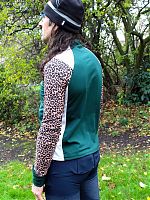
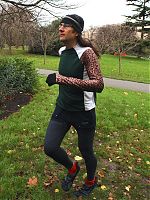
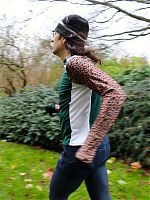
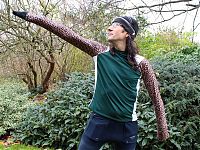
One of the great things about this design are all the opportunities for colourblocking, and I wanted to play around on this version so you can really see the seamlines – plus I added an extra seam of my own on the shoulders! On the Front and Back, I used some forest green UA Cold Gear fabric (now long gone) from my stash. On the Side panels, I used some reflective fabric from The Rain Shed. A note about this fabric, though – I really like it, but it is not lycra as stated in the description – it’s much, much closer to the sort of textured fabric you find in technical race tees (like DriFit). For the sleeves I used some leopard-print lycra from UK Fabrics, but I didn’t have quite enough leftover from my leggings to fit the entire sleeve in, so I introduced a curved seamline and used some reflective fabric at the shoulder instead.
But let me introduce my athlete-model, Daniel. I’ve probably run more training miles with Daniel than anyone else on earth and he’s a great friend of mine, in additional to being a truly inspiring runner. Dan only started running a few years ago, and has truly embraced endurance running, going from running his ever first race (a 10k) to running his first 100km ultra this year, with a bunch of marathons thrown in for good measure. He’s even run the grueling Mont Blanc Marathon, and regularly passes runners half his age on Tuesday nights.
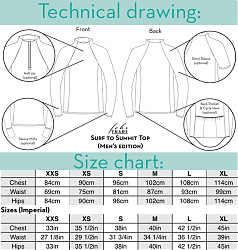
I made this men’s version of the Surf to Summit Top at the very end of the testing process, so it’s identical to the version you buy, and I especially like how this fits Dan in the waist and hips – this is exactly how I intended the men’s version to fit. It’s slim-fitting without being loose, but isn’t skin-tight, either. If you prefer your tops to fit differently, I’ve included instructions on how to alter the pattern to get the fit you want, as I discovered in testing that men are really polarised on how they like their exercise tops!
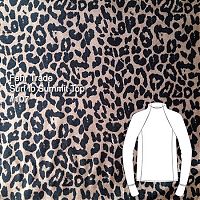
Not many men can pull off a good animal print, but I know Dan’s tastes and so made his top to be in earth tones, but having a print on the arms means that he can put a teeshirt over top and still show off a bit of fun.
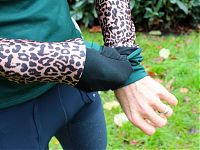
I mentioned that the white fabrics are reflective – they’ve actually got a reflective print on them, which you can really see in these photos of some scraps I was sewing up when making this top! With dusk before 4pm right now in London, it’s really important to be visible for night runs and this is a great alternative to an all-over reflective look.
Since this is a winter running top, I also gave Dan some sleeve mitts in the warmer Cold Gear fabric. This fabric is green on the outside, with a black, bushed back, so you can see where the reverse is shown when the mitts are engaged.
The ladies winter running versions I’ll show you today all use the same pattern options as Dan’s – long sleeves with the straight hem and added sleeve mitts. But all four versions look distinctive, just from changing around the fabric and adding some piping in strategic places!
I hesitated to show you these first two versions because they were pretty early samples and the neckline isn’t quite right, as you’ll see. But the neckline is fixed in the finished pattern, and I thought the piping and fabric choices were interesting enough to warrant a viewing anyway, in case they inspired some ideas in you.
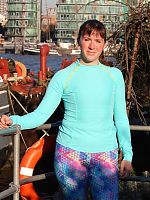
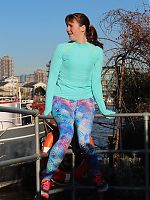
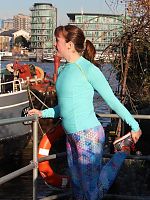
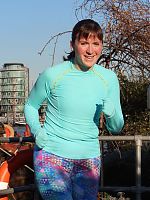
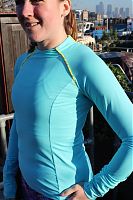
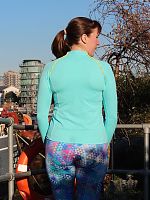
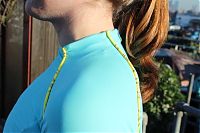
This first version is sewn up in aqua nylon lycra from UK Fabrics (now out of stock, though they have it in other colours). I was going to just make it plain, but then the pieces were hanging in my sewing room next to some strips of yellow foiled lycra I’d cut out years ago, and I had a lightbulb moment – what if I made stretch piping from the yellow lycra and round elastic?!
So that’s what I did! The round elastic is slightly more firm than the lycra, so the top fits a tad too high in the armpits (even though all my other versions are fine on me), but I love the colour combo!
Here you can see what I mean about the neckline – it dips too low in the front, which makes it a bit wrinkly in front. In the finished version I raised the front neckline so it sits much nicer and the facing isn’t fighting with it.
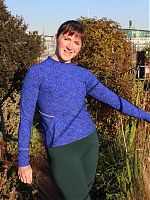
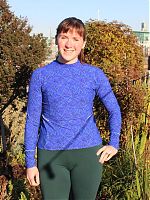
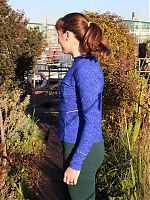
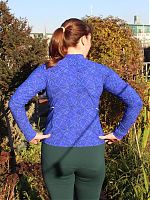
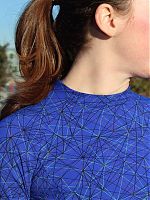
This blue printed version was made at about the same time as the aqua one (so has the same neckline issue) but I just couldn’t wait to sew up the premium, ex-designer wicking lycra I got given by a friend!
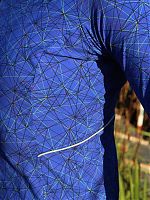
Some of you may even recognise the print (shhh! Don’t want to get her in trouble!), but the piece of fabric I was given was an oddly-sized offcut. Frustrantingly, no matter how I shifted the pieces around, I couldn’t quite fit everything in, until I decided I should just piece the Side panel. I learned a long time ago that curved or diagonal seams look intentional, but ones that are straight across often look like mistakes!
So I made this one angled towards the front, and inserted some (non-stretch) reflective piping into the new seam. While the top overall requires some stretch, having a short amount of non-stretch in a non-critical area isn’t really a problem. Just don’t try to do this around the neckline or biceps – those need to stretch!!
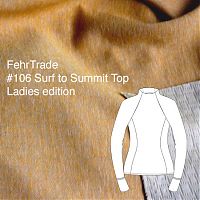
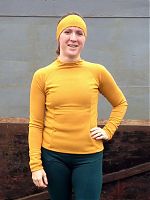
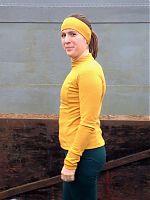
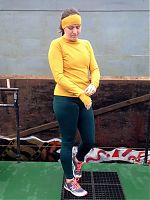
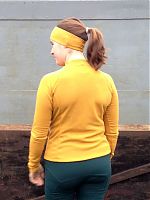
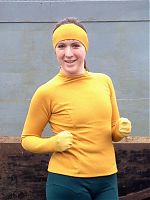
Again, this is an early draft of the pattern so disregard the low neckline seen above! Better to look at my latest version of this pattern, sewn only last week in the mustard colourway of the amazing merino jersey with the wicking backing. (Seriously. Buy this.)
You saw the sister to this top, modeled by Emily with her snowboard, but I loved the teal version so much that I just had to make another in the mustard colourway, too. And now that I’ve run in this, I am totally going to be squeezing a third version out, which will have a teal body and mustard sleeves! Not bad to get three very high-end merino sports tops from only 4 yards of fabric!
Like the teal version, this one is made using the final version of the pattern, so you can see that the neckline is higher in the front, it’s cut a bit slimmer through the body, and the straight hem is a bit longer than shown in the blue printed one. Just little tweaks, but ones that really make a difference when you’re on the move!
I also made a little matching merino headband to take advantage of the wicking backing. It’s got 1cm wide elastic along each side, which I zigzagged onto the wrong side, then flipped inside again and coverstitched. It kept my ears as warm as the rest of me during my trail run on Sunday!
This is a first for me – I’ve never made another version of a pattern so soon after release before. Usually, by the time I get to the point of releasing a pattern, I’ve made it so many times that I’m thoroughly sick of it and I don’t want to sew another for a long time. But the Surf to Summit Top is somehow different – I’ve made all these versions yet still I’m planning a few more in my head already!!
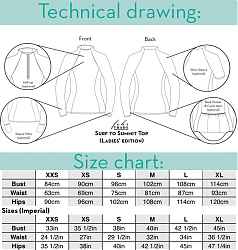
Remember you can save 10% off if you buy two or more patterns by using the code “10OVER20” before 26 December! The Surf to Summit Top pattern comes in men’s and ladies’ editions, too!

