Last Friday I talked about the new digital magazine, Seamwork and my article on activewear fabrics in the latest issue. Each issue comes with two quick-and-easy pdf patterns, which you can get on subsciption for $6 USD an issue (so they’re $3 each).
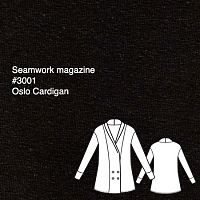
I’m a little behind, but on my last day of the Christmas holidays, I decided to sew up the Oslo Cardigan from the first (December) Seamwork magazine. Since this is from a former issue, I’m not sure whether you can actually purchase this pattern anymore (if you subscribe now, you’ll get the January patterns – a very nice bias cami and cuffed leggings). UPDATE: You can buy past issues’ patterns here now!
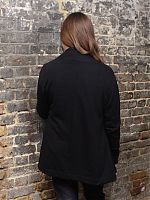
My measurements fit pretty neatly into their size Medium but all the Seamwork patterns go up to 3XL, which is brilliant for plus-sized sewists! I was really happy with the fit on this cardigan – it’s nice and slim without being either baggy or tight, and the sleeves are the perfect length for me (a little over the wrist). The hem comes down just over my bum.
All the Seamwork patterns claim to be able to be sewn in 2 hours or less. After piecing together the pdf pattern (it also comes with a copy shop version) and cutting out my fabric, it only took 55min for me to sew together!
As the title suggests, I made this up in a wool sweaterknit, bought for £6.50/m upstairs at Classic Textiles on Goldhawk Road. It’s super soft and a really nice hand (and also came in cream) and the cardigan fit nicely into 2m, with not much to spare.
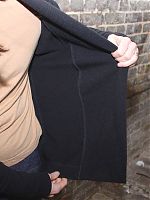
The construction is really easy and straightforward, too, with well-illustrated instructions. The only places I deviated was to use vilene bias tape to stabilise the shoulder seams instead of the suggested clear elastic (I hate clear elastic), and I waited to hem the bottom until after attaching the collar.
I’d definitely suggested just folding back the hem when you attach the collar – my hem needed to be about 2in (instead of the stated 1in) to match the collar length. Then I folded up the rest of the hem to match and topstitched with the coverstitch machine. This way everything was nice and even.

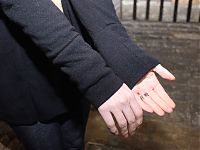
Nice long cuffs on the sleeves, too!
I didn’t do the front buttons purely because my sewing machine was at the repair shop (first time in 12 years!!), and my tiny JL Mini machine doesn’t do buttonholes. But I may go back and add them in later if I find it’s not cosy enough as-is. But for the meantime, it’s pleasantly warm, soft, and great to just throw on over another outfit. I ended up wearing this to the first day of my new office job (don’t worry, the future of FehrTrade is not at risk!), and it was the perfect layering piece!


