I’ve finished sewing together the furry exterior of my luscious long pile faux fur coat, and now, as I set about creating the lining for it, I thought it’d be a good time to share all the tips and tricks I picked up along the way. Some are from the special “sewing with faux fur” supplemental lesson in the October 2008 Burda WOF magazine, but others are from my own experience.
Faux fur sewing tips!
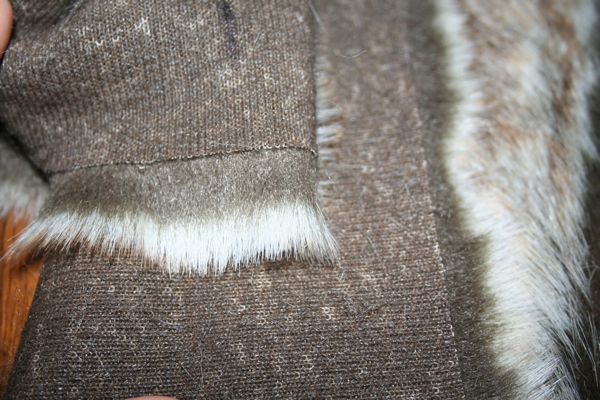
- Only cut one layer of fabric at a time, with the wrong side facing up. Be sure to cut through the backing only and NOT the fur itself! I used the very tip of my tailor’s shears, but an exacto knife would also work. A flat layout also means you need to duplicate any pattern pieces that would normally be placed along the fold, and other pieces must be cut out as mirror images (ie: one sleeve needs to be cut pattern face down and the other cut pattern face up so you end up with a left and right
- After cutting each piece, go outside and run your hands along every cut edge pulling away any excess fur. Then give the whole piece a vigorous shake before bringing it back inside (really, it’s not littering as birds will use it to make their nests nice and soft!).
- Use a long stitch length, 2.5-3mm (3 is what I normally baste with, for comparison’s sake)
- Always sew with the nap of the fur (so for side seams, that’s top to bottom. For U-shaped raglan sleeve seams, that’s sewing down one side of the U with the sleeve side facing upwards, stopping, and sewing down the other side of the U this time with the body side facing upwards)
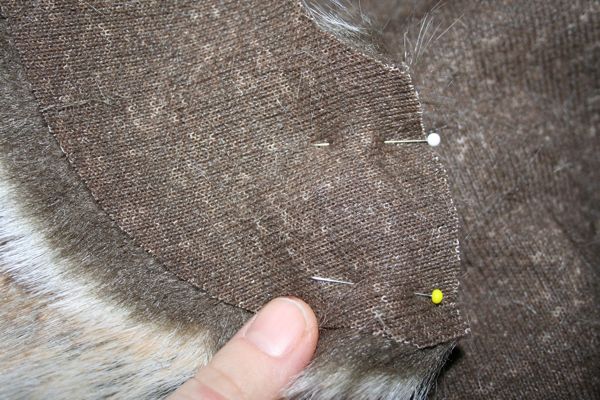
- Pin perpendicular to your seam, and pin often! Even if you’re normally a parallel pinner like myself…
- After you’ve sewn a seam, from the right side, pull the hairs out of the stitching with a chopstick or blunt pencil to fluff it up and make the seam less noticeable.
- Don’t bother with chalk or tailor’s tacks – when your fur is as thick as mine, no one’s going to see ANYTHING through it so you might as well use a marker on the backing! If you need to mark the right side of the fur, use tiny pieces of masking tape as they’ll come off without removing fur and won’t leave any residue.
- A standard needle and foot works perfectly well (no need for my walking foot even!)
- If you’re using a pattern that’s not intended for fur, be sure to choose a simple design with limited seams and no excess pleats, gathers, or darts. Eliminate all buttonholes and or zippers and replace them with giant snaps or fur hooks
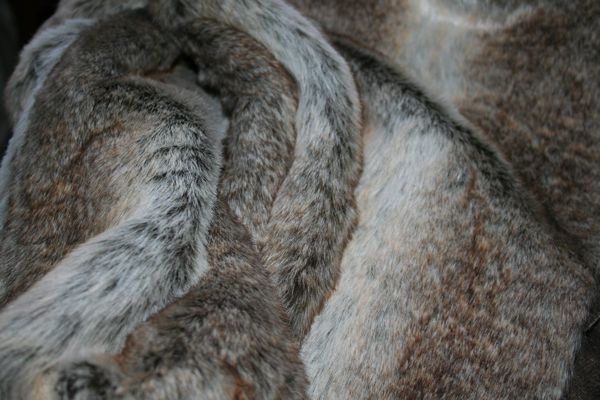
If you needed a refresher, I’m making the BWOF 10/08 #102 fur jacket in this fabric.com faux chinchilla fur.

Tany just made this in a shorter pile fur and it looks divine! I really can’t wait to finish this so I can wear it out!