The Gown is progressing nicely, the shoes are bought and are being broken in little by little (while doing such glamorous tasks as watering the garden and taking out the rubbish!), so it’s now time to focus on my hair. In the past I’ve made fascinators (First in gold and then in silver) with a comb base that worked well for my long, thick, and straight hair, but post-chemo my hair is only two of those things so I’m using a headband for the base of this fascinator. In some strange twist of Life Imitating Art, my hair looks almost exactly like it does in the wonderful cartoon of us drawn by John Allison way back in March when I had barely any hair at all!
It appears that my “How to Make a Fascinator” tutorial vanished off BurdaStyle during one of their site moves, so I’m really glad I saved it as a Pdf a while ago so you can download it here now!
In the past my construction technique mostly centred around the glue gun, but for this one it just felt a bit wrong to do so when the rest of the ensemble is full of couture techniques. So for this base I used two teardrop shaped pieces of blue wool felt (the only colour I had on hand), with one of them stiffened with the ultra-rigid interfacing I used on my sun hat. I then covered this felt with a scrap of the vintage dress satin, stitched on the underside to prevent any puckers at the edges. You could omit this step if your felt matches the colour of whatever you’re covering it with, but the blue kept showing through the first few layers of feathers so I needed the satin layer.
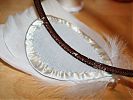
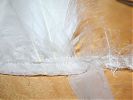
I specifically chose a thin headband that had a fabric covering around it so I’d have something to anchor my stitches to, so keep this in mind while you’re shopping, as it’d be difficult to sew onto an all-plastic band (in which case you’re probably better off using glue). I then sewed the satin-covered base onto the headband, making sure my stitches went around the band each time for strength. Since the top was being covered in feathers, I didn’t bother to hide my stitches on the top side.
Once the decoration attachment is all complete, I’ll stitch the other blue felt piece to the underside of it all to hide the stitches (and band) and create a bit of grip on my hair.
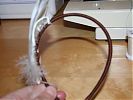
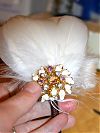
Here’s the fascinator with just the white goose feathers attached:
Sewing these onto the base was way easier than I was expecting. I just took 2 or 3 stitches over the central portion of the feather near the base, and that was enough to keep them secure. I’m leaving them unattached at the tips because as the headband stretches whilst worn, the feathers stay close to my head anyway.
Here’s the underside so you can see my stitches and that super-stiff interfacing:
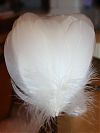
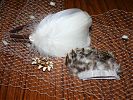
I bought all my fascinator supplies a month or so ago, when I only had a vague idea of what I wanted to do, and I ended up overbuying on feathers by a huge amount! I could’ve easily gotten away with 10 or 20cm of goose feathers instead of 50!
When you buy feathers they come attached at the base by two sets of thin cotton tape with a few rows of stitching holding it all together. So if you want the individual feathers, you’ve got to verrrrrry carefully unpick the stitches without unpicking the feathers!
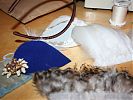
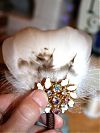
But now I’m having trouble deciding which looks best! Should I have just the white goose feathers and the brooch from my (other, not “of the dress”) grandmother? Or have the small, super fluffy speckled coque feathers to break up all the white? (I’m just holding the brooch on with my fingers in these photos so sorry my thumb’s in the way and also that the flash is making the stones look blue! And the brown feathers are not attached yet either so disregard the uneven placement, and I hope you get the overall idea…)
Please leave me a comment with which you think looks best!
Keep in mind that, yes, I am having a veil. I bought this awesome net off etsy with fluffy chenille bits interspersed throughout (except mine’s ivory). It’ll be bobby-pinned into my hair near the fascinator for the ceremony and photos, so the fascinator will be worn alone for most of the day.
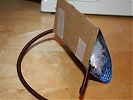
And finally, here’s a shot of my quick cardboard protector to slip over the fascinator to keep the feathers from getting caught and snagged (I totally stole this idea from my beloved ASOS fascinator).
Coming up this week: What we made at Crafternoon, plus a rundown of the October(!!) KnipMode. And whether I will survive Saturday’s hen party. Oh dear! (And please accept my apologies again for not being able to answer anywhere near as many comments as I’d like to right now!)

