While I was in the States visiting family, I also took the brave step of contacting a few other activewear-sewing ladies and asking them if they’d be interested in pattern testing for me. I knew that I wanted to keep the testing pool small, but also use sewists who I knew had sewn their own exercise gear before, both so that they were comfortable with the basic techniques, knew what they liked, and also could potentially go out an exercise in my patterns for some useful on-the-road feedback. I was utterly delighted when every single one of them said yes, and this really started the timeline towards Launch Day, which I knew I wanted to be before the usual New Years resolutions exercise explosion. Since I started the XYT Workout Top first and it was further ahead in the patternmaking process, I’d give the testers two weeks to test that, a short break, then hopefully I’d be finished with the PB Jam Leggings by that point so they could have two weeks to test that before I’d get their feedback and finish up everything for Launch Day.
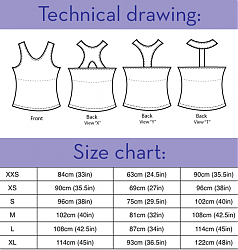
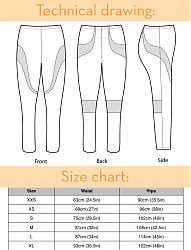
The XYT Workout Top pattern pieces were pretty much ready for testing, but I knew I’d have to create the tech drawings as well as all the illustrated instructions at some point, and, while I used to be a semi-decent drawer, I am totally crap at drawing anything digitally. Like, comically crap. So my first attempts at the tech drawing were done by my sketching them out on paper, scanning it in, then tracing over top with (yes, you guessed it) The Pen Tool in Illustrator before cleaning it all up, mirroring to make things symmetrical, etc.
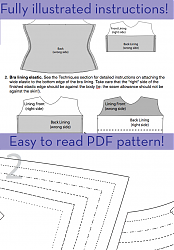
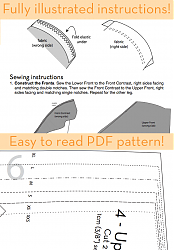
The instruction illustrations were all done by myself, too, but I did all of those without the hand-sketching step, sometimes using the pattern pieces themselves as a starting point (since I already had those digitally, I just had to shrink down the scale!), and sometimes just referring to photos I’d taken during construction. I never quite appreciated exactly how long illustrated instructions take to create, but my god, they took a LONG TIME. The step-by-step illustrations were easily the most time consuming piece of the entire patternmaking process, EASILY. I totally understand now why some indie designers skip the illustrations entirely, because it would be SO tempting to, and it’d make the process to Launch Day so much quicker. But in the end, I’m glad I did do them, as I think they make the instructions a lot clearer, especially for non-native English speakers.
Another thing I wasn’t really expecting was how the pattern testing process would really work. I guess I kinda thought that I’d send them out, some testers would have some fit issues, others might not think the mesh bra worked for them, I’d get some feedback, and maybe catch a typo or two. Ha! I’m so, so glad I have the amazing pattern testers I did, because both of my patterns needed major revisions thanks to my testers. Yes, it hurts at the time, but I’d much, much rather resolve these issues before release than have paying customers go through them later!
In the case of the XYT Workout Top, it came out in testing that power mesh comes in a huge variety of stretch percentages, so the pattern pieces needed to be modified to try and accommodate the most common amounts, plus a lot of the testers were having issues with the exterior fabric pulling and creating drag lines on the front straps, which lead to my brainwave fix of shortening the lining straps.
After going through all these XYT testing issues I thought to myself “Phew! Well, at least the PB Jam Leggings should be much easier since the construction’s so straightforward!”. Never think this! I got some early feedback from a few testers and each and every one of them said the same thing – the knee placement is really low, and the back rise is too short. Well, I always knew I had a white girl pancake butt, but the knees was a new one to me. So I got some vertical measurements off my testers, and Lo! It was revealed that I have freakishly long thighs. Like, a good 6cm (3in) longer from hip to knee than Normal Humans, and I honestly had no idea! Because I have really standard Bust, Waist, and Hip measurements, plus I’m the standard B cup, it just made sense for me to draft to my own measurements, then use this as the base for Size Small, and grade the rest of the pattern sizes from there. But now this wasn’t looking so clever afterall…
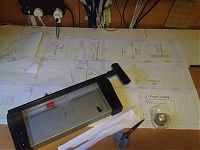
So I went in to the graded pattern, removed the excess vertical space above the knee across all five sizes, increased the back rise, and tidied up all the curves. Then I repaginated (slicing at the new intervals), and packaged it up for the testers who hadn’t already started sewing yet. But this is why some of you noticed that the knees were low on a few of the testers’ versions – they’re showing you original versions of the pattern, before the excess Melissa Thigh Freakishness was removed!
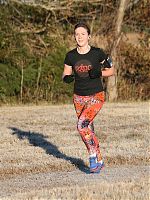
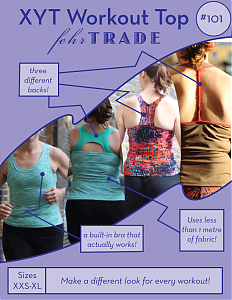
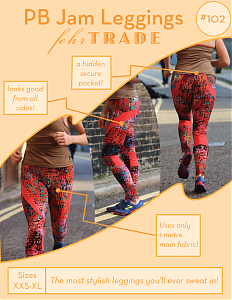
While the pattern testers were finishing up, we took advantage of an unseasonably nice day in London to do a mass photoshoot of all the various samples I’d made of both patterns, both to use on the site, but also to show as product examples and ultimately, use in the pattern “envelopes”. This last piece was really difficult for me as I’m not a natural graphic designer, but I had some good advice from James and I think the resulting first pages of the pdfs look nice, though I acknowledge that this is one area where I could’ve benefited from hiring in a proper designer if I’d had the funds.
Finally, it was nearly Launch Day, the last tweaks had been done, and it was time for me to upload the finished patterns into Etsy for digital sales. Etsy definitely has its quirks on the digital download side, but overall they’re worth it for the indie designer as it means you don’t have to set up your own e-commerce site, nor digital fulfillment, and they charge a heck of a lot less in commission than other sites (Etsy charge 4% per sale, plus a little more from Paypal if that was used, as opposed to some sites wanting a 20% cut!! Of my hard work!). Overall I’d recommend using Etsy to others, as they’re established, the payment systems are robust, and it’s really easy to download sales data for tax purposes, too, but they’re not totally perfect yet.
I guess the final step I wasn’t really prepared for was how the patterns would actually sell – I guess I thought there’d either be a huge amount of sales the first day, then fade out to nothing, or a constant trickle over time. But for me at least (and this might be partially due to my launching over Christmas Week), I saw a healthy amount of sales for the first 2-3 weeks, tapering down to slow & steady thereafter. I’m interested to see how sales will correspond with other sewists making versions of their own – if sales bump up as word of mouth grows, or if my existing patterns will sell more when I release my next patterns, for example.
And speaking of next patterns, I think that’s been the best part of all this for me – seeing that I really can make patterns that people want to sew, that people are happy to spend money on, and that I’m really proud of. It’s not yet at a point where I’m able to say I’m earning a full living wage from sewing alone, but hopefully as time goes by and I get more commissions for things like custom-drafted leggings (and other projects!) and teaching classes alongside my patterns, I’ll earn enough from this that I won’t feel tempted to go back into the stressful tech world. Working from home and working for myself has been a huge change and one I’m really still trying to adjust to, but ultimately I’ve felt much happier, healthier, and stress-free over the past few months than I was when I was earning more. Surely there’s a life lesson in this?

