Blog

Our DIY wedding – printed materials

One cost that can add up really quickly for a wedding are all the printed materials you need for the day. I’m not just talking about the invites (which can get ridiculously expensive if you go the letterpress, inner envelope, return card, RSVP envelope, etc route!), but also all the other bits of papery stuff that is forgotten until a few days before when you realise you actually do need them!

The illustration

The first step in our wedding design process was to commission a cartoon drawing of us from the illustrator John Allison (of Scary Go Round fame). James has been a big fan of his comic for ages now, and we both really liked his design style. So we sent him a photo of us, a brief description of James’s suit and my dress (at that point I was still thinking of that Vogue cowl-neck number) and to imagine 6 months’ more hair on my head. Which somehow he got eerily spot-on.

(Apologies for the awful jpg artifacting – I’ve not got the big version of the illustration in front of me to work from)

The wedding website

With the illustration in a nice, big file, we could then set about making our wedding website, which was to be the crux of our invitations. We both work in web developments, and absolutely everyone we know, right up to my grandparents, has an email address, so this way we could put the bulk of the information for both receptions on our site and be able to update it later, too. The RSVPs were all online, using a Google Spreadsheets form (easy to set up, easier for people to reply to than a trip to the post office, and we could both get access to the running tally), and all the usual venue info and registry links could be added without having to worry about word counts and layout.

I can now post a link to it for you to have a look at James’s standards-compliant coding prowess, because I don’t have to worry about you all messing up the RSVPs or gatecrashing or anything! The worst that can happen is that you decide to buy us some more insulation off our registry…

Invites

So with the website in place, all the invites really had to do was give folks the date, and point them towards the website. We ran up two sets of postcards from Moo.com (one set for the UK wedding and reception, and one for the Pennsylvania reception). And to set the tone, the wording was “James and Melissa are finally getting married!” ha!

Our DIY wedding – the flowers

To carry on with the rest of our DIY wedding (oh no, it didn’t end with the wedding dress!), the flowers were something we’d both thought about, but hadn’t really wanted to go overboard with, preferring instead for subtle and personal accents. My bridal bouquet of white roses, plus two bridesmaids’ bouquets, and a ton of rose buttonholes for the gents, were all made by James’s Auntie Anne, who is a keen amateur florist. She even sent me a self-addressed envelope to get fabric swatches of the bridesmaids dresses so she could best match their bouquets to their dresses!

How gorgeous is this centrepiece, too? I told her since we wern’t having “wedding colours” (ugh ugh ugh!) that she should either go for all colours, or just white. So she incorporated the bridesmaids’ dress colours into it and I just love it. I think it’s just stunning, and I’m glad we got to enjoy it during the ceremony and then again during dinner at the top table.

Our DIY wedding – refashioning my grandmother's gown

I’ve got many, many more wedding photos to come, but as I was slowly going through all the photos from friends and our professional photographer, I realised that there were a lot of parallel poses between my grandparents’ photos and ours.

Big thanks to my Dad for taking the time to scan in my grandparents’ wedding album in hi-res format, and also to our truly INCREDIBLE and AMAZING wedding photographer, Paul Tanner. I’m pretty sure he was the best money we’ve ever spent.

Confetti toss:

Post ceremony posing:

Walking back down the aisle:

Cutting the cake:

Pre-wedding girly preparations:

If you’re new to this site, let me back up a minute and explain what went on here. First of all, yes, I sewed my own wedding gown. But that would be too easy (ha!), so I decided to sew it from my grandmother’s gown.

La Mia Boutique Sept 2010

I’m still away on my honeymoon for a few more days, but in the meantime please enjoy my pre-prepared rundown of the latest La Mia Boutique magazine!

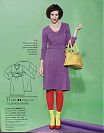
I love this casual, raglan sleeved minidress:

There are quite a few nice trench coats in this issue, but single-breasted ones like these are quite difficult to find:

While this reminds me of a knit tunic Burda did a few years ago, I like that this A line dress is for silks and lightweight crepes, and doesn’t require any zippers.

Our DIY Wedding – first friends' photos

It’s going to take us quite some time to filter through the 300-odd AMAZING wedding professional photos that we just got through, but in the meantime, here’s some of my favourite shots of the wedding from those that our friends took.

It should give you a great idea of what the dress looks like, and how it held up throughout the day and dancing, anyway!

Signing the official registry:

My bridesmaids and Man of Honour (remember I made their silk jersey dresses?)

Something old…

Check back on Sunday around noon (London time) for wedding dress photos!

Around the end of August, I got an MMS (photo text message) from my bridesmaid Pip’s boyfriend Rob of a brown case next to an assorted pile of clothes with the message “Saw this and thought you might be interested.”

I replied with “Ooh what’s inside? Have you got a model no or year? And does it work, or Need Love?”

To which he said “No idea at the moment. It’s in the window of a charity shop, I’ll check it out on Tuesday.”

And I said “Ah I can’t really justify a 3rd machine! But if it’s a vintage Singer I’m interested (I’ll pass on any others, so don’t spend too much energy on it!)”

And since I never heard anything further about it, I completely forgot about our conversation (conveniently still saved in my phone though!) until they presented it to me as a wedding gift!

It weighs a TON, but it’s got a great hard case:

…which opens with an altered Citroen car key! ha!

Front, left, and back views:

Mr and Mrs

Just a first glimpse for you all! We should get our professional photos through this week so there’ll be more to share then.

Thank you all SO much for your comments and emails! The day was utterly perfect, fantastic, amazing, and truly the happiest, most wonderful day ever. details to follow. So much you’ll be sick of hearing about it, honest.

Final wedding "in progress" update

This will be the last update you’ll get before the wedding on Saturday, so after this it’ll all be finished photos, which is rather exciting!

I almost winced trying on my gown for the final time on Monday night – I thought for certain there’d be some niggling problem I’d have to fix, but no, phew! Everything’s still good. My sister-in-law marked out a nice curve in the train, trimmed it to within an inch or so of the pins, and then I did the hem last night. As it turns out, I’ve still got a good two feet of train left, and the thumb loop is intact, so I’ll be able to easily lift it up for the dancefloor.
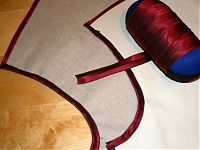
The original hem was just a narrow turned hem that’s stitched by machine, so I did the same thing on the new area to keep it consistent. First I folded the allowance over so the fold was at the marked hem line, and I machine stitched as close to the edge as I could get. I pressed this (with the indispensable silk organza press cloth!), then carefully trimmed away the allowance as close to the stitching as possible. I then folded over the hem again and stitched about 1/8” away from the edge, then gave it another good pressing.

But this wasn’t the only hem I sewed last night, no no! I also hemmed both bridesmaids dresses! My sister-in-law was a huge help here, too, by hand basting the hem of each dress very close to the cut edge of the fabric. So when it came time for me to send them through the coverstitch machine, not only did I have a nice line to follow, but the basting kept the silk jersey from twisting underneath like it loves to do.

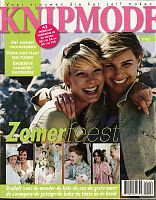
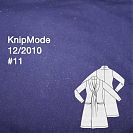
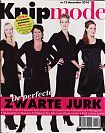
KnipMode October 2010

Hot on the heels of the a-freaking-mazing Burda September issue (in which I have no less than eleven Must Sews!) comes the KnipMode October edition. It’s a bit unfair on Knip to have to follow an act like that, so I’m naturally less enthusiastic about these styles that are just good rather than incredible. Maybe I’ve been buying Knips for too long, but I’m seeing a lot of repeats in this issue that appeared a few months or years ago…

But anyway, on to my highlights!

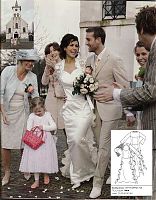
The cover feature is all about three garments in leather – a leather blazer, an A-line dress, and this skirt. I rather like the skirt but I think the gathers would be really difficult to achieve nicely since you can’t do two lines of gathering stitches (as the lower one would leave permanent holes). And this section gave me massive deja vu from the October 2009 issue where they also had a leather jacket, skirt, and A-line dress…

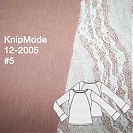
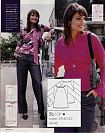
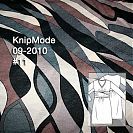
Next there was a section showing lots of winter knitwear that could either be sewn, or knitted (giving me massive deja vu yet again to the January 2010 issue where they also did the same thing!). Most were either long, baggy, or both, but I rather liked this batwing tunic which could look really nice in a thin, drapey sweater knit:

Lavender confetti bags

We decided fairly early on that for our wedding confetti we were going to throw lavender buds instead of the traditional rice, birdseed, or tissue paper varieties (many of which are banned at venues these days anyway as they don’t break down readily enough). But I wasn’t quite sure how we’d portion these out to our guests until I saw this tutorial and free pdf label and got inspired to do something similar.

I ordered a ton of small glassine bags from this UK shop and we were planning on designing our own labels along the lines of the ones in the Mint Design link, but our laser printer decided to choose this point to run out of ink (after three years on the same cartridges, it’s still excellent value!) so we required a change of plans.

Stashed away in a drawer, I had a bag full of reproduction garden ephemera that my mom had bought be and thought I’d like, and I saw these old Amateur Gardening magazines, Woolworths flyers, bills of sale, and gardening catalogues as a perfect accompaniment to our vintage-inspired modern wedding. The reproductions vary in age from the 1910s to 1950s, and I just LOVE the way they look all mixed up!