Blog

La Mia Boutique August 2010

After quite a few great issues of La Mia Boutique, it pains me to admit that this issue seems to be a throwback of the weird, not wonderful, old days of LMB. In fact, there’s not really any “Must Sews” for me in here at all, though a few of the designs have interesting pattern shapes when you take a closer look.
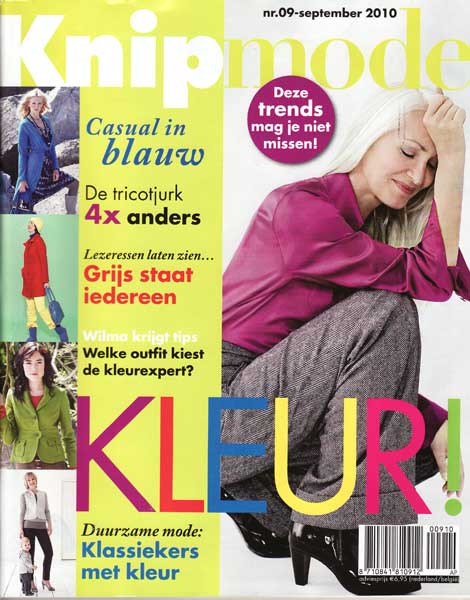
cover:

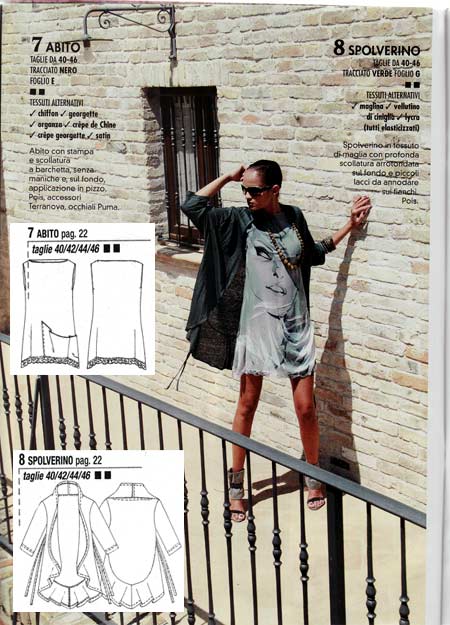
First up, an oddly-shaped maxi dress for those of us with really uneven hips… Even that ruffle shape is strange.

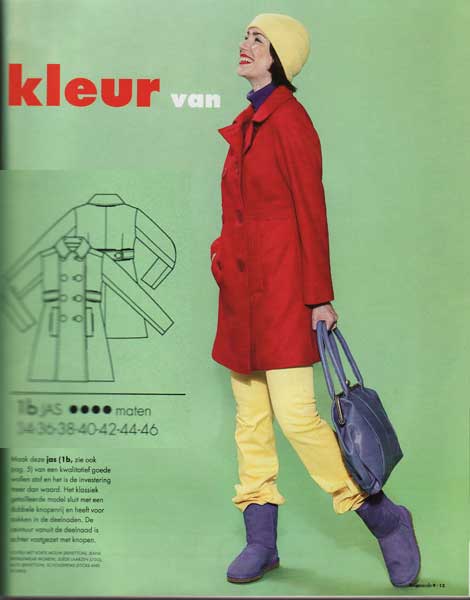
Here’s a rather nice tunic top with a large patch pocket, paired with a knit cardigan.

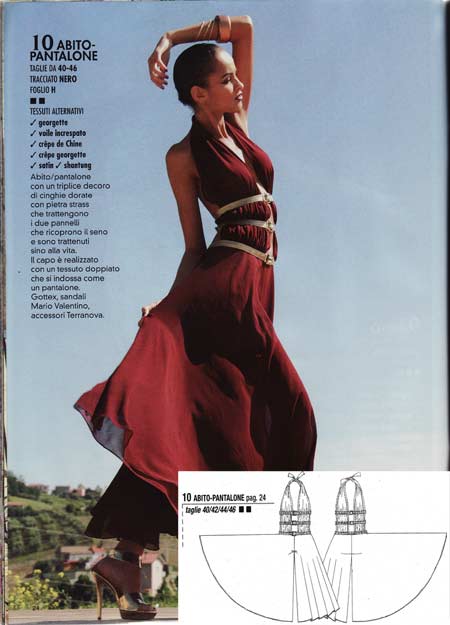
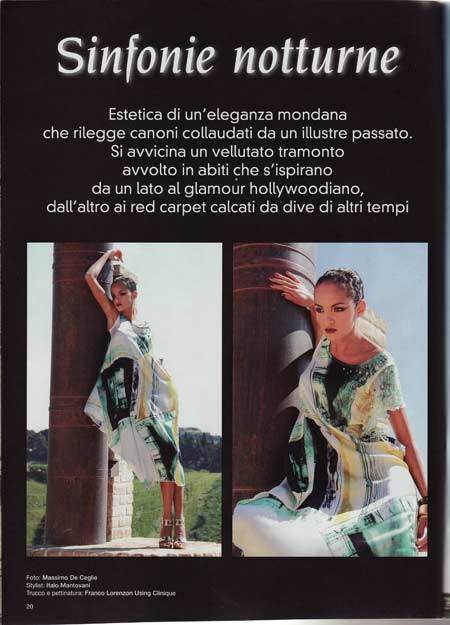
Seriously, WTF is this? An enormous maxi jumpsuit with windows for your navel and a neckline down past your waist? Really, who would wear this besides this model getting paid to wear it?

Bridal bodice – a slight (but fixable) setback

Apologies for the photo-less post, but with four weeks to go to the wedding, the planning has gone from busy-but-manageable to STRESSAPALOOZA! And as a result, I haven’t had a chance to take the photos of my beautiful lining prickstitching off the camera yet.

But before I forget, I wanted to describe a slight setback I ran into in preparing to attach the skirt to the bodice. To start the process I removed the central skirt panel that contained the blue dye stain (from the tissue paper it was stored in for 60 years), and sewed the two gored sections together, which makes a really unexpectedly beautiful central detail. But as I was lining up the centre front, centre back, and side seams on the skirt and bodice to make the skirt pleats, I kept having excess fabric on one side of the front skirt.

Scratching my head, I measured the front of the skirt, and the CF is indeed central. So then I measured the seam line of my bodice, and ERRRRRRRR! the right side is 27cm to the CF point and the left is 24cm. So that’s why I was having excess skirt fabric on the left but having it match almost exactly on the right.

KnipMode September 2010

Still no August Burda or La Mia Boutique in my postbox (though I just found out my 6 month resubscription to Burda, made in a moment of weakness, won’t start until September now, argh.*), but KnipMode’s September issue arrived already, just like clockwork!

The first, colour-blocking feature has a bunch of great patterns in it, though I’m not quite sure about the styilng…

Case in point: fantastic coat! But purple Uggs? Really?

This knit dress appears no less than six times in this issue, but I thought you could see the lines best in this version. Though I think if I make this, I’d add a gathered waistband to the back, too, to make it all even.

Bridal bodice – buttons, lining and shopping!

Ok after that little lingerie diversion (and a day spent being filmed for BBC1!), we’re back on the wedding gown!

First up was a quick fitting of the shell with all the boning pieces inserted and the waist stay hooked. And I can breathe a sigh of relief, because it’s looking good. A tiny bit of horizontal pulls around the zipper (which can be fixed by laying off the ice cream a bit) and a bit of boning show-through at the centre front (which I’m going to hold off worrying about for now, but I may just shorten that boning piece so it stops below the bust).

So I can push on ahead, safe in the knowledge that there’s no major fitting issues…

First up – I sewed on all 13 original covered buttons along the right side’s zipper, matching up with the original satin loops I placed along the overlap during the zipper insertion step.

On the surface, these look like ordinary covered buttons, but look at the underside!

I’ve never seen buttons like this before in my life! Instead of a shank with a hole, there’s a mound of stuffed fabric to sew through! What a strange vintage detail! I’ve learned so much from taking the original gown apart…

Honeymoon Lingerie – nightgown muslin

True confessions – I took a brief break from the wedding gown. I don’t deal well with long projects and I was getting really itchy to complete something (I didn’t have any completed projects in July because of the gown, aaaaagghh!).

So I took one evening out to do a test run of one of the patterns I’d earmarked for honeymoon lingerie and Shasha’s Malaysian silks, Burda 7418 (on the right in my earlier image below):

This is a brand-new Burda envelope pattern, but I just went and bought the pdf version instead because a) I’m impatient, b) the pdf patterns are way cheaper than the paper versions (we have a laser printer and printer paper is cheap!), c) piecing together pdf patterns takes only 5 minutes longer than tracing a paper pattern and I can do it sitting down, and d) no seam allowances, woooooooop!

This was my first downloadable pattern from the German Burda site, and I was pleased to find that the instructions were in nine languages, with fully illustrated instructions. I was expecting it to just be in German! But do pay attention to the print preview, though, because you may not need to print the last ten pages or so (the English instructions only take up a few pages). The only weird thing is that they decided to waste some paper giving us two side panel pattern pieces (one to be cut in lace and the other in self-fabric) and the two pieces are absolutely identical. Weird.

Bridal bodice – finishing the edges, waist stay, and zipper

The next step in my epic wedding gown project was to properly finish the neckline and armhole edges in advance of the lining. Instead of most lined garments where you construct the outer shell, construct the inner shell, then place the two together, right sides facing and sew around the opening edges, in this case Bridal Couture advises us to construct the outer shell, fold in the opening edge seam allowances, then create the lining, with the opening edges similarly folded inside, and then place the two together wrong sides facing and very carefully fell-stitch along the opening edges, prickstitching the lining where necessary.

So here are the neckline and armhole opening edges, nicely clipped, pressed, and catchstitched:

The next step was to add the waist stay, tacked to the boning channels with bottom edge of grosgrain on the marked waistline:

Bridal bodice – boning

With the seams (mostly) constructed and all the seam allowances tacked down, it was time for the boning! Bridal Couture assumes that you’ve got a fairly standard princess-seamed bodice and so advises that you sew the channels to the centre of the underlining pieces at the very beginning before attaching the underlining to the fashion fabric. But my bodice has all sorts of crazy seams and the boning crosses over a bunch of seamlines, so I had to obviously apply my channels after the main seams were stitched, as Susan Khalje advises in this Threads article.

I was originally thinking to make my own channels with silk organza, but then I saw that the Sewing Chest had pre-made and seam-free cotton channels so I bought those and ended up going with that instead to save myself some time. And as Ms Khalje talks about using them herself, I figured it’s okay!

So I started a production line – first I sewed the end of the channel closed with the sewing machine, then I carefully pinned the channel to the bodice underlining where it was needed, then cut the end just before the seamline at the bottom of the bodice. Once all the channels were in place, I then catchstitched them all to the flannel underlining, keeping the bottom free to insert the boning.

Here you can see all the channels, minus the one going on the zipper tape (to be attached after the zipper is in place):

Bridal bodice – Piping and basting

…in which I work with more piping than a plumber and more basting than a Thanksgiving dinner!

When I last checked in, I had cut and prepped all the pieces of the bodice, so it was now the point in my plan to sort out the piping if I was going to do so (and you’ve probably rightly concluded from the title that I did!). I had about 80cm of piping from the original dress’s waist seam, but I realised this wouldn’t be enough to pipe both sides of pieces #2 and #7 like I’d planned. So before I could do anything, I had to make some piping!

Luckily, the dress’s collar pieces were nice and long and on the bias, so this was a piece of cake. I cut four strips of 5cm wide and joined the edges together to make one long strip, then inserted my 2m of satin rattail and ran the whole thing through the sewing machine with the zipper foot.

But as I’ve already established, I can’t be making errant needle holes nor can I afford to use the seam ripper any more than what’s absolutely necessary, so in order to get the piping inserted perfectly on the first try, some hand basting was in order.

First, I basted the piping to one of the pieces, aligning the piping’s stitches with the basted seam lines:

And I did that for all four piped seams:

Bridal bodice – Prepping the pieces

I finally got the muslin fixed and finished! Thanks for all your advice, though I haven’t had a chance to reply to hardly any of you, for which I do apologise…

Muslin #3 changes –

  1. Unpinned the shoulder change, took off the waist stay, and since it seemed to be pulling everything upwards before, I reasoned that it must be too low. I repinned it a little higher and everything seemed to sit nicely and correct those weird problems it threw up before.
  2. I’ve said it before but I’ll say it again – I detest Rigilene boning! Only someone who hates women could’ve come up with those tiny, needle-like implements of torture. My spiral steel boning for the finished dress arrived and it just feels wonderful.
  3. No one actually came up with the fix I needed for piece #3’s weird bubble. As it turns out I just needed to flatten the curve a bit below the inset corner. (Before and After are below)
  4. There’s no way I’m muslining the skirt. It’d literally take a whole week of sewing time to even approximate the panels on the existing skirt, plus the drape and weight of the muslin fabric is totally different, and it won’t achieve much of anything I won’t learn in the actual skirt attachment anyway. End of story.
  5. Yes, I know about wearing proper undergarments. I’ve been wearing the bra I intend to wear on the day all along (though I got sharpie on it during my muslin marking process so I need to buy another copy of it, boo.). I was not being serious about the push up bra.

So with the muslin done, on with the dress itself!! Hurrah!

First step was to lay the pattern pieces onto the wrong side of my flannel underlining, fuzzy side down (I’d been transferring all my changes onto them and I prefer paper with no seam allowances over muslin with allowances). Once pinned in place, I then chalked the seam lines, waist, centre back and fronts, and the two notches onto it. Then I cut out the pieces with eyeballed seam allowances (when you’re dealing with seamlines, the size of the allowances are largely unimportant).

Next I laid the flannel pieces onto the wrong side of the satin, pinning only in the seam allowances because all the pin holes show on this fabric.

Yet another bridal bodice muslin

I’m no big fan of muslins and fitting tweaks, so the title is really reflecting my impatience at still being in the fitting stage. I want to get on with the fun stuff! But I also really want to get the fit and design perfect here as I can’t really go unpicking the vintage satin (the needle holes remain), so here I am, still soldiering on, though hopefully not for much longer…

Yesterday was my day off so I devoted pretty much the entire day to this dress. Right after breakfast I made up Muslin #2 (not shown because no one was around to photograph me), which incorporated the neckline changes and better-drafted add-on straps. There’s no photos, but essentially, I just needed to pinch some fabric out in three places, which you can see here shaded in orange on my pattern pieces:

So I made those changes to my paper pattern, unpicked pieces 1 and 3 from the muslin, cut new ones out, and reattached them, bringing us to Muslin #3. And I was pretty happy with the fit, apart from a bulge above my right breast which I immediately knew the cause of and fixed it on the paper pattern.