Blog

Vintage wedding gown photos

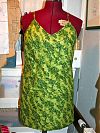
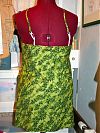
So you’ve already seen a bunch of detailed photos of my Granny’s gown (from 1949) laid out flat, but I wanted some on a real person so you could really see the style lines and how it falls. And this way I can get some nice Before and After shots when I refashion it into my gown for September.

Big big big HUGE thanks to my neighbour Kate who not only fit into this tiny dress (respect!) but actually humoured me and let me take photos of her in it to post to the internet (Secretly, I think she had fun!). Kate’s also engaged and I was thrilled to learn that she’s not having wedding colours, either!

So let the vintage dress photos commence!

Well-travelled silks

Yay! My friend Shasha was in Malaysia recently and she went to the massive Gulati’s fabric store and brought me back some silks!

I must’ve coached her well because she bought 2m each of this gorgeous turquoise silk satin which coordinates perfectly with the blue floral silk jacquard. You can tell she’s got such the eye for colour because these two just look like they’re born to be sewn together, and she said she thought the blues would go well with my colouring. You can see bigger photos of each on their on in my fabric stash gallery.

Bridal Bodice update

When you last heard about my wedding gown, it was two years ago(!!) and I was leaning towards turning my Granny’s gown from 1949 into something with a cowl neck, deep back, and sleek lines, using Vogue 2965 as my starting point.

But recently I’ve been looking more closely at the fabric I’ve got to work with in my grandmother’s gown, and my recent cowl sewing adventure has reminded me that cowl necks need pretty huge amounts of fabric, can’t easily be pieced together, and on top of that, the silk satin in her gown is more of the heavyweight duchesse variety than something very drapey that would cowl nicely. And while I love a low back, it does make things awkward for bras and any sort of shapewear, too.

So I had a bit of a wake up call and told one of my bridesmaids to keep reminding me that “This is just one dress. It is not all dresses.” (thanks, Stacy!). Yes, I like cowls. But I also like other things, too. And I do not need to put everything I like into one dress!

Paris fabric shopping

Ahhhhh, Paris! We had a simply wonderful time in the City of Lights this weekend, cramming an entire holiday into a few short hours. We’ve both already been to Paris a few times, so we didn’t feel the need to do the touristy stuff all over again. This left us with an entire weekend to devote to eating and shopping, and socialising with our friends Sat and Sarah (who I’d not met before this weekend, but I now feel like we’ve been friends for years!). As is my habit when I go away, I went fabric shopping so I can now share those shops with you…

As Isabelle says in her guide to Paris fabric shops, the bulk of the fabric and notions shops are in Montmatre, so if you’re pressed for time, head directly to the Abbesses metro and head east (which, conveniently passes right by a branch of my favourite-ever perfume shop, too!). There are a few other fabric shops in the same area that I didn’t pop into, plus a giant notions shop with more buttons than you could possibly imagine, so Montmartre really is your one-stop-shop for fabric, lining, interfacing, zippers, trim – the lot! Everything in Paris shuts down on Sundays, but happily, nearly all of the fabric shops are open on Saturdays which is convenient if you’re only in town for a weekend like us!

Au revoir!

We’re off to Paris today for a weekend of food and fabric shopping excess! Unlike Susannah, we’re driving down (and staying with friends), so I can’t really do any sewing to do en route, but I fully plan on hitting up Isabelle’s Montmatre fabric shops and doing some keen couture window shopping while I’m there, too. But because we’ve got the car, I don’t have any baggage limit on the amount of fabric (and macarons) I can buy, either. BWAHAHA!

Now seems a natural point to put my summer sewing on hold, and start sewing my wedding gown in earnest when I get back (more on that next week) in addition to my “OMG crazy busy secret project”, that’s going to keep me really on my toes in July (as soon as it’s announced, I can tell you what it is, honest).

So how have I done on my Summer Sewing Shortlist? Actually, not too badly! I was never expecting to make everything in one month, but I did manage to make…

Black Beignet skirt and a bias cowl top

It feels like I’ve been talking about sewing the Colette Patterns Beignet skirt for ages now, but it’s mostly because I’ve just been so busy with life (running, socialising, wedding planning, the boat, and my garden, mostly) right now that I’ve been sewing in tiny increments here and there! But it’s finally complete, and I even managed to sew up the bias cowl top from Patrones 292 (#19) to wear with it!

Even though these go so well together, I’ve actually got no shortage of other things in my wardrobe to wear with either, so there’s no “orphan coordinates” here! And I managed to sneak some mustard and navy into my wardrobe a bit earlier than I’d planned, too!

How to sew a narrow bias edge

I had a busy yet productive weekend – not only did I finish my Colette Patterns Beignet skirt, but I also made the Patrones 292 sleeveless bias cowl top, too! I didn’t have enough time for a photoshoot over the weekend, but I did remember to finally document my favourite way of finishing the edges of thin blouses like the cowl top so I can finally share this with you.

This technique is great for necklines and armscyes on sleeveless tops, and is my preferred way to finish any kind of blousey, lightweight fabrics like silk satins and the viscose (rayon) you see here. You get a thin, finished edge that looks good inside and out with a minimum of fuss, and you don’t have that awkward problem of facings flipping out or anything, either. As long as you’re okay with a small amount of topstitching on the right side, this is the technique for you…

So before we begin, sew one of your seams so you’ve got a C-shape. If you’re finishing a neckline, this means you sew one of the shoulder seams. I’m finishing the armscye of a sleeveless blouse here, so in this case I’m sewing both shoulder seams, leaving the side seams free.

Step 1


Cut out a bias strip that’s the length of your opening edge, plus a few centimetres just to be sure. For the width, I prefer a finished facing of just 1cm, so my width here is 1cm + (2× 1.5cm seam allowances) = 4cm.

KnipMode sale alert

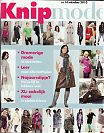
I recently (after years of saying I would!) finally sorted out a subscription to KnipMode magazine, but since they said it won’t start until the August issue, I took a whirl round my favourite online KnipMode source, Naaipatronen.nl to get the June and July issues, plus one for a friend. I’ve used them for years to get my KnipMode issues and they’ve always given me great service.

Imagine my surprise when yesterday they sent me a partial refund, because they just started a 3 for 2 sale on all their magazines (they also stock Ottobre, Knippie, Burda, and Burda Easy)! How nice is that, the sale wasn’t even running yet when I ordered! The sale’s not mentioned on the English version of the site, but it’s a news story on the Dutch side, and runs until Tuesday (22 June).

Patrones 290

I’m kinda going backwards here, since I already reviewed Patrones 292, but Kim ended up with a spare copy of this issue so I got a surprise in my happy postbox!! Thanks, Kim!

Overall, this issue was more summery than 292 despite coming out earlier in the year, with tons of shorts (which I do not wear), but these tops worn with them were pretty cool. The white one uses a knit on top, and wovens for the two lower panels. What a great idea for lovely flowing silks or chiffons…

I love the bubble, cropped sleeves on this jacket…

Manequim April & May 2010

Are you ready for some exquisite eye candy? Remember when I showed you my one and only Manequim magazine last year, and I raved about how amazing the designs were? Well, Susannah from Cargo Cult Craft came over for Crafternoon and brought not one but two issues of Manequim with her that a friend recently brought back from Brazil!

And she is WAY nicer than I am, because she actually let me borrow them! I can’t believe she let these pretties out of her sight for a week while I scanned and traced like a mad woman… I actually only ended up tracing three patterns, but I scanned a lot more so I could go back and draft others in my size when the inspiration strikes. Manequim may have an amazingly talented design team, but the sizes offered are really limited – usually only one size per each design, with a few patterns being offered in three sizes. Not to mention that the roadmap pattern sheets are crazy to trace from. They make the new Burda sheets look like child’s play…

So thanks to Susannah, we can all have a few minutes of total escapism, as we marvel at the inventiveness in these designs (no really, some of the pattern shapes are mental!).

Manequim April 2010

I actually rather liked the dress shown on the cover, until I saw in the tech drawing that the ruffles extend from the shoulder down to mid-thigh, and are only being held in by the belt. As far as I’m concerned, belts should never be required for a dress to look good!