My galaxy-print birthday sheath dress

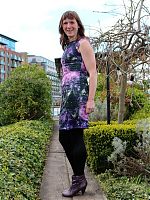
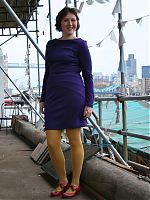
Happy birthday to meeeeee! I hinted about it last week, but I decided to celebrate the occasion this year by sewing up something special to wear, using a fabric that I’ve lusted over for months even before I broke down and ordered it. My feeling is that if you adore the fabric or pattern (or both!) then the resulting garment is pretty much guaranteed to be a hit.

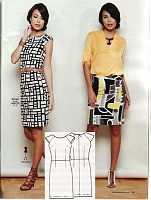
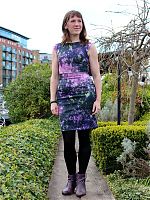
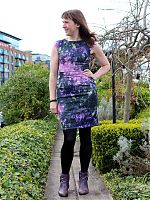
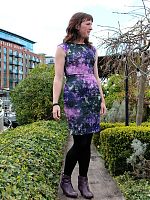
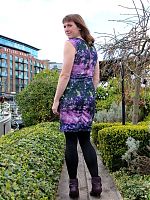
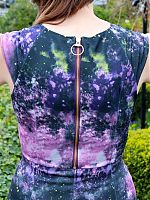
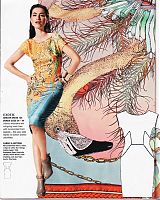
For this dress I used the Derek Lam-inspired knit sheath from the January 2014 Manequim magazine combined with the most amazing galaxy print ponte jersey which is even nicer in real life, I swear! It’s a digital print on a smooth, white ponte jersey base, and it’s both stable and stretchy, making it the bestest fabric ever (and I have just over a metre leftover! woo!).

It’s been a while since I sewed a Manequim pattern and I’ve dropped in size over the past few months of marathon training to a 42 (Burda 40), so I decided to sew up a muslin of this first to test the fit. The resulting turquoise ponte muslin was very close fitting, and I wasn’t entirely certain at first whether it was too tight, or utterly perfect. So I lounged around in it for a day, decided it was comfortable enough, then cracked on with the final version without any pattern changes.

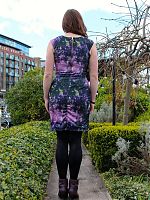
The final version is definitely tighter than the muslin, though, and I’m fairly certain it’s down to adding the lining layer, even though it’s stretchy! You can definitely see some horizontal pulls in the dress showing it’s a tad too tight, and it’s a struggle to get that waist seam on and off over my boobs, but one it’s on, it’s not uncomfortable, thankfully!

The pattern is really simple – a front bodice with both vertical and horizontal bust darts, back bodice with long vertical darts, raglan cap sleeves, and a skirt pattern with vertical waist darts (the same skirt pattern is used for both front and back). The pattern calls for a long invisible zipper, but as I could easily get the muslin dress on and off without it, I was going to leave it off the finished version, too…

…until I discovered the most perfect purple, metal teeth zipper in my stash! So then I decided I had to use it and make it an exposed zipper feature instead. It was a bit shorter than I’d have liked, but it reached exactly to the waist seam, which worked out nicely visually (though for ease of getting in and out of it, a longer zipper would’ve been much better!).

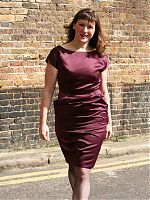
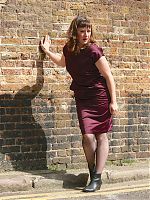
My Matthew Williamson birthday dress

Thank you all so much for your patience! I finished sewing this dress in time for my 34th birthday on Monday (and I proved it by showing you dressform photos and talking in depth about the construction process!) but such a rich, dark colour really requires daylight to shoot properly, and today was the first opportunity we’ve had.

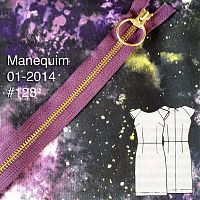
Another reason I wanted some great photos of this is because it’s an incredible pattern with some seriously striking design lines and beautiful details, and frankly, it deserves to be seen properly! In fact, it’s a true designer pattern, and from Matthew Williamson, no less! It was printed in the September 2012 issue of Burda magazine, but you can still purchase it as a pdf download if you missed it and want to make your own!

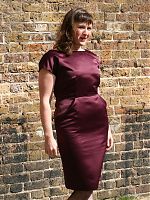
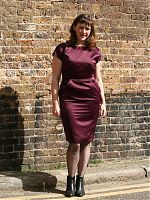
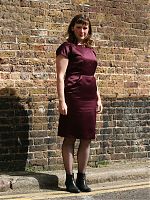
I made mine in some lusciously soft and supple “Ravissant Duchess Satin Plum” that’s been in my stash for three years just waiting for the perfect use, and paired it with a floral lining fabric gifted to me from Veronica when I was in Paris last Spring. Personally, I think these two make the most perfect pairing, even if it’s only me who sees the inside!

As I said on Monday, this pattern is a step up from the usual Burda patterns – more like a Vogue Designer pattern in all its wonderful details, but with the usual precise Burda drafting. I really wanted to do this dress justice, so I did quite a few things the long way, like the fell-stitched sleeves, walking vent, and all the matching seam intersections!

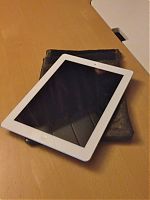
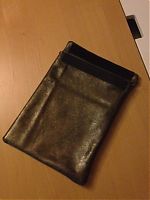
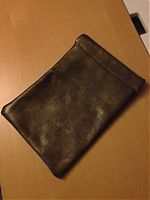
Birthday leather iPad case

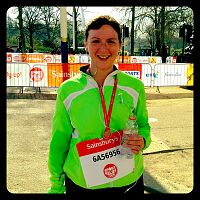
Yesterday was my birthday, and I wanted to start the year off right, so I got up early and ran the Sport Relief 6 mile run down on The Mall, and I’m happy to report that I ran a new PB of 46:38 for the 10k! Though I have my doubts as to whether the course was entirely accurate, since this is a full 5 minutes faster than before…

Then I came home and enjoyed the glorious sunshine, cupcakes, and the pressies James had in store for me – luscious new Wolfords, a beautiful hardback copy of Habibi, and a cool lunchbag that mimics the old school brown paper bags.

Oh, but there was one more thing…

So of course I had to sew a case for it!

I wanted something more classy than crafty, so I used bronze/black leather from the obi belt (which I actually hardly wear and is too big now!) and it’s lined with black sweatshirting leftover from James’s sweatshirt from a few Christmases ago.

I measured up the ipad and then cut the leather to be two conjoined rectangles of 21cmx26cm, plus about 6cm more length on one side for a closing flap, plus a facing (only because I didn’t have enough leather to do a self-facing

I used long strips of velcro (sewn on) for the closure, making sure the soft loops are on the flap so the iPad doesn’t get scratched as you slide it in!

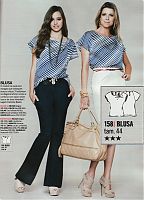
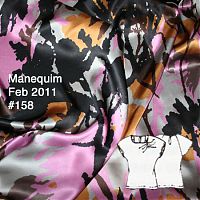
Manequim silk birthday blouse

I love this blouse!

It all started in Paris last June when I saw this amazingly gorgeous silk satin (charmeuse) in Tissues Dreyfus that I just had to have. But it was €22/m (zoot alors!) so I only bought 1 metre. But even now I still love it love it love it love it so it was worth it worth it worth it!

Ever since, I kept my eyes open for a good blouse pattern that only needed 1 metre of fabric, and along came Manequim Feb 2011 #158, which called for exactly the amount I had – 1 metre long and 150cm wide!

These two were clearly meant to be together! I don’t often do prints, but this one is just so gorgeous with the psuedo-floral/paint splatters of silver, black, orange, and fuschia that I wanted it to form both the centrepiece of my March Mini Wardrobe as well as be my special birthday garment this year!

Pre-birthday miscellania

Birthday dress!

My LMB draped birthday dress is finished, so thank you to everyone who commented on my muslin! I’ll be having the photoshoot tomorrow so you can see it on my big day itself on Thursday (no, not THAT big day, that’s in September!). I’m really happy with the way the final dress turned out, and the silk jersey is just so gorgeous to wear…
Labels!

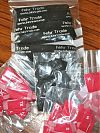
My new labels also arrived this week (albeit with an eBay shipping mishap).
For some reason Cash’s aren’t offering the silver/black I had before, so I went with GB Nametapes for this lot. I’m not 100% convinced on the font I chose for “Fehr Trade”, but I love that I could get the URL printed smaller this time around. Considering that the last lot of 120-some lasted me just over two years, I have a feeling I’ll get used to this design soon enough.
BurdaStyle!

Looking beyond my birthday plans, I am super excited that BurdaStyle are coming to London next week, so I (of course!) need something new to wear to their mixer!

The LMB draped dress – muslin

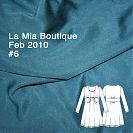
As good as my word, I sewed up a muslin for my birthday dress (next week, birthday fans!), which will be the draped jersey dress from the Feb 2010 La Mia Boutique magazine, #6:

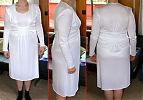
I sewed up the muslin in a viscose jersey, chosen for its very similar draping to silk jersey (with the bridesmaids’ dresses also in silk jersey, I bought TONS of this!), but it is pretty thin and see-through so it’s really only ever going to be good for muslins. After sewing a size 44 in the turtleneck and finding it quite roomy, I decided to go with a 44 here, too, even though I should be a 46 according to their size charts. This is sewn up exactly as per their paper pattern, with no alterations.

Here’s the front, side, and back views of the muslin:

Mentally sewing the LMB draped dress

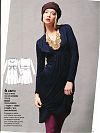
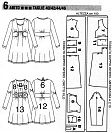
I’ve gotten as far as I can on my secret other project while I wait for supplies (mostly new labels – can you believe I’ve sewn through the last lot of 120-odd Fehr Trade labels in the past two years??), so I cut out my muslin pieces for my birthday dress. If you’ve got a good memory, it’s this luuuurrrrrvely draped number from the Feb 2010 La Mia Boutique magazine, #6:

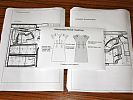
What I normally do for foreign language patterns (La Mia Boutique is in Italian) is look at the pieces and get a brief order of construction in my head. Usually I work from the top down, starting with assembling the front bodice pieces then join to the back at the shoulders, then finish the neckline, then if it’s a knit, attach the sleeves at the armscye and sew up the side seams, or if it’s a woven, do the side seams first them attach the sleeve in the round. After sewing for a while, you begin to see that most pattern instructions have you sew things in roughly the same order, so you can just do those here to suit this particular pattern.

But for more complicated patterns like this one, I like to sit down with a pen and paper and mentally go through the whole process, visualising how the different pieces interact and the pros and cons of doing which seams in which order (like “if I do this first, is it going to make it awkward to serge that?”). It’s a great mental exercise in spatial thinking, and one of the most pleasurable aspects of sewing for me.

And it means I don’t have to type in every single word of the foreign instructions and figure out what the translator’s trying to tell me (sewing terms are not the best translated! )!

So since I was writing these out anyway, I thought my order of construction might help others who were eyeing up this pattern.

Me-Made March

Me-Made March has been in full swing for a month now, and as I stated in February, I’ve been playing along at home, but taking photos of what I wear every day is just completely infeasible for me, so I’ve just kept a record of what I’ve worn instead.

I did something similar a few years ago and it was really helpful in observing what I tended to wear throughout the week and which items I turned to most often. I can’t actually remember the last time I wore an outfit that didn’t contain at least one “me-made” item (not counting weekends, where I live in grotty, boat-DIY clothes), so this challenge isn’t really that challenging for me! It’s what I tend to wear anyway!

March

  1. Tues. Navy blue riding trousers & purple cashmere turtleneck (RTW)
  2. Wed. Taupe corduroy skirt & turquoise mohair sweater (layered over a RTW white long sleeved top) (so yes, I am wearing the exact same outfit as shown in my citizenship post, right down to the same tights and boots!)

  3. Thur. First Jalie jeans & plum and green lace Patrones top
  4. Fri. Foldover wool trousers (so warm!) & RTW black long sleeved top
  5. Sat. Two 40th birthday parties! Burda September cover dress

Saturday afternoon sewing pow-wow

I normally get quite a lot of sewing done on the weekends, but this weekend was particularly fun because Susannah of Cargo Cult Craft came over to the boat on Saturday afternoon for a big, fat geeked-out sewing session!

She brought her stash of ALL the 2010 Patrones issues, plus her assorted stash of Manequims, and I lugged my KnipModes, other Patroneses, and Manequims out of my sewing batcave. You should’ve seen the amount of pattern magazines on our saloon table! It was downright decadent, I tell you…

I ended up tracing two Patrones patterns then and there:

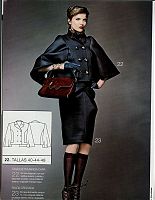
This cape jacket (295-22)

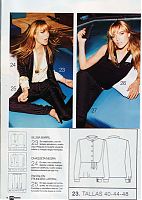
And an asymmetrical, yoked blouse (291-23)

Susannah fell in love with two Knips (a gathered knit dress – April 10 #14 and a long sleeved knit cowl top – Feb 10 #19) and traced those on our saloon floor, too. Poor James could barely find a scrap of carpet to walk on between my brown kraft paper and her Swedish tracing paper!

Our DIY wedding – refashioning my grandmother's gown

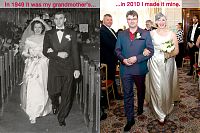
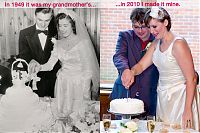
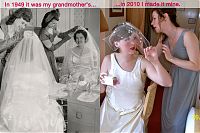
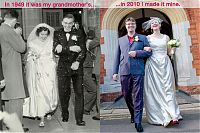
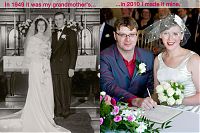
I’ve got many, many more wedding photos to come, but as I was slowly going through all the photos from friends and our professional photographer, I realised that there were a lot of parallel poses between my grandparents’ photos and ours.

Big thanks to my Dad for taking the time to scan in my grandparents’ wedding album in hi-res format, and also to our truly INCREDIBLE and AMAZING wedding photographer, Paul Tanner. I’m pretty sure he was the best money we’ve ever spent.

Confetti toss:

Post ceremony posing:

Walking back down the aisle:

Cutting the cake:

Pre-wedding girly preparations:

If you’re new to this site, let me back up a minute and explain what went on here. First of all, yes, I sewed my own wedding gown. But that would be too easy (ha!), so I decided to sew it from my grandmother’s gown.