Blog

Diary of an indie patternmaker, part two

Read Part One here!

While I was in the States visiting family, I also took the brave step of contacting a few other activewear-sewing ladies and asking them if they’d be interested in pattern testing for me. I knew that I wanted to keep the testing pool small, but also use sewists who I knew had sewn their own exercise gear before, both so that they were comfortable with the basic techniques, knew what they liked, and also could potentially go out an exercise in my patterns for some useful on-the-road feedback. I was utterly delighted when every single one of them said yes, and this really started the timeline towards Launch Day, which I knew I wanted to be before the usual New Years resolutions exercise explosion. Since I started the XYT Workout Top first and it was further ahead in the patternmaking process, I’d give the testers two weeks to test that, a short break, then hopefully I’d be finished with the PB Jam Leggings by that point so they could have two weeks to test that before I’d get their feedback and finish up everything for Launch Day.

The XYT Workout Top pattern pieces were pretty much ready for testing, but I knew I’d have to create the tech drawings as well as all the illustrated instructions at some point, and, while I used to be a semi-decent drawer, I am totally crap at drawing anything digitally. Like, comically crap. So my first attempts at the tech drawing were done by my sketching them out on paper, scanning it in, then tracing over top with (yes, you guessed it) The Pen Tool in Illustrator before cleaning it all up, mirroring to make things symmetrical, etc.

The instruction illustrations were all done by myself, too, but I did all of those without the hand-sketching step, sometimes using the pattern pieces themselves as a starting point (since I already had those digitally, I just had to shrink down the scale!), and sometimes just referring to photos I’d taken during construction. I never quite appreciated exactly how long illustrated instructions take to create, but my god, they took a LONG TIME. The step-by-step illustrations were easily the most time consuming piece of the entire patternmaking process, EASILY. I totally understand now why some indie designers skip the illustrations entirely, because it would be SO tempting to, and it’d make the process to Launch Day so much quicker. But in the end, I’m glad I did do them, as I think they make the instructions a lot clearer, especially for non-native English speakers.

Another thing I wasn’t really expecting was how the pattern testing process would really work. I guess I kinda thought that I’d send them out, some testers would have some fit issues, others might not think the mesh bra worked for them, I’d get some feedback, and maybe catch a typo or two. Ha! I’m so, so glad I have the amazing pattern testers I did, because both of my patterns needed major revisions thanks to my testers. Yes, it hurts at the time, but I’d much, much rather resolve these issues before release than have paying customers go through them later!

Diary of an indie patternmaker, part one

Quite a few of you were interested in hearing about the process of launching my own line of exercise sewing patterns, and since I tried to keep everything very quiet until the launch day, I couldn’t really talk about the process at the time, either (I decided to keep it quiet to minimise the “Are they ready yet? Are they ready yet? How about now??”, etc pressure when people get excited!).

I’ve been thinking about the possibility of making some of my own patterns for a while now, testing the waters last year with my Lacey Thong pattern, of course, but a full time job, marathon training, boat work, and busy social schedule mean that it always seemed to be on the back burner and never at the top of my To Do List. But I was made redundant from my tech job in August (really, it’s ok!) so I had time to think about what I wanted to do while we were in Mexico, and I realised that I wanted to give sewing a shot as my main career, with patternmaking as a large part of that.

I had lots of ideas in my head (and in my sketchbook!) but I opted to specialise in exercisewear because that was something I a) was passionate about, b) had lots of practice sewing and designing for myself, and c) there wasn’t much on the market for already. I knew I wanted to release at least two patterns at the launch, but I developed these sequentially, starting with the XYT Workout Top.

The first step in the XYT development was to draft my own sloper and make a series of muslins for the different versions, chopping and redrafting the basic shapes until I was happy. Then I made a muslin which had a bra the same basic shape as the exterior with one layer of power mesh, but I found that even though I took the side seams in closer and closer, I still didn’t have the support I needed for running. It was only after talking to a friend that I was able to make the leap to the arrangement of the second mesh layer that made all the difference and stopped the bouncing! I then finished off this muslin version, wore it for a few runs, and only then did I start the process of transferring my hand-drafted pattern pieces into digital.

I started by scanning in the paper pieces and re-joining them digitally in Photoshop, and then came the laborious and tedious process of tracing around all the pieces with the Pen Tool (ie: vector paths) in Illustrator. I’ve used Photoshop for 10+ years, but I was a complete Illustrator novice when I started this patternmaking, and my god there’s a steep learning curve!

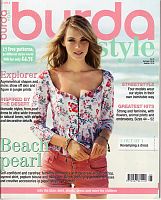
Burda magazine February 2014

I don’t know what happened this month, but I appear to be the last person on earth to receive their February issue! Some people were already posting reviews of their sewn garments a full week before mine arrived in the postbox, not fair! But better late than never, here are my picks…

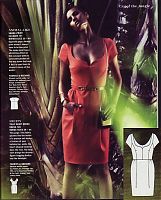
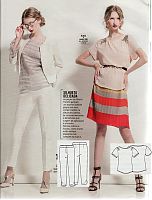
First up – this dress isn’t particularly earth-shattering, but it’s a nice classic shape, with short- or long-sleeve options, and a clever little central hidden kangaroo pocket in the skirt, too. I’m definitely eyeing this one up as a possible birthday dress for March, especially since I’ve got all that luscious silk twill that Dilly gifted me when she came to visit!

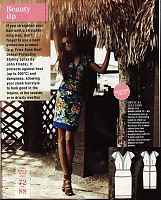
I know there are a lot of sewing ladies online that go ker-ay-zee for anything with buttons in the back but… I seriously don’t get it! So, you have to have someone help you get dressed whenever you want to take it on and off? How is that a good thing?! I’m not convinced by the central pleating on this dress, either, which might end up looking less than flattering…

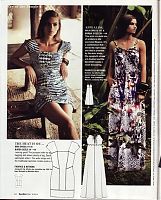
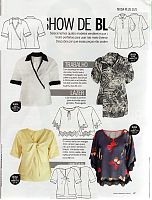
I’m not entirely sure what it is about this wide, cropped blouse, but I absolutely love it! Maybe it’s the cocoon-shaped sleeves, or the back yoke, or the nice V neck, but I really could see myself wearing this a lot with leggings. I don’t think it’s quite as successful with the full skirt Burda’s paired it with, however.

Londoners – Come sew with me! Panty Party 13th Feb!

Remember around this time last year when I released my free Lacey Thong pattern and had that big Lingerie Sewing Week extravaganza?! Well, in the intervening year I’ve of course sewed way more lingerie and released more patterns, but I still love my little ‘Thongs and wear mine all the time, so I thought I’d share the love and have a full-on PANTY PARTY!

It’s in the evening of Thursday 13 February, so you can de-stress after a long day at work by playing with frilly lace…

That’s right – come and sew with me and we’ll make Lacey Thongs til we run out of free tea and biscuits and/or start wearing panties on our heads. I’ll cover all the basics of lace placement, attaching lingerie elastic, that cool “burrito method” of enclosing the crotch seams, and you’ll get to go home with some saucy little panties just in time for Valentine’s Day. Or a Me Party, whatever floats your boat.

The panty party venue is at the Thrifty Stitcher’s studio up in Stoke Newington (a quick walk from Canonbury overground, or there’s plentiful buses), and all materials will be provided, including the aforementioned coffee, tea, and bickies.

The Sherlock coat – progress report

I mentioned briefly back in December that, for James’s birthday, I gave him the promise of a custom-made coat in the style of the one Benedict Cumberbatch wears in Sherlock. Or as it will henceforth be known, “the Sherlock coat”.

A few others online have made this coat (including a few FehrTrade readers, hello!!), but I found the most helpful resource to be this livejournal entry from a lady who sketched and measured a lot of the details after analysing screen grabs. This was a big help in taking James’s TNT short jacket pattern and adapting it to look more like the coat on screen!

I first made an approximation on his paper pattern and sewed up a muslin. From this the only real fitting problems were that the upper back was too tight, and the Centre Front needed to be shifted by about an inch, but it was otherwise fine. I guessed a bit wrong on the collar and lapel shape though, but it was fairly easy to just draw a nicer shape onto the muslin itself and transfer it to the pattern.

Once the muslin was settled, I then bought the wool coating (delayed a bit as Crescent Trading were closed over the holidays) – not the exact black and grey small houndstooth used in the original (simply because I couldn’t find any locally), but instead a black/grey/brown check which still had the same feel. I also bought the black acetate lining at the same time, but the black cotton flannel for underlining came from Minerva.

I then settled in for the mammoth task of cutting out all the pieces in wool, underlining, interfacing, and lining, then fusing the crap out of everything that needed interfacing. With two patch pockets (and flaps), plus two welt pockets, two back belt pieces, sleeve cuffs, and a collar, (not to mention facings!), there was a good day taken up just by fusing alone!

Dawn's Psychedelic Rainbow PB Jam Leggings

When was the last time you actually LOLed at a sewing blog? Because I just did, twice, reading Dawn’s (aka “cabinbaby”) post about her PB Jam Leggings. Seriously! She totally nails the self-defeating runner inner dialogue there, too…

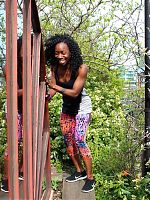
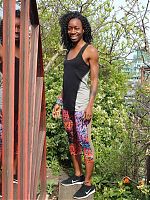
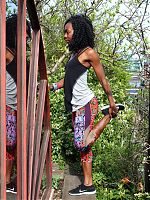
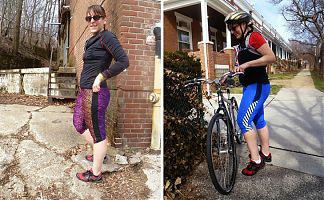
You all know I’m partial to super loud patterns and bright colours when I make my own leggings, but look – I have a fellow kindred spirit! Rainbow colours and psychedlic swirls weren’t enough for Dawn, no, no – she even used rainbow variegated thread, people! I totally applaud the use of the gymnastic poses in showing off all the finer points of the leggings, too.

One thing Dawn talks about in her post is using your serger/overlocker to make a mock-flatlock stitch, like you see on a lot of RTW sportswear. I haven’t found the regular overlocked seams to be a chafing problem for me, but I know a lot of people are more sensitive to it, and you can do your own flatlock stitching at home with just a few tension adjustments…

Read more about her versions over on her site, Two On, Two Off?

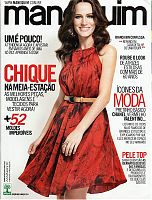
Manequim magazine December 2013

Brazil may be on opposite seasons for those of us in the Northern hemisphere, but there’s a lot to love in this issue, and importantly, lots of separates that can be layered and thus worn nearly all year round! Let’s take a look at my highlights, shall we?

First up is a group of Plus-sized patterns, all made up in white. The dress and shorts are alright, and the trousers have some interesting pleated godets at the hems, but ooh, look! It’s that jacket I loved from the first November issue (seen here on the right), but graded up to size 48!

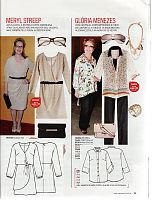
The designer style this month is Emanuel Ungaro, and when I first looked at these two, I thought the one on the left was a skirt pattern, and the one on the right was a dress, but they’re actually the other way around!

FehrTrade patterns – now in size XXS!

Apparently all I need to do to spur myself into a frenzy of activity is set a reasonable goal like I did yesterday when I stated the updated patterns would be ready “later this week”, because I buckled down and finished them that very day!

I’ve graded down to a size XXS using the same size grades as before, which puts this new size’s measurements at Bust 84cm (33in), Waist 63cm (24.5in), Hips 90cm (35.5in). And remember, both my patterns are drafted to be 90% of body measurements, so if you’re an inch or two smaller than this, the finished garment should still be snug against the body.

If you’ve already purchased one or both of my patterns, you should be able to log into Etsy and download the updated file from Your Account > Purchases (if someone could confirm this for me, that’d be great!). I’ve only done some minor cleaning up on the other sizes, though, so if you don’t need the XXS then it’s probably not worth re-printing, re-trimming, and re-taping (although I timed myself yesterday and the XYT pattern took me less than 15min!). Oh, and I fixed a minor numbering issue on the XYT Workout Top pattern which meant there was no Piece No.5. Oops!

Mint X Back Workout Top

I hope you’re not too sick of seeing all these versions of my workout patterns yet, as I’ve got a few more yet to show you and I’m saving some of my favourites for last!

I’m also very pleased to report that I’ve been able to go back and fit in an XXS size (84B 63W 90H) into both patterns – the leggings files are totally done and the top only needs some elastic calculations and that’s done, too! I’ll be updating the files within my Etsy shop later this week, and I’ll make an announcement when they’re up, too. All previous customers will be able to download the updated files should they wish (but there’s no real change to the other sizes so there’s no point in re-printing and re-taping if you’re not an XXS, really).

But enough of the housekeeping, let’s see the sewing!

For this version I chose to make the X-back version in some highly treasured and amaaaaaazing “space dyed” Hint of Mint supplex from RunnersFabrics (on hiatus til the end of the month due to a Canberra -> Perth move!). I browsed through my Bag O’ Lycra and found I had an old race tee that was the exact same colour as the supplex, so I used that for the upper back portion. I’m still chuffed about how well these fabrics match every time I put it on!

For the shelf bra here, I used nude power mesh I’d picked up at Kantje Boord when I ran the Amsterdam marathon back in 2012. It’s a bit too cold here to wear the top on its own on my runs, so I’ve been wearing it underneath jackets and loving the support – it’s plenty enough even for my long, 2+ hour runs at the weekends.


(Seen here paired with my mesh-insertion leggings I made last spring!)

Manequim magazine November 2013 (yes, another!)

Manequim always have two issues in November, apparently because there’s “too much summer to contain in one issue!” or something to that effect! There were quite a few things I like in the first issue but this one was mostly shorts, swimsuits, and Plus-sized patterns (all being things I don’t really wear) but there were a handful of highlights…

First up is my very favourite garment of this issue – a silk tank with chiffon inserts and contrast bands! It’s paired with some tie-waist trousers and also a casual jersey skirt, too (despite the styling, this was not in the style of a particular designer – just a bumper summer clothing feature).

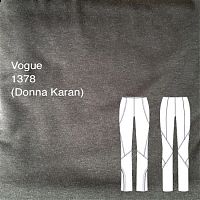
You’d be forgiven for not seeing anything special in these trousers, but omg look at the tech drawing! Those curved seams, that topstitching (or is it pintucks? Or pleating?)! If only these were in my size…