Blog

A matching green Cake clutch bag

Wow, what a busy week last week! Thank you all so much for your support and orders of my new VNA Top pattern (remember you can still get 10% off everything by using code “LASEREYES”)! The big wedding I was attending was actually last weekend, but I was so swamped I’m only just able to share these details with you now…

Remember the green cropped blazer I’d sewn for the wedding? I’d shown you how it looked with casual clothes, but I can now show you how I wore it on the day, along with the dress I’d planned it around:

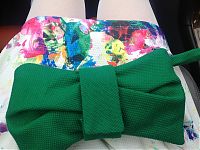
You can really see how the green piqué works alongside the texture of the dress in this closeup shot I took in the car on the way to the wedding…

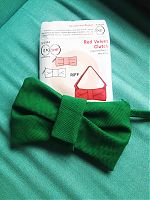
And you can also see that I did indeed manage to sew up a matching Cake Patterns Red Velvet Clutch from the same fabric and lining as my jacket! The whole look was a success, IMHO, and the chilly evening meant I kept my jacket on almost the whole night, only taking off my jacket (and exposing my bare back in the dress) when we hit the dance floor.

Little bits of sewing

I’ve come to that point near the end of the year where I want to gather together a bunch of little projects I’ve made recently, but yet didn’t quite seem big enough for their own post… You’ll see my traditional, year-end roundup tomorrow (I hope! I haven’t actually started it yet, eep!), but before then, let’s finish off the last little bits of the year…

Twin clutches

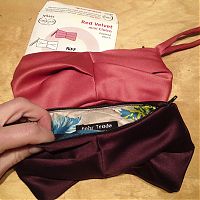
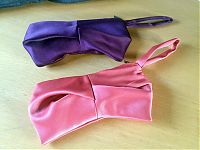
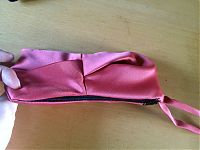
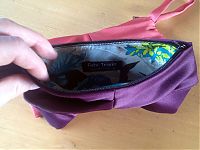
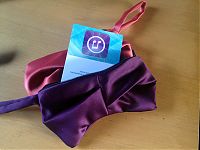
The most exciting of these are undoubtably the Cake Patterns Red Velvet Mini Clutches I made for James’s twin, teenaged nieces. They’ve pretty much only wanted cash or gift cards for a few years now, but this year I fancied giving them a little something extra to hold their gift.

The Cake Red Velvet Mini Clutch is a smaller version of the full pattern without the illustrated instructions, but on the plus side it’s free, super cute, and easy to whip up in a few hours with scraps. Here I used satin scraps leftover from my Matthew Williamson birthday dress and my swirl sheath dress and a bit of floral lining leftover from the former, too.

These are big enough to hold your average mobile phone, keys, lippy, and credit card, but not much else, but most of the times I want a little bag to match a dress this is all I really need to carry anyway. These were certainly one of those gifts I’d have liked to have kept for myself, especially since they match my dresses!

Bolster pillow covers

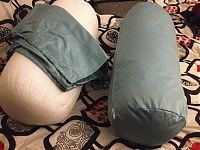
I’m totally less excited by home dec sewing, but we really wanted some bolster pillows for lounging in our big, new bedroom on the boat – now that I’m working from home, I especially need one under my knees while I work on my laptop! When we bought our bedding from IKEA, the duvet cover sets came with four pillowcases, and since we only use one regular pillow each, the others were just sat on a shelf.

Lots of little happenings

First of all, thanks so much for all your kind comments last week! It was a bit week for me, posting two finished garments and a pattern/tutorial so this week might be a little sparse, especially in the leadup to our departure next week.

But I’ve been doing a bunch of little bits over the past month or so – things that aren’t really big enough to post about on their own, or that I’m not quite ready to post about yet, or things that I’m just really keen on. So it’s time for a little roundup post, I reckon!

Refashioned doggy tee

I’ve been so impressed by all the shirts Novita has been making for all her foster dogs over the past few months, so when a friend asked if I could maker her Boston Terrier puppy a Run dem Crew shirt for his cheering duties at a race, I thought it sounded like fun.
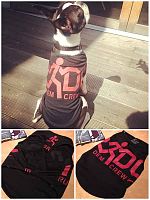
With Novita’s advice, I used the free Milla Milla pattern in size Medium (we tried Small initially but it was too tight), and it was really quick to put together apart from the binding. Don’t use their crazy, fiddly binding instructions – next time I’m just serging on a folded binding and topstitching! Done! I used a small RDC shirt as the starting fabric, and tried to place the logos as best I could. Apparently little Stringer Bell was the hit of the cheering station!

The Napkin Project embroidery

I didn’t get as much detail in as I’d hoped, but I did complete a decent design for The Napkin Project before the deadline!
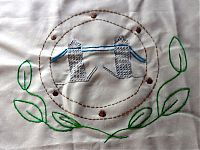
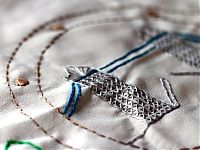
The topic was “home” so I worked in Tower Bridge, boatlife (via a porthole) and the greenery of the gardens. All the embroidered napkins will be used in a nursing home in Bristol to spark memories in dementia patients, so I hope mine is well received! My grandmother is suffering from dementia right now so I’m really proud to be a part of this project and help others like her, even in a small way.

Fabric Buys

I wasn’t meaning to, but I ended up buying some fabrics from Minerva. Oops.
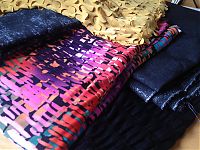
The crazy print will become perfect running leggings (of course!), there’s some silver-coated denim in there, a cool cutwork mustard jersey that reminds me of camouflage tents, and a few other interesting 1m cuts of jerseys, too.

Running vests

One fabric I bought but which isn’t pictured above is a large quantity of the cheapest stretch fabric they had, for use in running muslins. As it turns out, the peach poly jersey is actually not too bad – at least it’s a nice middling weight for use in testing tops or bottoms.

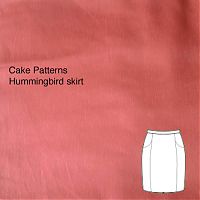
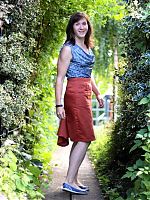
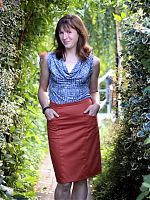
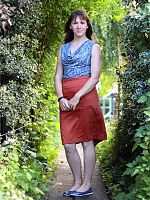
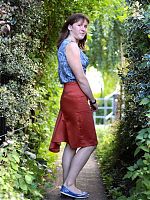
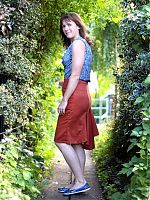
A terracotta Hummingbird skirt

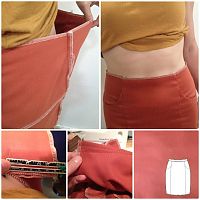
The latest in my my upcoming Mexico trip travel wardrobe is the latest Cake Patterns design – the Hummingbird skirt! There are two views included: a shorter pencil skirt with plain back, and the pink view, which has an awesome “tailfeather flounce” in the back. Of course I chose the fancy version, what else!? I’d seen that the orange view sews up quite short, and I was expecting this to be rather long, but it hits right at my knees which is perfect.

I discussed it before when I sewed up their Cabarita top, but Cake Patterns’ “draw your own size” system is pretty cool – here you pick your pattern size based on your hip measurement (my size was a 40), then choose your waist measurement (mine was a 32), and draw a line between them. The only part that got really confusing was figuring out where the darts should be drawn, as there’s numbers and dots all over the place!

The only problem is that I’d cut out my pattern pieces a few weeks ago, and as you’ve seen, I’ve lost a significant amount of girth in the past two months, and when I went to try on the skirt mid-construction, it was hanging off me – seriously, I took six inches in total off the side seams! This isn’t anything to do with Cake’s sizing – this has got everything to do with me dropping a bunch of weight between choosing a size and sewing it up. Happily, I was able to take in the skirt at the side seams and the back darts and get a really nice fit before finally adding the waistband on.

The fabric is a terracotta cotton sateen which I picked up for free (you can’t beat free!) in the swap at the recent Goldhawk Road meetup. It’s definitely best as a bottom weight, and it sews and presses really nicely, but it does have a tendency to fray quite badly. I originally thought the Hummingbird was lined, but then when I realised it wasn’t (and that I couldn’t be arsed to draft my own lining), I decided to overlock the edges of all the pieces before sewing. This prevents fraying, and should prolong the life of the skirt, too.


Worn here with my Prada Trompe L’oeil Sequin Top

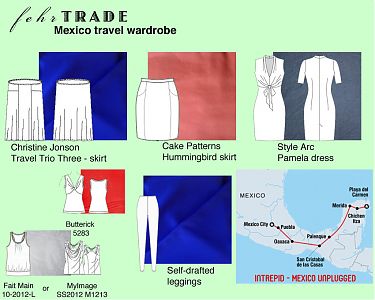
My Mexico travel wardrobe

I’ve made a few mentions of it over the past few weeks, but James and I are off on a grand holiday to Mexico at the end of September! We’ve been talking about going for years and we’re so excited to have finally booked everything. We decided on the Intrepid “Mexico Unplugged” trip since it stops everywhere we want to go, is a small group & eco company, and provides the perfect mix of taking care of booking hotels and transportation, but doesn’t tell us how to fill our days. Which will mostly be filled with eating and visiting ruins!

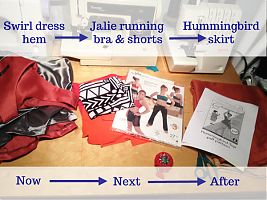
Anyway, as this is a different sort of holiday than the past few we’ve gone on, and I have a few weeks left to prepare, I thought I’d share with you the few pieces I’d like to sew before we leave…

As you can see, I’ve included lots of bottoms as those are what I’m most in need of right now after losing weight for my track race! My tops still fit reasonably well, though so I’m happy to just bring along ones I’ve already made to pair with them.

I’m hoping to sew:

(I’m cheating a bit by posting this after I’ve started sewing – two of these are done already!)

Plus if I can fit them in before I go, either of the two workout tops from my SS13 Sewing Ideas, or the jeans which I keep delaying

The current Sewing Queue

I’ve found myself at the end of yet another extraordinarily busy week, one where we’ve been out pretty much every single night, and we’ve had a friend over from the States, too. However, I have managed to make progress, albeit slow, on my swirl sheath dress in a series of 10 minute segments snatched here and there.

Since I bought my silver stretch lining fabric on Goldhawk Road last Saturday, I’ve managed to sew and press all the darts (the lining uses the original base pattern so no swirls inside), attach it to the facings, sew the side seam, and attach it to the invisible zipper.

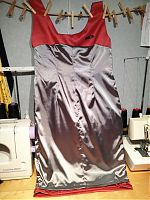
Here’s the back of the dress hanging flat in my sewing cave:

I did the lining hem by machine, but the coral fabric hem needs doing by hand, possibly in the car this weekend. The right side strap also needs a little bra keeper snap strap to keep it in place as it’s a pinch too long. Otherwise it’s done!

It doesn’t quite fit as well as the muslin did when I made it last summer though, but that’s down to me rather than the pattern – I’ve got a big track race next weekend in Sheffield for the British Transplant Games and my trainer has put me on a training diet to shed as much excess weight as possible before the race, as this translate directly into seconds on the track.

She and I were both taken aback by how successful this has been – I’ve lost 4cm (1.5 inches) off my waist and hips and 4.5kg (10lb) in four weeks! If it wasn’t for the hours of running up hills I’d suggest she sell it as a diet plan (the running would reduce its popularity somewhat!). And really, don’t be concerned, as I’ve been stuffing my face with fruit and veggies and lean meats pretty much continuously all month, so I’m not on some idiotic juice cleanse starvation diet or something.

The downside of this is that all my trousers and skirts are hanging off me (my poor Beignet skirt has a cinched paper bag waist now!) and I’m in desperate need of new bottoms. I was planning on sewing up a few pieces for our upcoming Mexico trip next month(!!) but now it’s clear I need to sew as many bottoms as possibly and just pack tops I’ve got already.

I’m still mentally putting together a nice travel wardrobe plan (which I shall reveal in good time), but my immediate sewing plans are thus:

Striped Cabarita collared tee

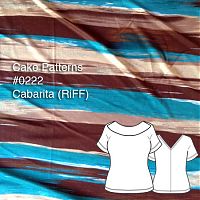
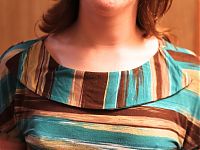
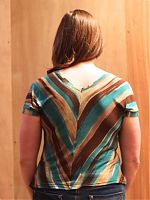
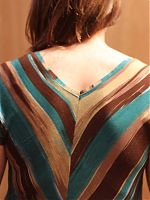
As soon as I saw Cabarita, I knew I had to sew it. It’s got some really unique features I’d not seen in other knit tops – the vintage-inspired collar is the most obvious one, but the back V-neck and choice of short or long dolman sleeves really do make this a cut above the average teeshirt pattern.

Cabarita is the first of the “RiFFs” range from Cake Patterns and is available either printed or as a pdf from Etsy (I opted for pdf!) (Though note that if you ordered the printed version, you need to download the back neck binding piece here as it was accidentally omitted!)

Cake Patterns usually have lengthy and descriptive, very beginner-friendly instructions, but Steph started a side-range of “RiFF” patterns that have the same level of professional drafting, but with brief, text-only instructions and no layout diagrams, intended for more advanced sewists who just want the pattern (hello, that sounds like me!). Crucially, though, they still feature the (now signature) “draw your own side seams” method. When I compared my drawn pattern pieces to my knit sloper, they were scarily close (from the bust down), so this method really does work!

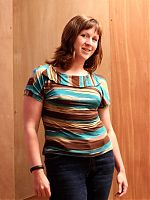
Now, a bit of a confession: I wasn’t entirely sold on the the collar at first. I thought maybe it might look a bit too costume vintagey, and might get in the way or flop around a bit. But I’m glad I included it as I really like it now, and it really does add to this pattern, which might be a bit too plan in front otherwise.

When I sew this top again, though, I’ll a) use lightweight knit interfacing on the collar so it stays in place a bit better (rather than the edges folding over, like you can see below right) and b) attach it so that the seam is on the right side and therefore hidden under the collar as it hangs, negating the need for any understitching on a narrow serged seam allowance.

This fabric is a lovely and soft viscose jersey in brown and turquoise from Minerva (and also comes in brown/pink and brown/orange colourways). Minerva don’t do half metres so I took the plunge and only ordered 1m, and I’m happy to report that I could easily fit the shorter-sleeved version into it.