Blog

Un-petiting the Burda September cover dress

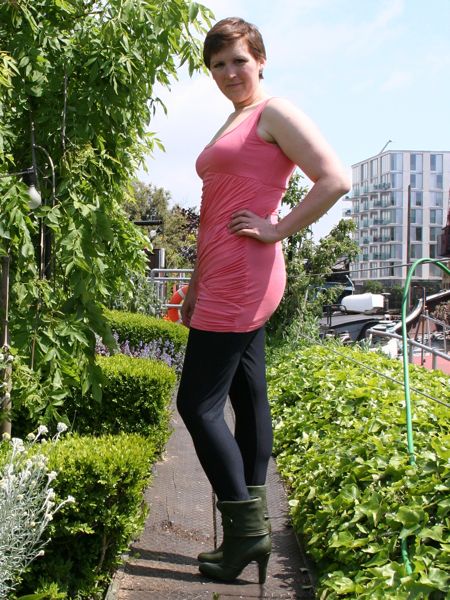
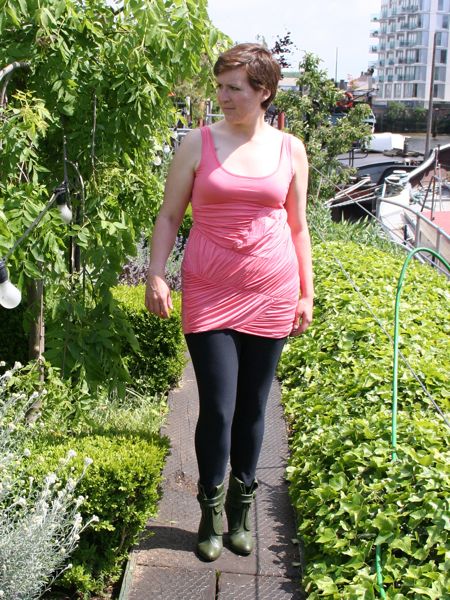
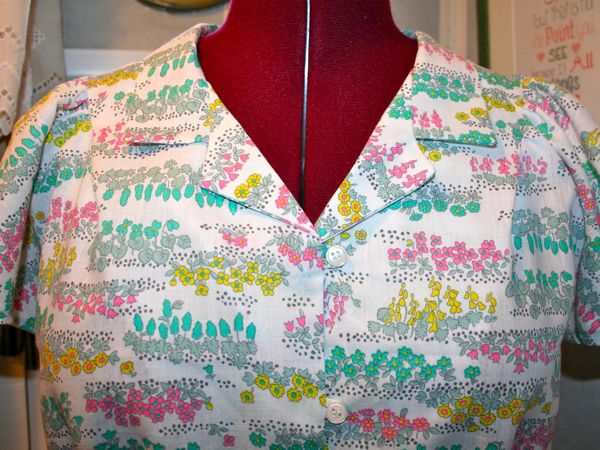
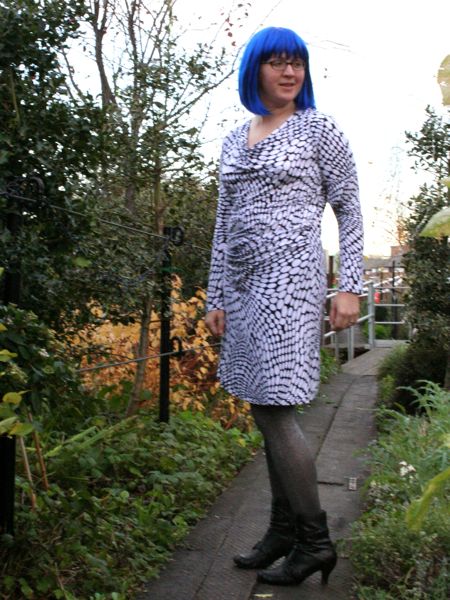
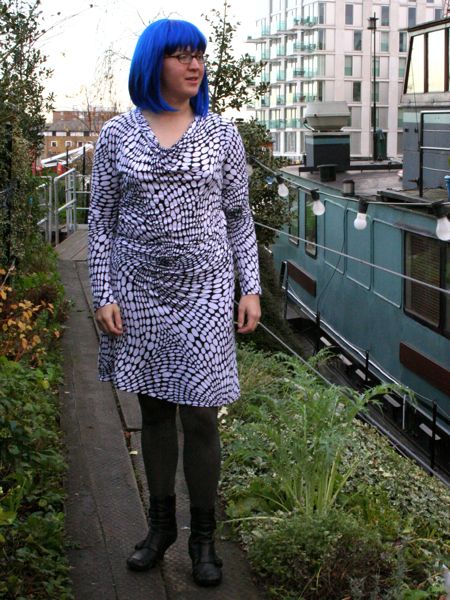
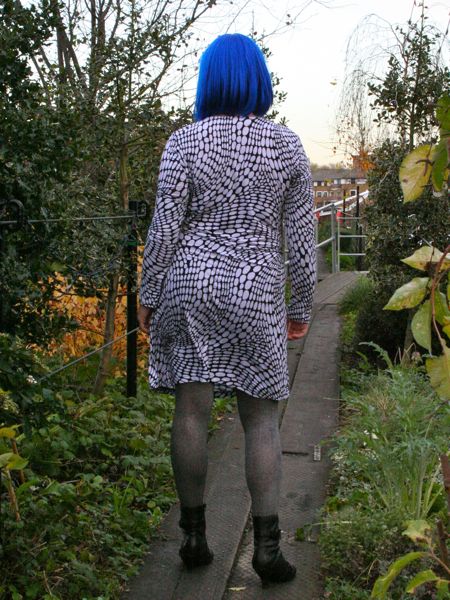
While I wait for the weekend to photoshoot the Lekala ribbed top (either you all are too smart or I’m too predictable!), I’ve started work on creating the cover dress from the September Burda magazine. It’s a really cool, curved seam design with no side seams and designed for knits, but it’s one of Burda’s Petite patterns.

I am in NO way petite – at 5’8” (172cm), I am closer to Burda’s Tall height (180cm) than I am to the petite height( (160cm). I have a sneaking suspicion that my torso is quite compact and my height is mostly in my legs, but in any case… I’ve made a few of Burda’s petite patterns before with good results, namely, my 30th birthday dress and the blue silk cocktail dress, so I wasn’t totally scared off because it’s for petites.

I made up a muslin of the top half of the dress (the half I’m most concerned with) on Wednesday night and I’m happy with my alterations so I thought I should share what I did.

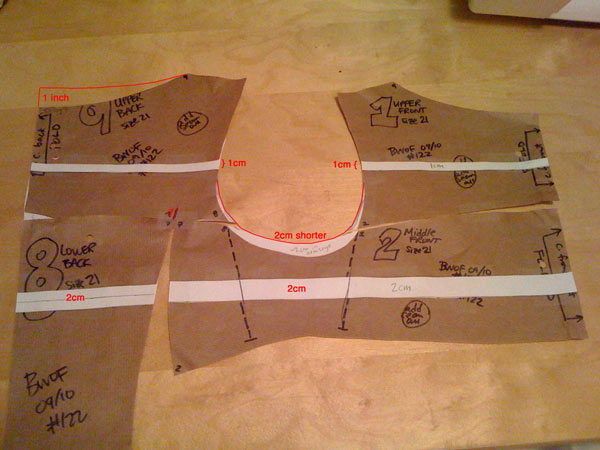
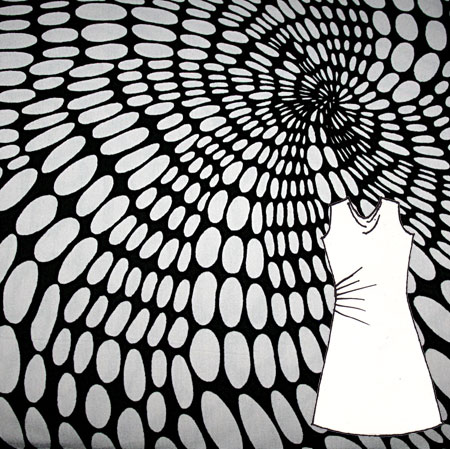
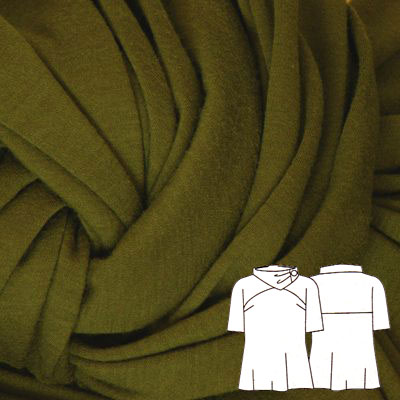
First of all, lay out pieces 1 and 2 so that their folded edges are aligned, taping the pieces together loosely. Then lay out pieces 8 and 9 so that their folded edges are aligned, and that these meet the front pieces at intersections 7 and 8. Don’t worry that the shoulders are far apart or that some of the curved seams don’t meet up whilst flat.

My alterations are the white pieces shown below:

DIY Boat Skylight covers

I’m very excited because this is the first opportunity I’ve had to crosspost anything between this sewing site, and our site for our boat, Hendrik!

We’ve got a total of six skylights on Hendrik – four flat metal ones in the front of the boat where we live, and two peaked, wooden framed ones in the back captains cabin which we rent out to our lovely lodgers. We’ve largely been able to keep our front skylights from leaking too badly, but the age and design of the ones in the back meant that they really needed some covers both to limit the drips and to protect the woodwork and the original 1930s patterned glass.


(this is the larger, saloon skylight)

So a few months ago I got some swatches from Pennine Outdoor to have a look at their tent fabrics, and decided that the “UV Treated Window Material” (P49) and “PVC Coated Polyester” (P9) would work best. Importantly, since I had the swatches I also tested to make sure I could sew through these on my regular domestic machine! I bought two metres of the green and one metre of the clear, which came to £23 including shipping (and this gave me plenty enough for these two skylights, and probably enough for at least one of our flat skylights).

Bridal bodice – a slight (but fixable) setback

Apologies for the photo-less post, but with four weeks to go to the wedding, the planning has gone from busy-but-manageable to STRESSAPALOOZA! And as a result, I haven’t had a chance to take the photos of my beautiful lining prickstitching off the camera yet.

But before I forget, I wanted to describe a slight setback I ran into in preparing to attach the skirt to the bodice. To start the process I removed the central skirt panel that contained the blue dye stain (from the tissue paper it was stored in for 60 years), and sewed the two gored sections together, which makes a really unexpectedly beautiful central detail. But as I was lining up the centre front, centre back, and side seams on the skirt and bodice to make the skirt pleats, I kept having excess fabric on one side of the front skirt.

Scratching my head, I measured the front of the skirt, and the CF is indeed central. So then I measured the seam line of my bodice, and ERRRRRRRR! the right side is 27cm to the CF point and the left is 24cm. So that’s why I was having excess skirt fabric on the left but having it match almost exactly on the right.

Self-drafted leggings

I bought this ASOS ruched tunic back in April and I love the design of it – the ruched panels are really flattering, it’s a viscose knit and it’s entirely lined in lingerie mesh. But when it arrived, I realised it was way too short to wear as a dress, but too long to wear as a shirt and looks just plain lumpy when worn over regular trousers or jeans. And with the panels going at weird angles creating an intentionally uneven hem, there wasn’t a natural point to cut it off and shorten it, either.

So I filled the wardrobe hole by creating some leggings specifically to wear with this top!

Summer sewing shortlist

Last week you got to see the newest Patrones that Aisling sent over, but you all have been far too good to me, because last week I also got a surprise parcel from Daisy!

She did some awesome detective work and worked out my size and style and picked out Simplicity 2754 and Butterick 5317 for me! And she did a great job, because I really like them both! I always have a hard time seeing the potential with the Project Runway patterns because the pattern covers are so horribly done that you can’t see any details at all, and Simplicity’s site makes it really awkward to browse by technical drawing (what I do as a general rule with Burda magazine previews). Anyway, as it turns out, I really like the details of this one, and doing some research myself, I remembered that Trena made it a few months back and I absolutely loved it! And she’s so got the right idea with those back view enhancements! And the Butterick Maggy London dress is just screaming out for a border print, as far as I’m concerned – the skirt is just a rectangle with pleating, so anything with a border or lace at the edge would go perfectly as you don’t have any cut, curved hem or side seams. So it actually is as easy as it’s labelled, seeing as how you’re really just making the bodice…

These patterns all came at the perfect time, because not only did I finish the second bridesmaid dress this weekend (photos coming later this week), but London has stumbled into a mini-heatwave which always gets me raring to sew! After spending the last two months solid on these dresses for my girls, I’m more than ready to sew for myself now, and I’m not scheduled to start on my wedding dress muslin until July.

Sooooo, how much can I cram into the next month, eh? Granted, I’ll still want to make a few things here or there while I’m working on my gown, but I thought it’d be a good idea to get all the things I want to sew together in one place. I’m not calling it a wardrobe or SWAP since they don’t all go together, and I don’t want to commit myself to ALL of these since I tend to get bored easily, so let’s just call this a shortlist so I can choose from these at will…

The FehrTrade Summer 2010 Sewing Shortlist!

From the top:

Bits and Pieces

Ok, so to take a brief break from reading material, I thought I should update you with what I’ve been up to in the sewing room…

Bridesmaids dresses

I had the first fitting of P’s muslin, and there are surprisingly little changes to be made – raising the neckline and armscye, pulling up the waistband by a centimetre, and that’s about it.

So I’m doing a second version of the bodice for her to try on this weekend, and then I unpick the skirt off that muslin and attach it to G’s bodice (the skirt is enormous and I didn’t have enough knit muslin for two!) and have her first fitting while I get down and dirty with the waistband pleating. I’m anticipating the pleating to be the most time-consuming part of both the dresses… (Earlier post about the dresses and colours here)

A spring dress

I finished a nice Springy version of BurdaStyle’s Heidi dress yesterday (finally!).

It was just waiting for a hem for nearly a week, which is a long time for me. It’s nice timing as Spring (or maybe even Summer!) arrived this weekend and it was gorgeous outside on deck with the barbecue going and everyone hopping from boat to boat. I’m hoping to do a photoshoot tonight now that we’ve got daylight for longer in the evenings…

Metric Pattern Cutting

It’s fitting that Neighbour Helen decided to buy me this book for my birthday, as she’s the one who got me interested in drafting recently, and she liked it so much she bought one for herself, too!

I’ve heard that this is one of the best pattern drafting books around (alongside the Armstrong book, but there’s a £60 price difference there, too!), and I can see why. It’s certainly not an easy book to get to grips with, but if you’re a visual learner like me, then you probably really only need the drawings to be getting on with anyway. The book is absolutely packed with different blocks and various sleeve, collar, skirt, dart, yoke, etc drafts, with precious little else included. It’s a book that doesn’t mess around and gets straight to the point, which is great as it doesn’t take up much space on the bookshelf, either (frankly, I’ve seen thicker magazines!!). There are no wasted pages here, and Winifred Aldrich certainly doesn’t mess around!

Vintage flowered Alexander blouse

Before I jumped in with both feet in my quest to turn BurdaStyle’s “Alexander” blouse into a dress, I thought it wise to first make the pattern as intended – a cute blouse with flowy, gathered sleeves, front and back buttons, and a vintage-inspired peplum.

I had some vintage flower-print lightweight cotton in my stash that had been in my Granny’s stash for some time and she’d given it to me last time I was over in the States. As it turns out, she’s ill at the moment and in need of some cheering up, so I thought it fitting to send this blouse back to her since she liked the print so much and we’re roughly the same size!

Unfortunately this is one of those patterns that look SO much better on a real person than a dress form, but you’ll see that when we get to the dress!

Here’s a view of the collar , which I altered using Gertie’s “drafting a convertible collar” tutorial. This was a super easy way of lowering the quite high collar and adding a little something extra to the neckline:

The "Lauriana meets Dolce & Gabbana" dress

First up in my duet of winter knit dresses is this amazing knit cowl dress that fellow sewist Lauriana drafted for me(!!!) this summer. Whilst designing this, she not only correctly observed my size, but also that I adore cowl necks and assymetrical details, and gave me the option for a sleeveless or sleeved version! She’s the best! Since I’m in dire need of comfortable winter dresses, I opted to go for long sleeves this time around, but I would definitely make this again for summer without them.

I made it up in some luscious Dolce & Gabbana viscose knit that I bought at Ditto Fabrics HQ in Brighton in June. It’s been in my stash just waiting for the perfect pattern match, and since it’s such a crazy, busy print, I thought this pattern with both front and back on the fold would be great for keeping the swirled dots intact.

Tricky pattern? Build a paper model first!

After a weekend of tracing patterns and sewing kids clothes (some you’ll see later, but others are Christmas gifts not to be ruined), I finally got a chance this evening to cut out the fabric for the wool jersey top from the latest Patrones, #285, that I wrote about last week:

I came across some gorgeous ex-Prada wool jersey at Ditto Fabrics (you’ll remember them from earlier in the summer when I visited their Brighton shop) and knew I was destined to pair fabric and pattern together! (NB: if you’re planning on making this top with this fabric, buy 2m instead of the 1.5m called for in Patrones as it’s ever-so-slightly narrower than Patrones’s and I had a real tricky time fitting everything into 1.5m!) I also bought some dark turquoise ex-Burberry coating, some I-can’t-believe-it’s-not-silk ex-Prada polyester jersey with trompe l’oiel sequin print, Paul Smith grey marl jersey with stars, and some black stretch denim (all pictured at the bottom of my fabric stash gallery if you fancy a perv!). Honestly, I’m beginning to think the owner Gill is a bit like the UK version of Gorgeous Fabrics, she has such an eye for quality ex-designer stuff!

The funny this about this pattern is that on first glance, it looks like a really easy garment – just a basic blouse with dolman sleeves and some horizontal seaming in the front and back, topped off with a triangular collar with a bit of gathering detail and a covered button. Or so it’d seem. Look a bit closer at the pattern pieces and start chucking bits of the instructions through Google Translate, and it all starts to become a bit more interesting…