Blog

Fehr Trade x Laurie King fabric – first samples

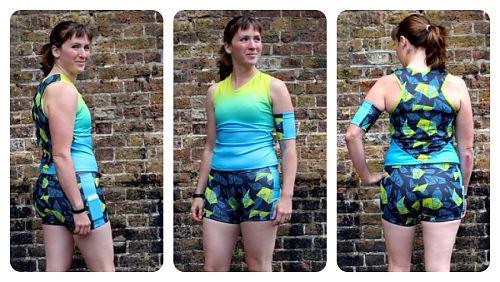
Thank you all so, so much for your enthusiasm and compliments on the launch of our fabric designs last week! I’ve been swamped with work (which is great!) but managed to squeeze in some time to sew up the first two samples – a VNA Top and Duathlon Shorts (booty length) in the coordinating “Maps” citrine & black colourway.

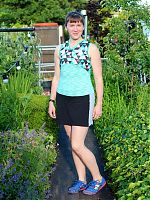
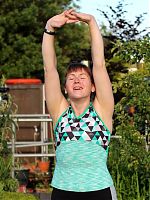
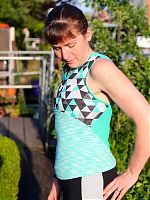
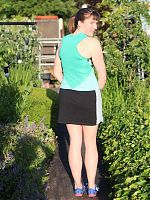
So if you buy one yard of the “Maps” citrine/black VNA fabric and one yard of the “Maps” citrine/black Duathlon fabric, this is what you get! Cool, eh? There’s more photos of me modelling at the end, but I know loads of you were waiting to see finished versions first before taking the plunge!

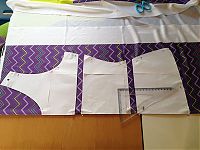
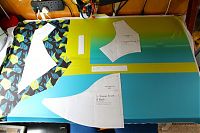
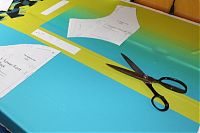
Having cut out and sewn both, I took some photos throughout the process, and have a few tips as well. The previous post shows you how to lay out your pieces onto the different zones, but in real life, I know my makeshift cutting table (err, desk!) isn’t big enough to hold the full yardage.

So the first thing I recommend is to cut the fabric apart along the different zones and trim the white borders.

This makes it a lot easier to match up the edges so you can fold the zones in half and cut on the fold (or in the case of the Duathlon shorts, cut two layers at once). It also means I can fit the fabric onto my cutting table!

A speedy weekend

Wow, thank you all so much for your enthusiasm and support for the new fabric designs – I’m so glad you all are as excited by the idea as I am!!

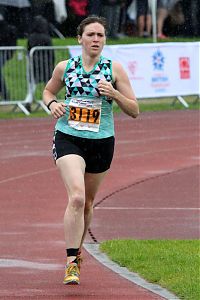
Unfortunately, however, I didn’t get a chance to sew them up into samples over the weekend because I was up north in Bolton competing in the British Transplant Games! On Saturday and Sunday I raced in the 3km “mini marathon”, 1500m, 800m, 400m, and 200m (my planned mixed relay race was cancelled due to poor weather).

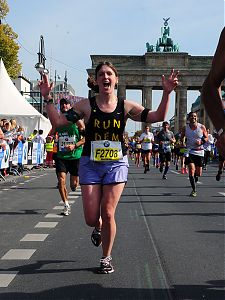
The bulk of my races were on Sunday (in the sideways rain!), and I’m proud to say that I competed in my own designs – a VNA Top and a pair of Duathlon Shorts, booty length. I must say, this particular combo makes me feel so speedy and confident that I just loved racing in it. Also, if you haven’t tried the booty length, adding silicon “gripper” elastic to the hems makes a world of difference – they don’t budge at all, and were comfortable enough to wear under my team tracksuit all day.

An extended weekend full of sewing

Last week saw the end of a very good but busy work project, so what do I do when faced with a bit more time and mental energy than usual? Why, I sew of course!*

Liberty, but not as we know it

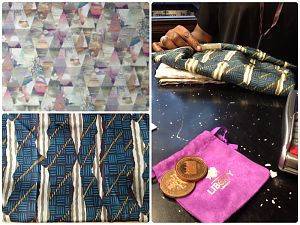
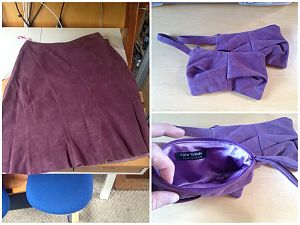
I received some lovely Liberty gift coins for my birthday, and because Previous Me knows Future Me so well, I had stashed some extra birthday cash along with it in the suede pouch, knowing I’d forget all about it and be pleasantly surprised. Which is precisely what happened!

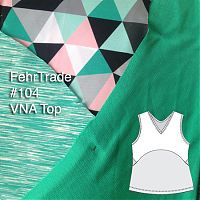
So now armed with £60 to play with in Liberty, I decided to take advantage of a rainy day and go shopping. Now, I know loads of you go weak at the knees for anything Liberty, but I don’t. I find most of the traditional Liberty prints to be painfully twee and nothing I’d ever, ever wear. So I was thinking I’d see what was on offer in their jerseys, but first I got waylaid by the remnants table, where I scooped up a vaguely-African print silk twill (1m for £25, seen lower left).

The jersey selection was really small and mostly ditzy print (gag), but I kept being drawn to a dreamy, blurry, triangular print that came in a few shades, but only in Tana Lawn. I finally decided that if I kept coming back to this print then I should buy it and figure out a project later. So 1.5m of the palest colourway came home with me (seen upper left above) and brought my grand total to £58. Now that’s budgeting!

Refashioned suede wristlets

A friend had recently given me two skirts which no longer fit her, a suede one and a silk one, and mentioned that I might want them for the fabric. Of course! So I chopped up the suede one on Sunday, making two of the free Cake mini wristlets.


(The colour on the left is more accurate…)

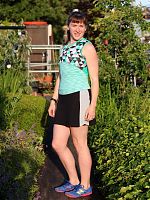
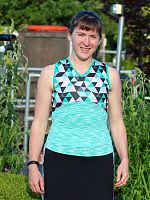
My teal mixed-print VNA Top and bonus booty shorts

I showed you a casual version of my new VNA Top pattern a few weeks ago, modeled by my athlete friend Anne, but one of the great things about this pattern is that it works equally well for both exercising and lounging about. Just change the fabrics and go up a size and it’s ready to throw on with jeans!

Since you’ve already seen one casual version, I wanted to show you my favourite workout version – actually, this might be my favourite workout top ever – I just love how the fabrics coordinate together!

If you’ve used any of my patterns before, you know how great they are for using up small pieces of fabric – because sportswear fabric can be expensive and I hate wasting anything, but also because it means you can coordinate tops and bottoms really easily! I made this VNA Top using a Spoonflower print I fell in love with, printed onto their Performance Knit base (though now that they’ve released their Performance Pique, I actually prefer that to the “knit”!), and when it finally arrived, I saw that the teal colour in it coordinated perfectly with the mint space dyed supplex I had leftover from my minty XYT Workout Top, but also with a bunch of mis-printed “Run to the Beat” technical tees I got given for refashioning. I couldn’t believe my luck!!

I cut the Upper Front in the Spoonflower print, the Lower Front & Back from the “hint of mint” supplex, and the Back and Bindings from the refashioned race tee. Three different fabrics in one top, but the shared teal colour mean they look great together!

The Spring Race Challenge podium

The Spring Race Challenge officially came to a close this week, but that’s no reason you should stop sewing your own exercise gear, or challenging yourself! But I had to draw a line somewhere so I could stop and draw a winner from the enormous (and sweaty!) pile of entrants, and I don’t think we can carry on calling this “spring” much longer, or the Aussies really will be into spring!

Everyone made such an effort in their sporty makes, and many of you said that you wouldn’t have pushed yourself to either a) sew exercise clothing nor b) sign up to a race if it wasn’t for this challenge, which is such a boost! Because seeing others exercise is such a big motivation, I want to show you all the entrants so you can see how great me-made exercisewear can be. And that it’s not just bonkers-me doing it!

(Though if you would like to know more about lil-ol-bonkers me, Karen from “Did You Make That?” interviewed me for her own Sporty Summer Sewathon and she asked some great questions!!)

The Sweaty Sewists (in order of submission)

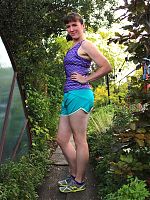
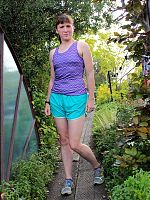
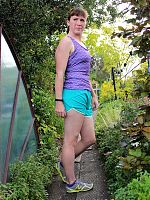
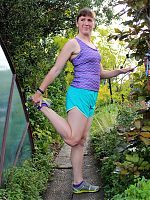
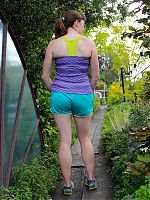
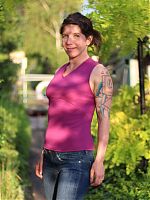
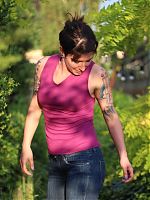
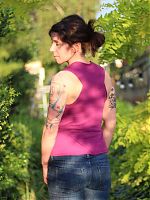
Anne's casual purple VNA Top

Wow, thank you all so much for your support and purchases of my new VNA Top pattern! I know many of you like to see how patterns look on a real person so I’ll be sharing the versions I made with you over the next few weeks. As with my Duathlon Shorts, I like to mix things up and use local athletes as models, both so that you’re not always just looking at me (boring!) but also to highlight what total badasses these ladies are!

For this pattern I was totally lucky to bag my friend Anne to model for me! Anne was big into roller derby for a number of years, has competed in triathlons and standalone open water swims, ran her first full marathon last year, and is at yoga and spin classes pretty much every night (seriously – she makes me look lazy!).

Here she’s wearing a VNA Top I made from a purple ponte jersey so you can see how well it works both as casual wear with jeans, but also when it’s made in just one solid colour!

The Spring Race Challenge – prizes!

Hands up if you’ve been motivated by the Spring Race Challenge to sew up some lycra and go out and be active… ooh yes, that’s rather a lot of you!

Well, I’m pleased to report that there’s now another reason to be motivated to enter before 7 July, and that’s because I can finally announce the prizes, which will go to one lucky entrant, chosen by random draw.

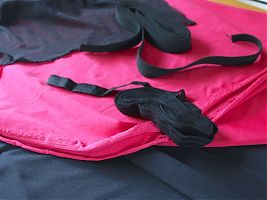
Sewing Chest has very kindly supplied a special activewear kit full of goodies to sew at least one workout garment (and likely two, if you’re clever with your cutting)! It contains:

  • 1.5m x 170cm wide black wicking supplex
  • 40cm x 160cm wide pinky-red wicking supplex (not as hot pink as it appears in my photo, honest!)
  • 50cm x 150cm of lightweight black powernet
  • 1.5m of 2cm wide black elastic, perfect for waistbands or under bra XYT bands
  • 5m of black FOE

It should be enough for you to sew, say, a pair of PB Jam leggings in black with red contrasts, plus a black XYT Workout Top with a red upper back and FOE edges… or a pair of black Duathlon Shorts with red sides and a black VNA Top with red lower front and bindings… Or any other combo you choose, really!

These activewear kits will soon be available to buy from Sewing Chest, too, which should make it super easy to buy all the bits for coordinating sportswear in one go!

I’ll also be throwing in a bumper prize pack of all four of my sewing patterns (if you haven’t got them already!) to the lucky winner so she can have some new patterns to go with the new fabric, too.

My light-up, twinkling running jacket – the sewing bit!

You heard all about the electronic components earlier this week, but the sewing of the jacket itself was in no straightforward, either! If you missed the video of the LEDs in action, have another look:

You might think, that, as a pattern designer for exercise wear, I might view other exercise patterns as competition. On the contrary – when I first saw the StyleArc Steffi jacket, my first thought was “Brilliant! Now I don’t have to draft it myself!”. I’ve got enough ideas in my head for patterns already, so I’d rather refer folks to other good patterns if I can rather than constantly reinvent the wheel.

This pattern was a birthday gift from my inlaws, and I was initially concerned because they’d bought me a size 10 instead of the 12 I’d asked for, but as it turned out this fits me really well anyway. It’s a smidge too tight in the chest for me to run in (my trainer has me focus on pulling my shoulder blades back to open up my chest for better breathing), but is utterly perfect as a warm-up, cool-down jacket, so hurrah for happy accidents!

I chose to do my colourblocking like it’s shown in the technical drawing – I used a grey/black sportshell as the main body, then I used the black reverse of this black/grey “budget” sportshell as the contrast panels. The main sportshell is really nice – a soft, technical jersey with a thin layer of fleece bonded to the inside – it feels really RTW and high quality. The budget one, well, lived up to its name. The grey side looks a bit naff, there’s no fleece, and the black side is just smooth like the other fabric’s grey exterior. So it was fine for my purposes here, but I wouldn’t recommend skimping if you want a similar jacket – go for the more expensive option and you won’t regret it.

My light-up, twinkling running jacket – the electronics!

This is an epic jacket, and something I’ve been wanting to do for, ooh, 6-7 years at least. You see, I really liked the idea of wearable electronics, and clothes that do something and interact with their environment, so I started buying LilyPad components many years ago with the hopes of making something.

Then I realised that I know nothing about circuits and electronics, and it all seemed really confusing every time I tried to sit down and learn about it. Finally, I decided that I’d bring my suitcase of tricks (no really, I have a little yellow plastic “suitcase” with all my beginning circuitry stuff in it!) along to France on holiday and I’d sit down and teach myself how to do it then. And I actually did!

LilyPad is the sewable line of Arduino products, made especially for folks like us. They’re easy to attach onto clothes, and (apart from the batteries) are machine washable, too. For this jacket I used a LilyPad battery pack (I started with the Coin Cell one but it wasn’t quite enough power), a Lily Twinkle controller, a bunch of LEDs, and a spool of conductive thread.

I used a mix of the regular LilyPad LEDs and the Micro LEDs because that’s what I had – the micro green ones were much brighter than the bigger purple ones, but you can really only get about four loops of thread around each terminal of the micro ones, so if you need to connect it to more than two lines, go for a bigger one. The Twinkle controller is really just a tiny board with four connection spots for LEDs and makes them fade in and out randomly (though you can connect more than one LED to each spot & they’ll twinkle in unison). I wanted to make things easy for myself this time around so I left out any input sensors, though I do have an accelerometer in my stash…

I’d thought to bring along this “Fashioning Technology” book and between that and this Lilypad Twinkle tutorial, I pretty much taught myself how to make a simple circuit to do what I wanted. When I go to do my next project, I’ll need to read a few different chapters and watch some more tutorials, I’m sure!