Blog

A classic pair of jeans

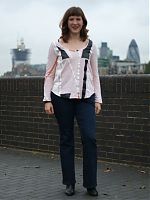
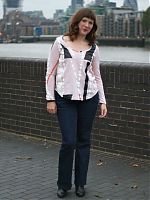
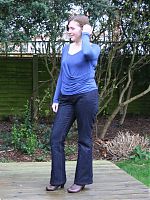
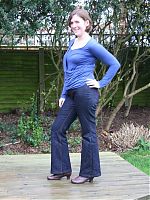
I know I’ve been recently focusing on sewing for my upcoming Mexico trip but I’ve been wanting to sew these since my FW12 and SS13 plans so it was high time I actually just sat down and made them!

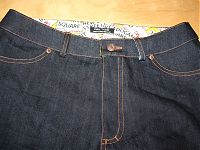
After umming and ahhing for months over which pattern I should use, then muslining two different patterns which were both too small, I ended up making this pair in two days’ flat! As you’ll recall, it’s #120 from the April 2010 issue of Burda magazine (sadly not on Burdastyle.com!), an issue which also had a great pair of men’s trousers I’ve been eyeing up for James, too.


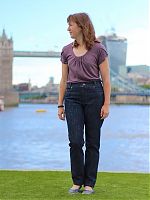
Worn here with my plum bamboo Jalie top

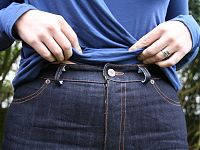
I’m a bit scared that I can sew an entire pair of jeans now (including the front fly) without looking at instructions a single time… I did, however, inspect a pair of James’s RTW jeans once or twice to see which side of the seam they topstitched!


This one has been lightened so you can see the details a little better!

Oh, and remember when I tried on the muslin for this pattern and it was way too small in the waist and hips? Well, I put the muslin to the side in my sewing cave and tried them on a few weeks later and they fit perfectly now! Yes, only I would go and change my body instead of just doing a pattern alteration…

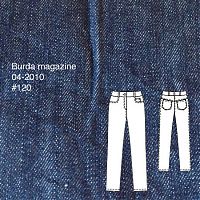
Honing in on a jeans pattern

Even though I finally finished my pink trousers and lace teeshirt I mentioned last week, it’s been so hot and sweaty that I haven’t quite managed to do a photoshoot for them yet. Everything’s written so as soon as I do, you’ll get to see how great they are, honest!

I also managed to cut out a Kwik Sew exercise top, but not start sewing it yet, but what I really wanted to talk about today is the ongoing process in deciding which jeans pattern to use as a match for some heavyweight, non-stretch denim in my stash. So when I say that I’m “always thinking two projects ahead”, you now know it’s the truth!

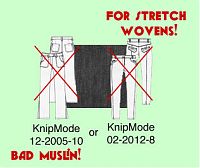
If you remember back to my Spring Sewing Ideas, I had two different KnipMode jeans patterns that I thought I might use:

However, I found out soon after that the 2012 KnipMode one was for stretch wovens, which dis-counted it for this particular bout of jeans sewing.

The 2005 one looked very promising, but when I made a muslin of it the look was not good – ill-fitting in the waist and hips and way too wide in the legs. I’m sure I could fix it with plenty of time and patience, but with such an enormous pattern stash it just wasn’t worth pursuing further!

So I went back to the drawing board, otherwise known as my online pattern catalogue, and had a look through all the magazine issues I’d tagged “jeans”. This was a lot! So as I flipped through, I took screenshot segments of the ones I liked the look of, and renamed these files with the brand and pattern number, and shoved them in a special folder.

Parisian jeans and a geometric Wiksten tee

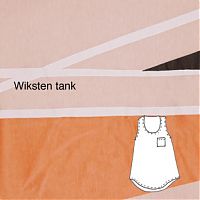
As some of you may have guessed from my FW2012 shortlist I posted yesterday, I’ve made the Wiksten tank, using the pattern and geometric Mood jersey Kollabora gifted me and also another pair of Jalie jeans! I wasn’t actually planning that they’d go together, but they were a perfect pairing for a relaxed Sunday roast at a cosy pub near the moorings.

Let’s start with the jeans – as I said earlier, my NY-Lon jeans are easily my most-worn item of clothing ever since I made them last year, but they’re starting to fade and I want to have a replacement pair ready before they totally die. The denim I used there was from Mood in NYC, but I’d found some great stretch denim at the Tissues Dreyfus coupon shop in Paris in March, and only €10 for a 3m length, too. I wouldn’t normally buy that much of the same fabric if given a choice, but it means that I’ve got enough left over to easily make another pair. I find it really difficult to find good stretch denim in shops, but this has good stretch and recovery without being too flimsy, so I snapped it up when I saw it.

I constructed these exactly the same as my NY-Lon jeans – again, my main deviations from the Jalie pattern were to use a Burda curved waistband (instead of their rectangular, bias-cut waistband that was just awful in my muslin pair), and extended the pocket linings to the centre front for a non-stretch “gut slimming” panel, as before.

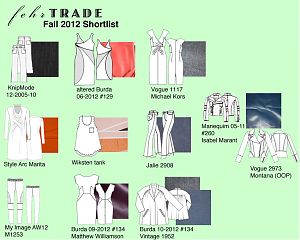
Fall/Winter 2012 Sewing Shortlist

A lot of sewers like to “Sew with a Plan” (SWAP), but I prefer to call this a “Shortlist” rather than a “Plan”, so I’m free to still change my mind and add/remove items as I go along! My main goal here isn’t so much to create a capsule wardrobe that can be worn together, but more to use up fabrics and/or that have been in my stash for a while that I’d really like to just wear.


(Click to enbiggen!)

From the top down, in no particular order:

  • KnipMode 12-2005 #10 – I’ve got some non-stretch denim aging in my stash from a few years ago, and I love KnipMode’s style lines for these. My wardrobe is in desperate need of more jeans, hence why there are two pairs in this Shortlist!
  • Altered Burda 06-2012 #129 – Now that my stretch satin from Gorgeous Fabrics is in hand, I can finally make the final version of this dress after completing the drafting and muslins back in July.

Pick Three

If you had to choose three (and only three!) things you’ve ever sewn to best represent what you can do, what would you choose?

I’ve recently been tasked with exactly this, and I found it incredibly difficult to decide. I mean, it’d be difficult enough if I was confined to just one type of garment, like “Pick three dresses” or “Pick three casual garments”, etc, but just three, from the hundreds of garments I’ve sewn in the past nine years?! This required thought.

Pick One…

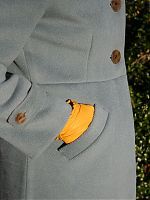
Having said that, strangely, the first of my picks was pretty easy – my Winter Coat.

I made this coat two winters ago and I’m really, really proud of the finish on it. The wool is extremely thick, with bound buttonholes, metal buttons, single welt pockets, a thick silk lining, and (most proudly for me) I didn’t use a single bit of fusible anything in its construction. I wear it to death in winter and I love everything about it.

Pick Two…

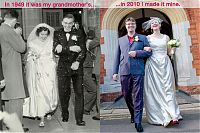
Should I play my trump card and pick my vintage refashioned wedding gown? Well, alright then!

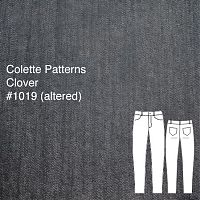
My Colette Clover jeans

A few months ago, I went and sewed up the Clover trouser pattern for the first time, in dark green sateen. Having fixed the zipper (my own mistake), I realised that I love the great fit of these trousers, but they’d be even better with traditional pockets and a front fly more like jeans… in fact, I’d actually just like some Clover jeans.

So that’s exactly what I did!

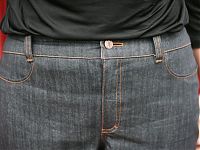
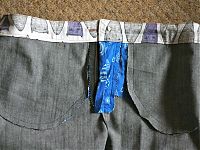
I first altered the pattern to create the front pockets (and I extended the pocket lining piece to the centre front to make a “gut slimming” panel), add a fly-front, and extend front waistband to match the fly underlap. I also added back pockets and belt loops off another jeans pattern. I didn’t bother to draft a back yoke as I actually prefer the look of jeans without them, and the back darts just disappear into the pockets anyway.

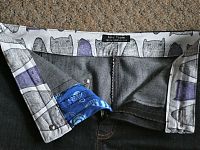
This stretch denim is ex-designer from Ditto Fabrics and it’s the exact same stuff I used in these designer jeans (I loved it so much I bought more). The pocket linings and waistband facings are fun Spoonflower cotton prints – Rainy Day Doodles for the pocket linings and fly underlap, and foxes for the inner waistband (the latter by my mate Galia!).

New Year's Progress Report

Back on the 17th I set some bold goals to finish by New Year’s:

I thought it was time for a little progress report, seeing as how I only have a few days to go…

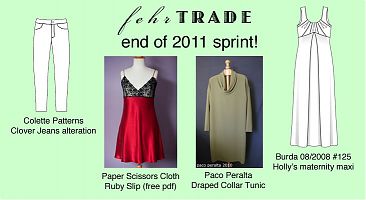
  1. Paco’s Drape Collar Tunic – I sewed this up in an evening before Christmas. Though I had to get very creative in order to get long sleeves out of the 2m of sweater knit I bought… Note to self: Buy more yardage, or shorten the body length next time!
  2. Clover jeans – I just finished these! I’m totally loving the fit and the (IMHO) improved pockets, too.
  3. Holly’s maternity maxi-dress, Burda 08/2008 #125 – Having no place to cut the fabric of the enormous skirt pieces, I actually took it along to work yesterday and cut it out on the big (and empty) lunch table at lunchtime! The few guys left in the office already think I’m weird anyway. Shrug. In any case, this is now ready to sew!
  4. Ruby Slip – I wanted to cut the skirt pieces at the same time I cut out the maxi dress, but the low table height was killing my back by the time I finished with the maxi dress. I don’t think this will take long to sew together if I can ever find somewhere to cut the single-layer, bias layout… A good cutting area is my new productivity choke point.

(Vote for my) March Mini Wardrobe

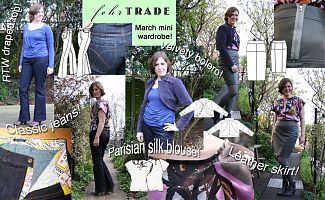
It doesn’t seem that long ago that I was first laying out my initial plans for this mini wardrobe, but now I’ve had some time to step back and have a look over what I managed to accomplish last month. I made this wardrobe mostly for myself, to use some luscious fabrics from my stash in combination with patterns that really appealed to me, but I also kept one eye on the contest requirements running over at PaternReview.com to make sure I remained within their rules, too. Here’s my entry into their contest, or you can just read on below…

I started with a blue viscose, draped knit top that I’d bought from ASOS and really liked, but I wanted to wear with both casual and dressy bottoms.

To coordinate, I sewed:

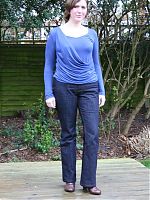
1. Jalie jeans – I’d made a muslin but the waistband was horrible so I had my work cut out for me on this pair using great quality stretch denim from Mood in NYC, plus some London streetsign fabric for the waistband facings and pockets. I used my vintage hand crank Singer machine for all the topstitching, plus I got to use my vintage buttonholer attachment and high quality rivets for the first time! I fixed all the waistband issues in this pair and these are now my favourite jeans. Read more…

The NY-Lon jeans

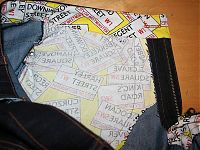
Why “NY-Lon” jeans? Well, it’s certainly not because they’re made of nylon fabric!! (ewww) I’m calling these that because I bought this denim at Mood in NYC on our honeymoon, and the lining pieces are London streetsigns fabric, bought as an eco reusable wrapping paper! So they’re New York and London together!

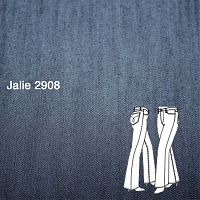
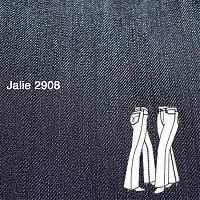
Once again, these are made using the Jalie 2908 jeans pattern. The first Jalie jeans taught me that, overall, the fit was great, but the waistband was an utter horror.

So I made two small but significant improvements to these, and I am SUPER happy with the result!

  1. I ditched Jalie’s awful straight, bias, uninterfaced waistband and used the curved waistband from my favourite Burda August 2006 trousers/jeans, which I also interfaced. I used the London street sign cotton as the inner waistband (as well as the fly underlap and the pocket linings).
  2. I extended my pocket linings to the centre front so they got caught in the fly front stitching and reinforced the front over my gut (you do NOT want stretch denim stretching out there when you sit – it’s not pretty!)

How to use jeans rivets

I’ve sewed a bunch of jeans over the past few years, and with every single one, I’ve been disappointed by the quality of the rivets available to buy as a home sewers. I’ve tried the ones available in stores, like Prym, Hemline, etc and every single time they let me down. Even when they’re properly hammered into place, they move around and “jangle” a bit, they’ve been snagging my coat linings, and I’ve had several fall out under normal wear of the jeans. For my last few pairs, I haven’t even bothered using rivets at all. I’d rather not use any than ones that look and behave badly!

I’ve been keeping an eye out for quality rivets for a while now, and I’ve heard word that a man named Junior in Louisiana does excellent ones and will sell them in small quantities. So I took the plunge and bought a few of his high quality rivets
(and a handful of all-metal buttons while I was at it), even though it meant importing them from the States.

Seriously, these rivets are fantastic – they look just like RTW, are easier to install than the crappy ones, and once they’re in, they’re in!

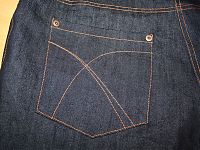
Here’s the finished back pockets up my upcoming jeans:

I can never go back to crappy rivets again – for real, I’m tossing the others in the bin. So as part of my grand education scheme, I’m going to show you all how easy these are to install. Just say NO to crappy rivets!

How to install jeans rivets

You’ll need an awl (an ice pick may work in a pinch though), some pliers with a wire cutter, and a big ol’ hammer.

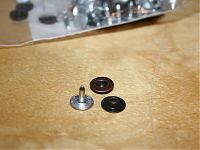
Here are the Rivets pieces. On the left is the nail, which goes on the underside of your jeans. On the right is the cap, with the right side shown at the top, and the wrong side (which connects to the nail) underneath: