Blog

I love a man in yellow

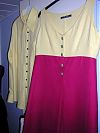
I started work on this shirt so long ago it almost seems amazing that I finished it at all! I was first held up by buying some machine feet for this project back in the beginning of April, and here it is in June and I’m finally showing it to you (though I did finish it over a week ago so it was technically May!).

I’ve made quite a few button-down shirts for my boyfriend James over the years, but after reading through Shirtmaking: Developing Skills for Fine Sewing by David Page Coffin I had the epiphany that they were all really badly done and I couldn’t possibly ever go back to my old ways after that. Really, I cannot recommend this book highly enough – even if you never sew menswear, it is essential reading for all shirt and blouse construction.

So instead of using the old Simplicity pattern (OOP 5273), I thought I’d break with tradition and make my first long-sleeved shirt for him using BurdaStyle’s Jakob pattern. According to his measurements, I made a size 52 and it fits him perfectly. He also adds that he’s “a textbook 15 1/2” in dress shirts in case that helps anyone at all.

A shirt, two dresses, and 10,000 meters

This past weekend was a Bank Holiday weekend here in the UK, so technically I got another day though it doesn’t really feel that way! I did manage to get some sewing in amongst the DIY, cleaning, baking, running, and hosting, however. I finally finished James’s linen shirt, and even made myself a new day dress from La Mia Boutique using some of his excess linen/tencel fabric and some raspberry tablecloths…

Hands in many pots

I’ve got my hands in so many different projects right, it’s almost hard to keep up with myself!

My first priority was re-creating my piece for the upcoming book, which (as I’ve seen it talked about elsewhere online) I believe I can now reveal is tentatively titled “Pillowcase Challenge” and is all about recycling vintage pillowcases into other items. You’re going to have to wait until next spring to see my creation in the flesh (along with a few other pillowcase-related tutorials I’ve got tucked away), but here’s a teaser of my sample ready to be posted:

Collar Me Bad

Yesterday was a beautiful, warm and sunny day – I’d already done all my DIY work on Saturday (plus cooked and hosted a three course charity dinner for 5!) so the day was all mine to relax and sew for a change!

I’ve been slowly working on making BurdaStyle’s Jakob pattern in a lemon yellow linen/tencel blend for James, but it’s been slow going because I’ve been trying to unlearn all my bad habits and follow David Page Coffin’s “Shirtmaking” book to the letter. I cannot say enough fabulous things abut this book – really, within 5 pages I knew I could never, ever go back to my old ways. Even if you never sew menswear, it’s still a must buy in my opinion for its techniques in dresses, shirtwaisters and the like.

No small feet

I was planning on next sewing up a long-sleeved linen shirt for James using BurdaStyle’s Jakob pattern, but having read through Shirtmaking: Developing Skills for Fine Sewing by David Page Coffin, I soon realised that all my previously sewn shirts were terribly amateur and that I’d learned SO MUCH in just reading the first ten pages that I’d now longer be able to go back to my own ignorant ways after eating from the tree of knowledge.

One of the things Coffin said is absolutely necessary is a felling foot for your sewing machine, which I don’t have. These seem to be a rare item for non-Pfaff machines in the UK, so I’ve had to buy one off American eBay (along with a rolled hem foot from the same seller, which Coffin also recommends).

Before I bought the feet, I had a quick rifle through my sewing machine feet box first to see if I already had them and just didn’t know what they were. When I got my sewing machine from my sister-in-law, she threw in a little plastic box full of feet and spare bobbin casings and screwdrivers and all sort of random pieces that she thought went with the machine. Some I’ve been able to identify, but others are still a mystery, so I’m hoping some of you will be able to help me out…


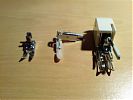
The A Team – the feet I use all the time! From left to right: the standard foot, the adjustable zipper foot, and the walking foot

The Tuxedo-Inspired Suit

If you’ve been following along, you’ll remember that my grandmother visited the Pendleton woollen mill in the 1960s and bought two 2 yard remnants of 100% wool navy blue suiting fabric for $6 each (so $12 total). In August, she gave these to me, saying she’d never got around to sewing up anything with them and she thought I’d make better use of it.

I’d already finished the jacket portion of this tuxedo-inspired suit (the show piece from my F/W 07 Collection), and you can see the first photoshoot of that here.

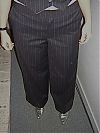
The trousers were far more straightforward than the jacket, however, so they didn’t take nearly as much time or seam ripping to complete! I wanted to tie together the satin accents of the two pieces so I opted to add a thin stripe of navy blue satin ribbon to the outside seams of each trouser leg, which I think gives a subtle sheen as I move. The integral belt/waistband of this pattern really evokes a sort of cummerbund, too, and raises this design above just a normal trouser suit.

The Big Fleecy

My boyfriend James has a RTW fleece that he loves, but it’s getting scraggly and it’s a bit too thin to be useful when we work outside a lot. He’s been bugging me to recreate him a new one for a while now, and I recently picked up KwikSew 2561 which I thought would be easier than just tracing his old one. He bought the fleece from cheapfabrics.co.uk since we knew how nice and thick it was from our earlier fleece adventures. After the mental gymnastics of the Pendleton wool jacket, I decided it was time to make something simple!

Gift and Receive

Things were a bit hectic in the leadup to Christmas this year, seeing as how we were starting from scratch in our own place this year. Sewing ornaments and other decorations took up most of my time, but I was able to fit in two sewn gifts in the few minutes I had before work in the mornings, sewing with very numb fingers in my heater-less sewing room.

Dude looks like a lady

As part of my FW/07 Collection, I decided to embrace the menswear trend and create a pinstripe suit, borrowing from classic tailoring, but updating it all with feminine elements.

The Pirate YARRty

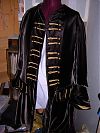
Wow. After nearly two years, I finally finished my boyfriend’s black velvet pirate jacket. Lined with gold satin, with functional pockets, functional buttonholes, brass buttons, tons of interior pockets for his gadgets, and hidden pocket inside the cuff for his Oyster card. There was so much handstitching on this and velvet is such an jerk of a fabric that I seriously wasn’t sure I’d ever finish it. I had problems at pretty much every step of the way, the majority of which stemmed from the fact that you can’t iron velvet. At all. Made in a different fabric, with non-functioning costume parts as indicated on the pattern, this would be a fairly straightforward project.

But since he wanted silk velvet and satin and for everything to function, plus have pockets absolutely everywhere, combined with a hem a mile long, this turned into a complete nightmare of a jacket. The handstitching alone took more manhours than I actually want to think about without bursting into tears. I did manage to make one big mistake near the end, even though I was so careful to NOT do it in my planning. It would’ve been impossible to fix without a complete deconstruction (and stitching lines remain in velvet forever), so I just left it as is. See if you can tell what it is from the photos, and I’ll reveal all below…