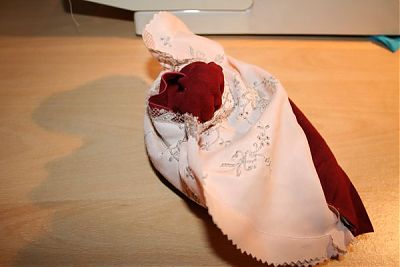
This might possibly be my longest running project-to-post duration since I drafted and sewed up this cute wristlet last February using some scrap leather and some vintage lingerie fabric for a lining. I made it as a gift for a neighbour who wanted to remember a dear departed friend who left her a stash of vintage fabrics, and I loved the resulting wristlet purse so much that I felt compelled to share it with all of you! But I had problems digitising the pattern so it languished… but recently I was inspired to take another stab at it and I love the way it turned out!


The great thing is that because it’s a small purse, you can really make this out of leather scraps, or even an old leather skirt or jacket from a charity shop (thrift store or op-shop)! Or it doesn’t even have to be from leather at all, it’d work equally well in corduroy, denim, or even felt! And because it’s a wristlet, you can keep your hands free for drinks & canapes, or for beers & barbecues!
Download the free pattern by clicking the image below!
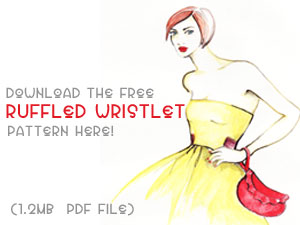
To anyone linking – please link to this page, not directly to the pdf file!
I hope you all enjoy this and please email me any photos if you make one for yourself! I’d rate this as an Advanced Beginner project just because of sewing the zipper, but it’d make a GREAT first leather project if you’ve never sewed with it before.
Illustrated instructions!
Text instructions are included in the downloadable file, but I wanted to provide photo instructions to make it easier for beginners to sew this, too. But when I put the photos in the file itself, it turned out way too big so I compromised and I’m offering them here instead!
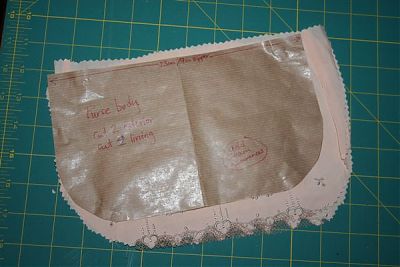
Step 1
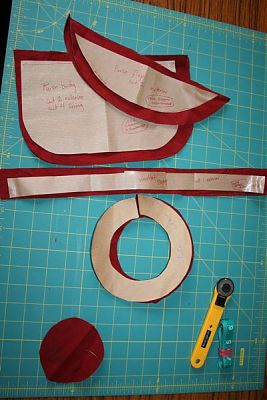
Using the exterior fabric, cut out two copies of the purse body, two copies of the flap, one of the ruffle, and one of the strap (or omit the strap for a ruffled clutch). The interior circle from the ruffle is unused and can be turned into a decorative flower by pinching the centre and securing with a few hand stitches.
If your exterior fabric is too lightweight, you may wish to cut two copies of the purse body and one of the strap in interfacing and fuse to the exterior copies before going further.
Step 2
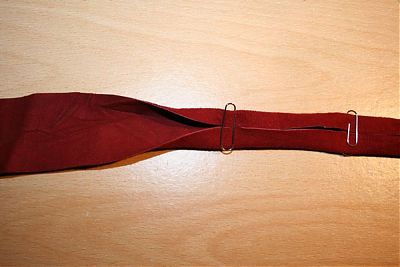
Take the strap and fold in both long edges toward centre, wrong sides facing in, and topstitch down both sides, 1/4” from folded edge. Lay aside.
- Tip – if using leather, use paperclips or binder clips instead of pins to not make unnecessary holes in the leather!
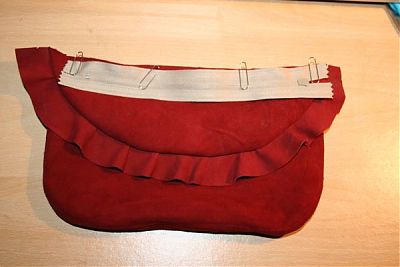
Step 3
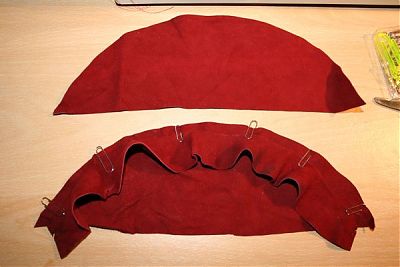
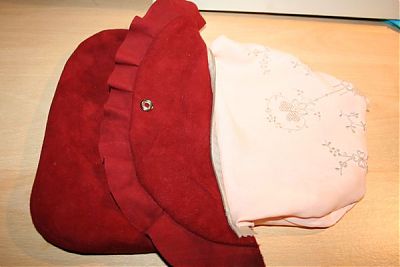
Place one of the purse flaps right side up and align the inner edge of the ruffle, right side down, along the flap’s curved edge. Then place the other purse flap, right side down, on top aligning the curved edges and transferring pins to all three layers.
Note: if you are not using leather, you may wish to finish the outer edge of the ruffle before attaching.
Step 4
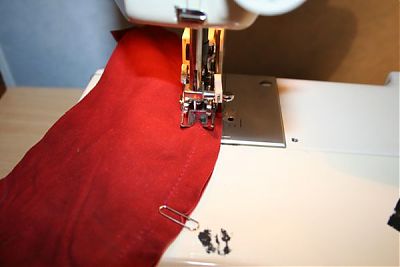
Sew through all three layers, 5/8” from the curved edge, taking care not to catch any errant folds of the ruffle in the stitching.
- Tip – if using leather for your exterior, use a walking foot (pictured), teflon, or roller foot on your sewing machine to keep the layers from shifting
Step 5
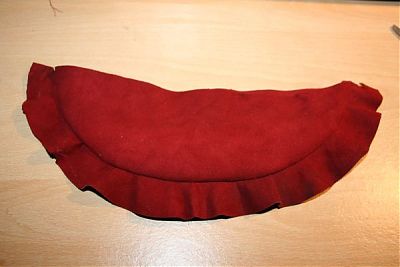
Trim the seam allowances and turn the flap right sides out.
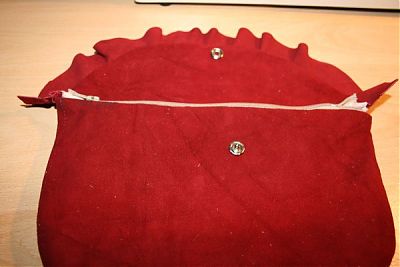
Use a hammer or snap press to attach a snap to the inner side of the flap (the side with the wrong side of the ruffle) and one of the purse body pieces at the marked star placement (not shown).
Step 6

Place the two purse body pieces right sides together and sew 5/8” from the outer curved edge.
Step 7
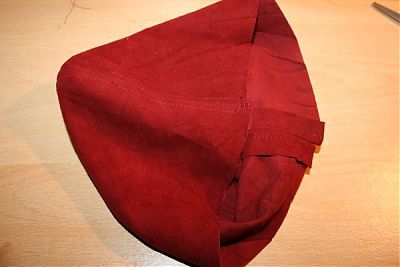
Turn the purse body right side out. Spread open the seam allowances and topstitch 1/4” from the curved seam, sewing through the seam allowance. Repeat for the other side of the seam, sewing through the other seam allowance.
Step 8
Cut two copies of the purse body out of the lining fabric.
Step 9
Place the purse body with the snap side facing down, and on top of that place the purse flap with the snap side facing up (snap not shown here). Then place the zipper, right side down on top of the flap and align the top edges of all three, taking care NOT to pin through the bottom layer of the purse body.
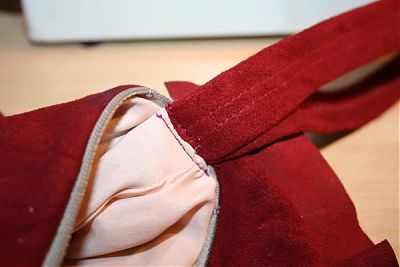
Step 10
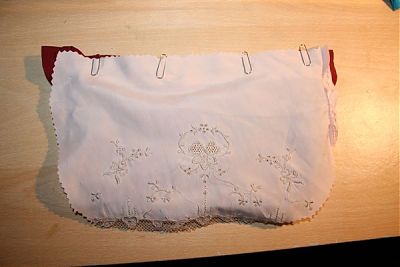
Add one of the lining pieces on top of the zipper, right side down, aligning the top edge and repositioning the pins. Using a zipper foot, sew through all 5 layers (purse body, two layers of purse flap, zipper, and lining) along the top edge, taking care not to sew over the zipper teeth.
Step 11

Open up the zipper, and flip the entire purse inside out. Lay the unattached edge of the zipper along the top edge of the unattached purse body, right sides facing. Place the top edge of the other lining piece on top of the zipper tape. Sew along this top edge, through all three layers (purse body, zipper, and lining) taking care not to catch the other lining piece in the stitching.
Step 12
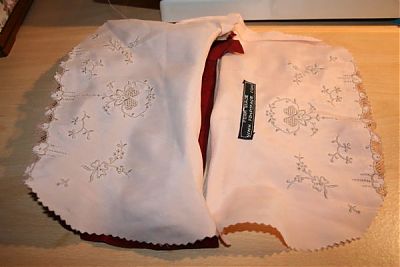
Turn out both lining pieces so that they’re free of the exterior and flap pieces.
Note: Now is the time to attach a personal label to one side of the lining should you chose to do so!
Step 13
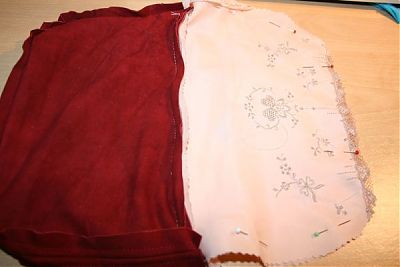
Lay the lining pieces right sides together and sew 5/8” away from the curved edge, making sure to leave a gap of a few inches at the centre for turning!
- Tip – if you’re using leather as your exterior, remember to change your machine needle to something appropriate for your lining here.
Step 14
Push the exterior fabric through the hole in the lining, turning the entire purse right side out.
Step 15
Pull the lining out and sew the hole closed, making sure to tuck the seam allowances to the inside for a clean finish.
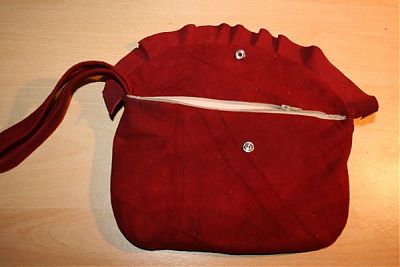
Step 16
Push the lining inside the purse and close the zipper. There should be two holes at either end of the zipper tape.
Note: If you’re using leather as your exterior, switch back to your leather needle now.
Step 17
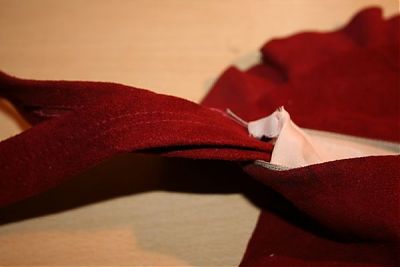
Fold the strap in half lengthwise with wrong sides together, and insert into the hole between the lining and exterior fabric. Open the zipper slightly.
Note: If you insert the strap into the end with the closed zipper head, your contents won’t fall out even if the zipper is slightly open!
Step 18
Sew through all layers close to the edge, making sure to fold exterior and lining seam allowances inside.
Note: If making a clutch instead of a wristlet, close the hole in the same way but omit the wrist strap.
Step 19

Sew closed the remaining hole at the other end of the zipper tape. You will probably be unable to reach it with the sewing machine, so use a hand needle to stitch it closed, making sure to fold exterior and lining seam allowances inward.
- Tip – if using leather as your exterior, you may need the use of a thimble and pliers!
Step 20
Et voila! Your ruffled wristlet is finished and ready for a night on the town!
Any questions? Errors? Omissions? Suggestions? Leave a comment below! And please send me photos of your finished wristlets!